
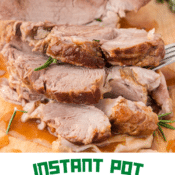
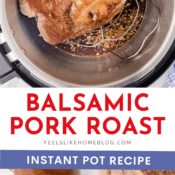


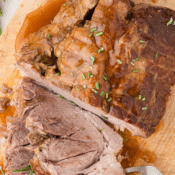
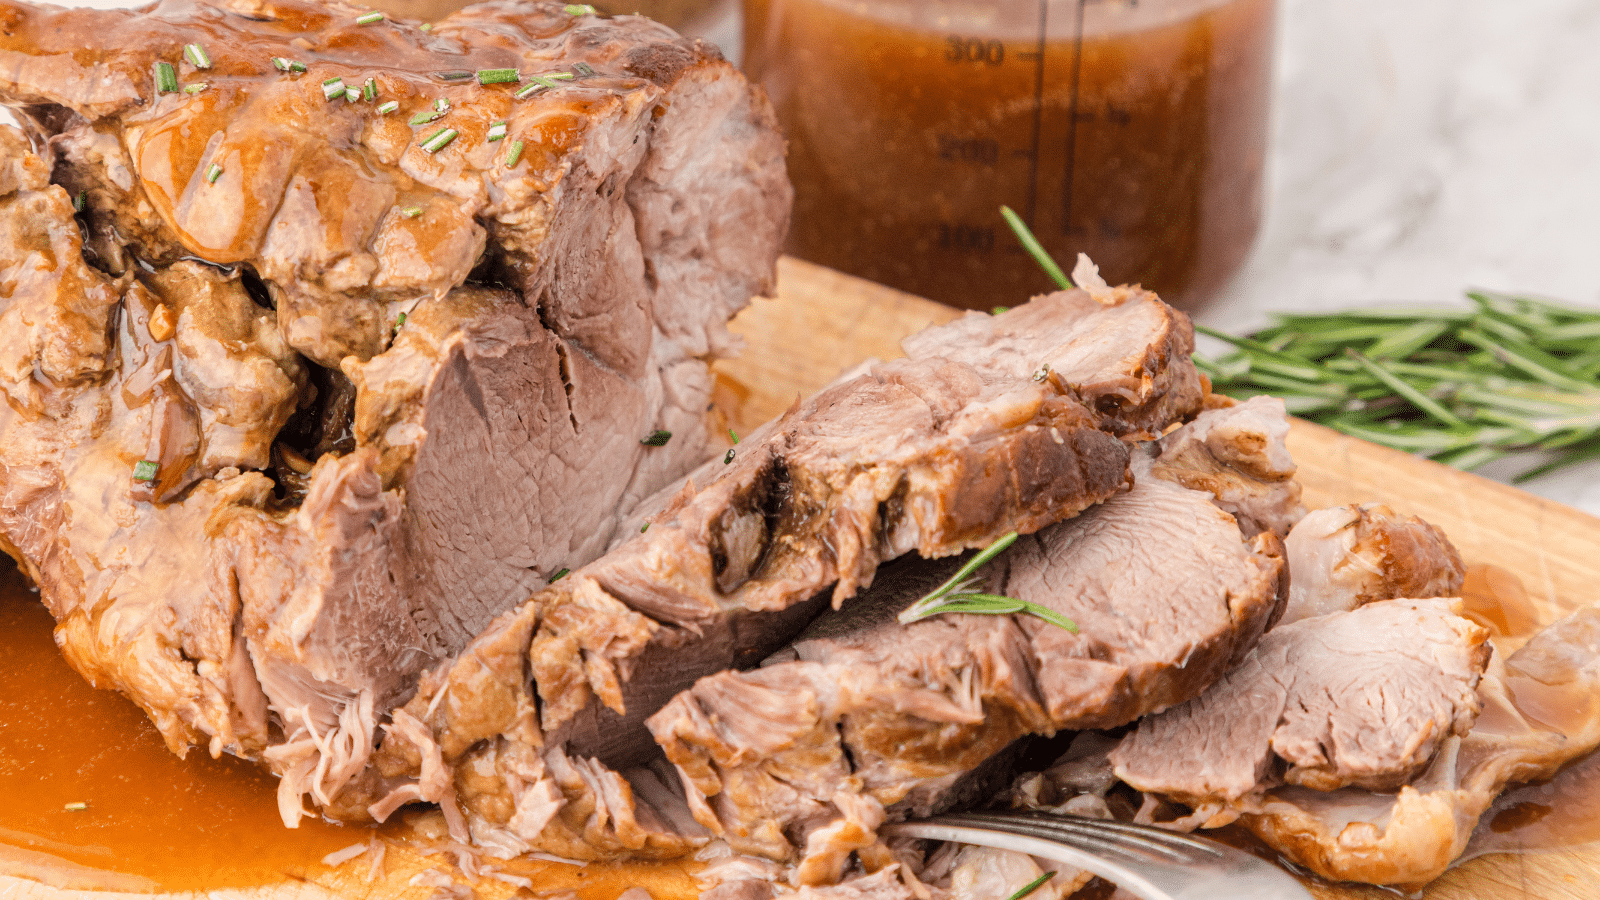
This Instant Pot sweet balsamic pork roast is delicious and flavorful, with balsamic vinegar, brown sugar, and soy sauce making the best glaze. Plus it cooks in under one hour!
We have gotten into a bit of a recipe rut lately. We have so many recipes at our disposal (over 550 on my blog!), but because I eat a bariatric diet with almost no carbs, our options are pretty limited. It's always 4 ounces of a protein and 4 ounces of a vegetable.
We made up a recipe binder months and months ago with our favorite bariatric-friendly recipes listed out in dividers by type of meat, and that does help because either Joe or I can page through our favorites and pick something that we haven't had in a while.
Even the recipes in the binder were feeling a little stale, so Joe was searching around on the internet and found something that inspired him to make a balsamic vinegar gravy, which he put on top of a pork roast.
We love pork, and I love this recipe. I can't say what it is about the pork that always comes out so well, but the combination of the balsamic glaze and the flavor of the pork are just out of this world.
When Joe makes this, I happily eat it for several days and scrimp on foods at other meals to make up the calories. It's worth the sacrifice.
Balsamic vinegar is naturally sweet, and adding a little brown sugar to it makes it really come alive. The sweetness is balanced out by soy sauce and the pork roast is smothered in rich, brown sauce. You can't go wrong with this tender Instant Pot pork roast!
What you'll need to make an Instant Pot pork roast
Equipment
This recipe requires very few special tools. Of course, you will need an Instant Pot or another electronic pressure cooker. I prefer a 6-quart model or bigger.
I also use a garlic press to prepare this recipe. If you have a super sharp knife and good knife skills, you could finely mince the garlic. You will want the pieces to be as small as possible.
Ingredients
See the printable recipe card at the bottom of the page for all measurements and nutritional information.
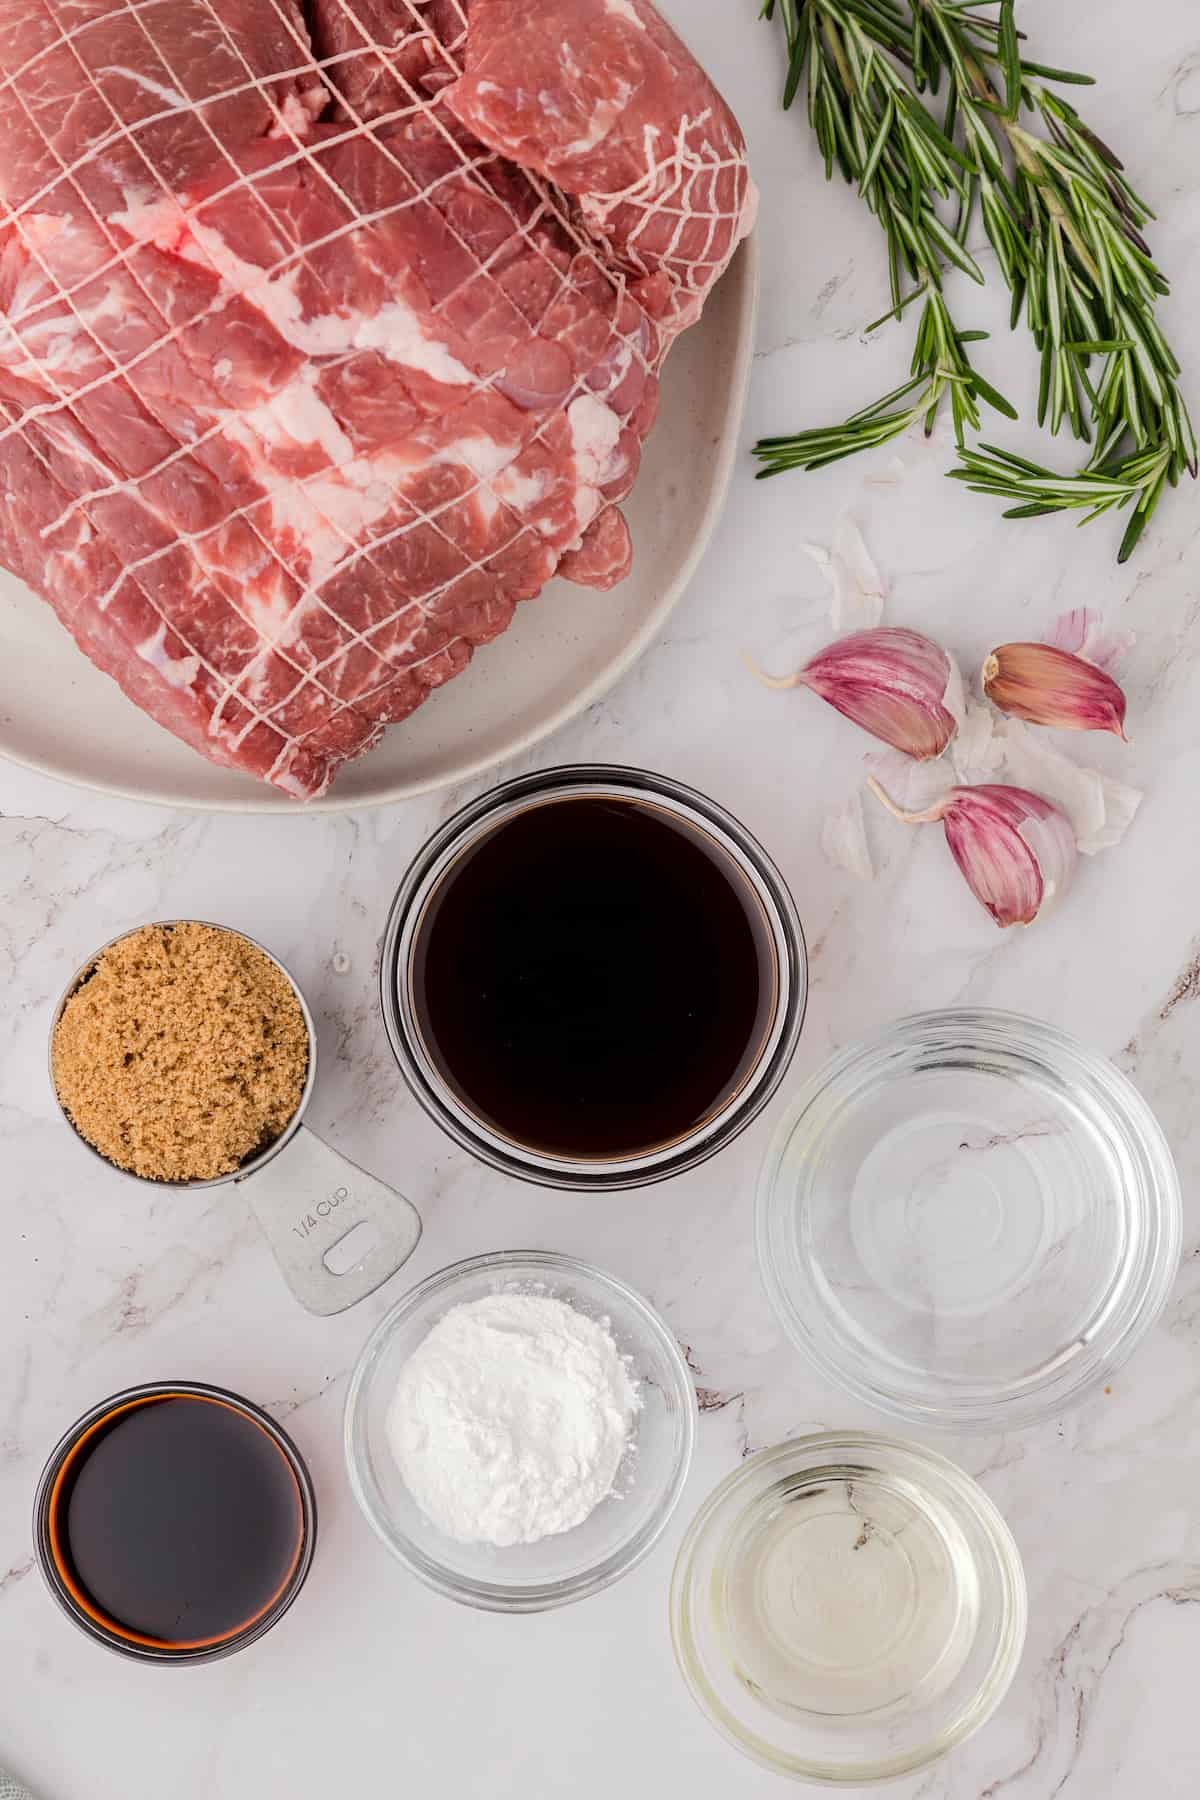
- Olive oil - This is to brown the pork.
- 2-3 pound pork roast - This recipe works best for a pork shoulder or pork butt because they will give you a more moist, almost stringy texture. You could also use a pork loin or tenderloin, but the cooking instructions are very different.
- Salt & pepper
For the sauce
- Fresh garlic, pressed with a garlic press
- Packed brown sugar - You can substitute this with an equal amount of Splenda or Stevia with very little loss of flavor.
- Balsamic vinegar - Get the very best balsamic vinegar that you can afford as this is the base for the entire sauce.
- Water - If you decide to add the cornstarch to the sauce after cooking, you'll need 2 tablespoons extra.
- Cornstarch
- Soy sauce
- Rosemary, chopped
What is a pork butt?
It's not what you think. The pork butt is a cut of meat from the front of the pig, in the shoulder area. It's called a butt because butchers three hundred years ago packaged the meat in barrels that were called butts.
Pork shoulders and butts are nice cuts of meat, but they need to be cooked at a low temperature for a long period of time in order to become tender and juicy.
The Instant Pot speeds up the process of cooking of cooking pork shoulder significantly, as you can go from start to finish in about an hour and have a fork-tender roast.
Why cook pork shoulder in the Instant Pot?
There are three main reasons you should use your Instant Pot to cook pork roasts:
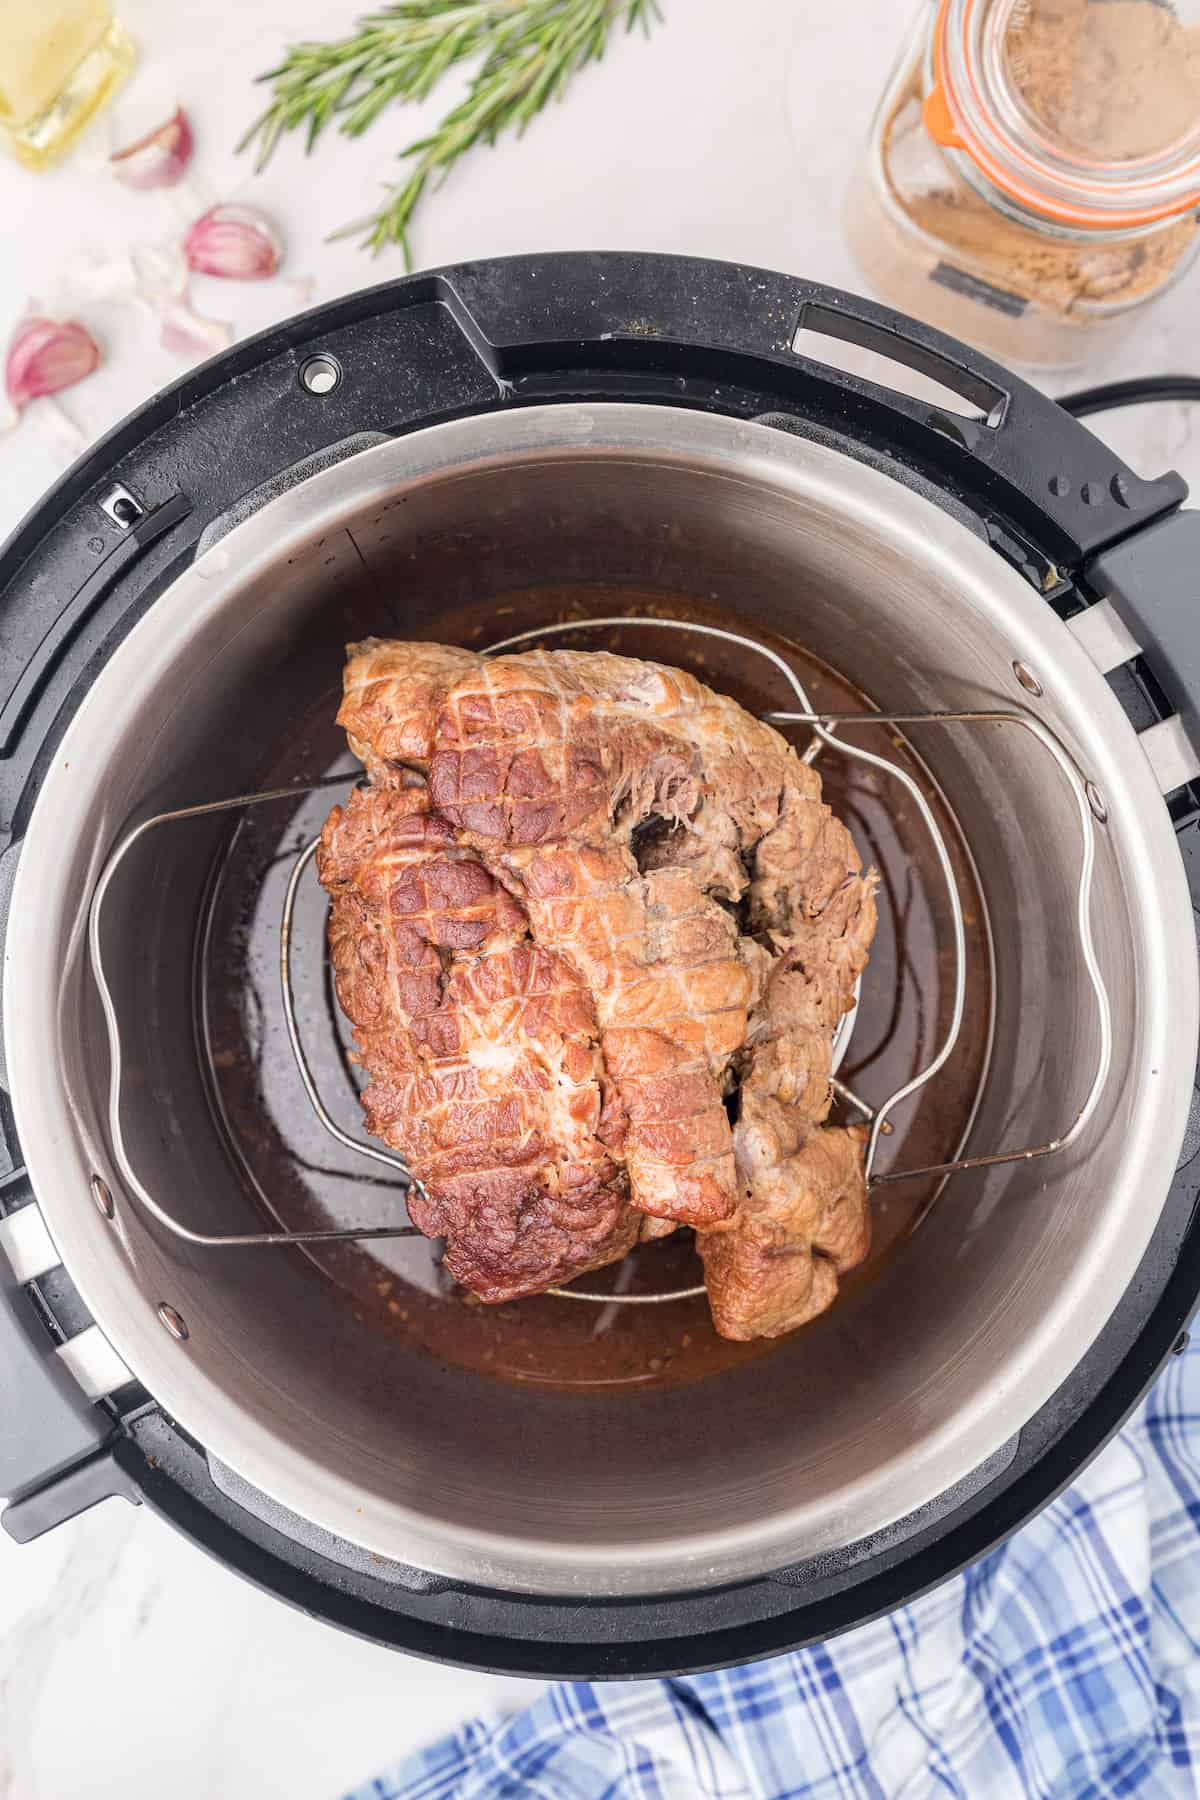
- The sauté function allows you to achieve a beautiful sear on the outside of the roast with minimal effort and without dirtying a second pan. Also, the Instant Pot comes with a trivet that allows you to prop the meat up above the cooking liquid, preserving the caramelization that you seared on and preventing a burn warning.
- The lid locks onto the IP, allowing you to walk away from the whole thing and come back an hour later to a safely and perfectly prepared roast.
- The Instant Pot allows you to enjoy a slow-braised, fork-tender pork roast in a fraction of the time it would have taken to cook one in the oven.
How long should you cook a pork roast in the Instant Pot?
When you cook a pork shoulder or pork butt in the oven, it takes approximately 40 minutes per pound of meat.
The Instant Pot allows you to cook the same piece of meat in about 15 minutes per pound. In other words, if you are cooking a 2-pound shoulder, you should set the IP for 30 minutes. If it's closer to 3 pounds, set the timer for 45 minutes.
Remember that pressurizing takes some time, so when you set the timer for 30 minutes, the roast will actually cook for closer to 40-45 minutes as the pressurization takes 10 to 15 minutes just on its own.
You also have to release the pressure. I like to do a natural release for 10 minutes and then vent the rest. Venting is not the same as quick release.
After all of the pressure has dissipated, you can open the lid and remove the meat from the pot.
You never want to quick release the pressure right after the cook time when cooking meat because the rapid change in temperature will cause the meat to seize and become tough.
When you're finished, a 3-pound pork shoulder or butt will take about 70 minutes to cook in the Instant Pot (10-15 to pressurize, 45 to cook, and 15 to depressurize), but that's still way better than the 120 minutes the same roast would have taken in the oven. Plus, the Instant Pot roast will be more tender and juicy from being pressure cooked in a moist pot!
How to make sweet balsamic pork roast in the Instant Pot
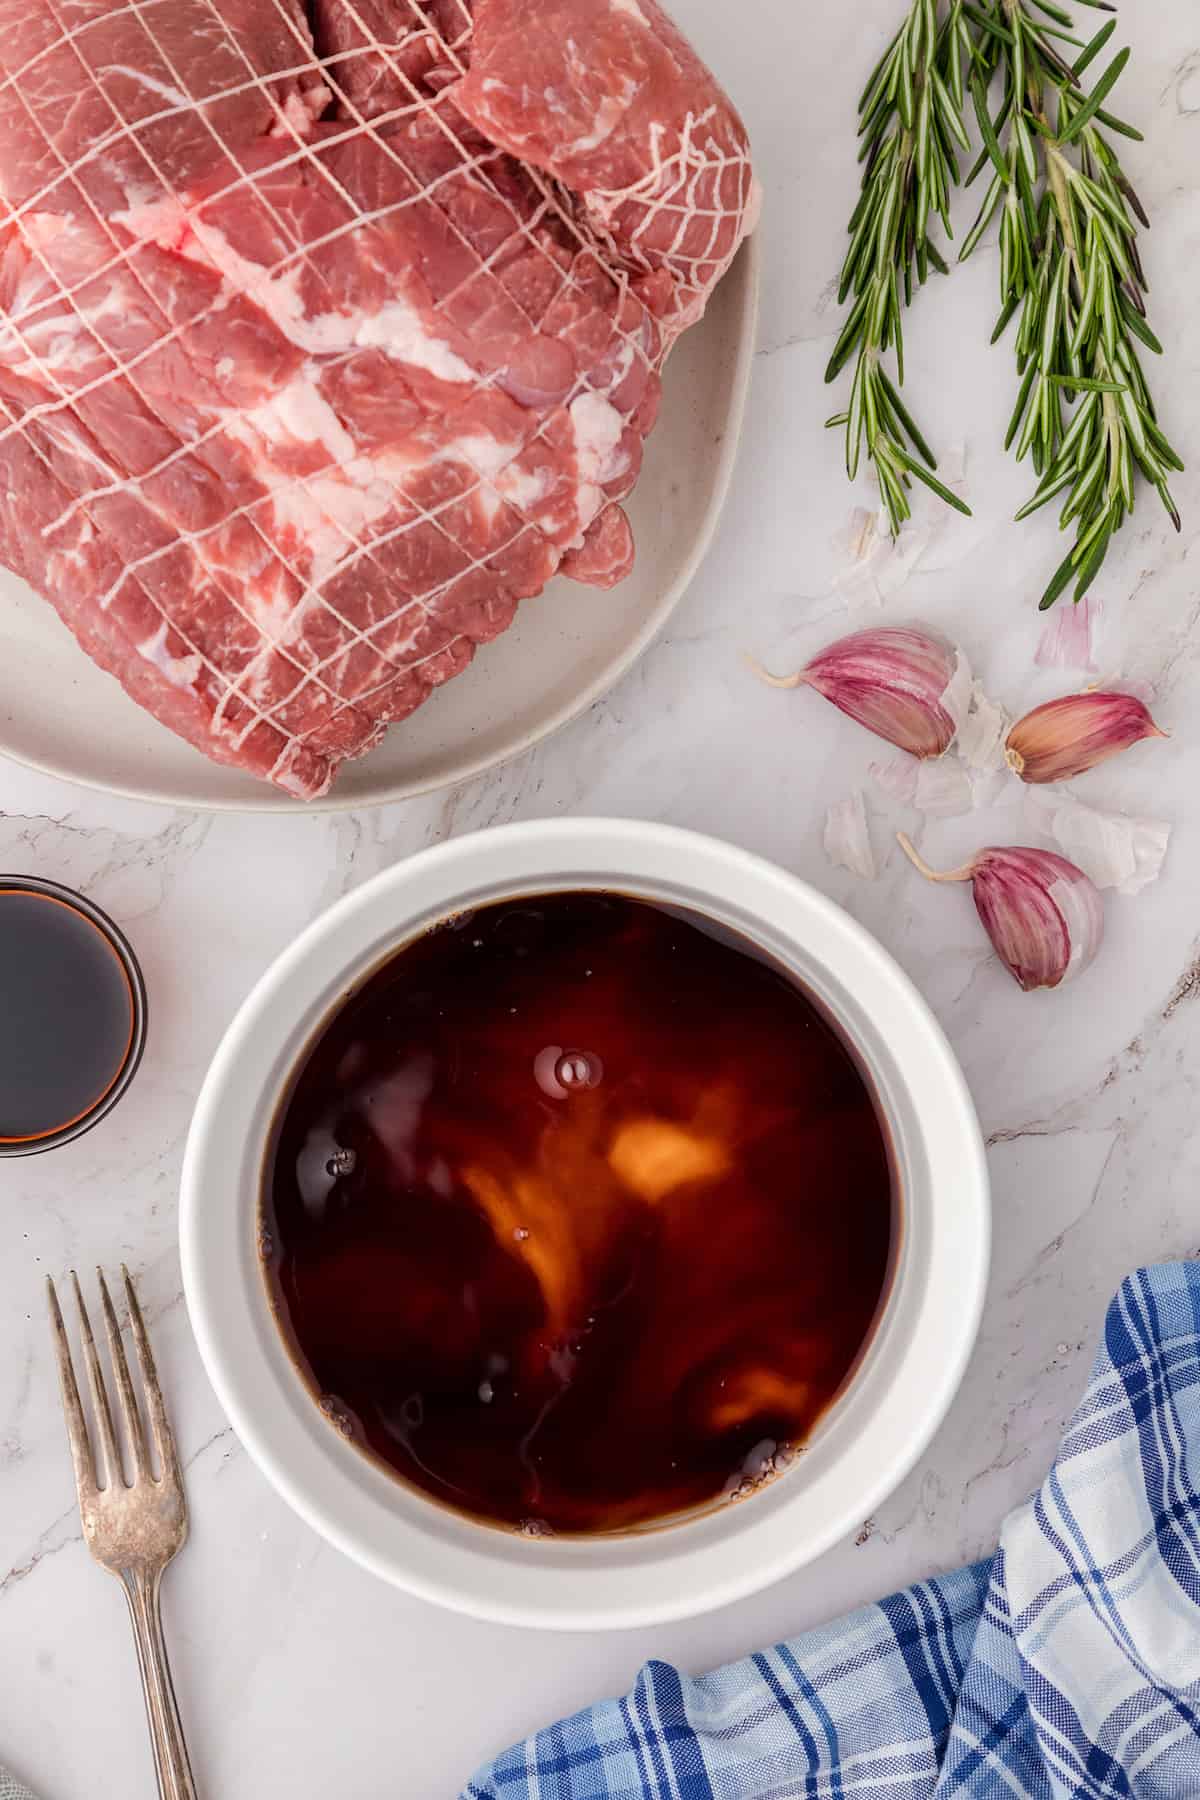
- Mix garlic, brown sugar, balsamic vinegar, water, cornstarch*, soy sauce, and rosemary in a small bowl.

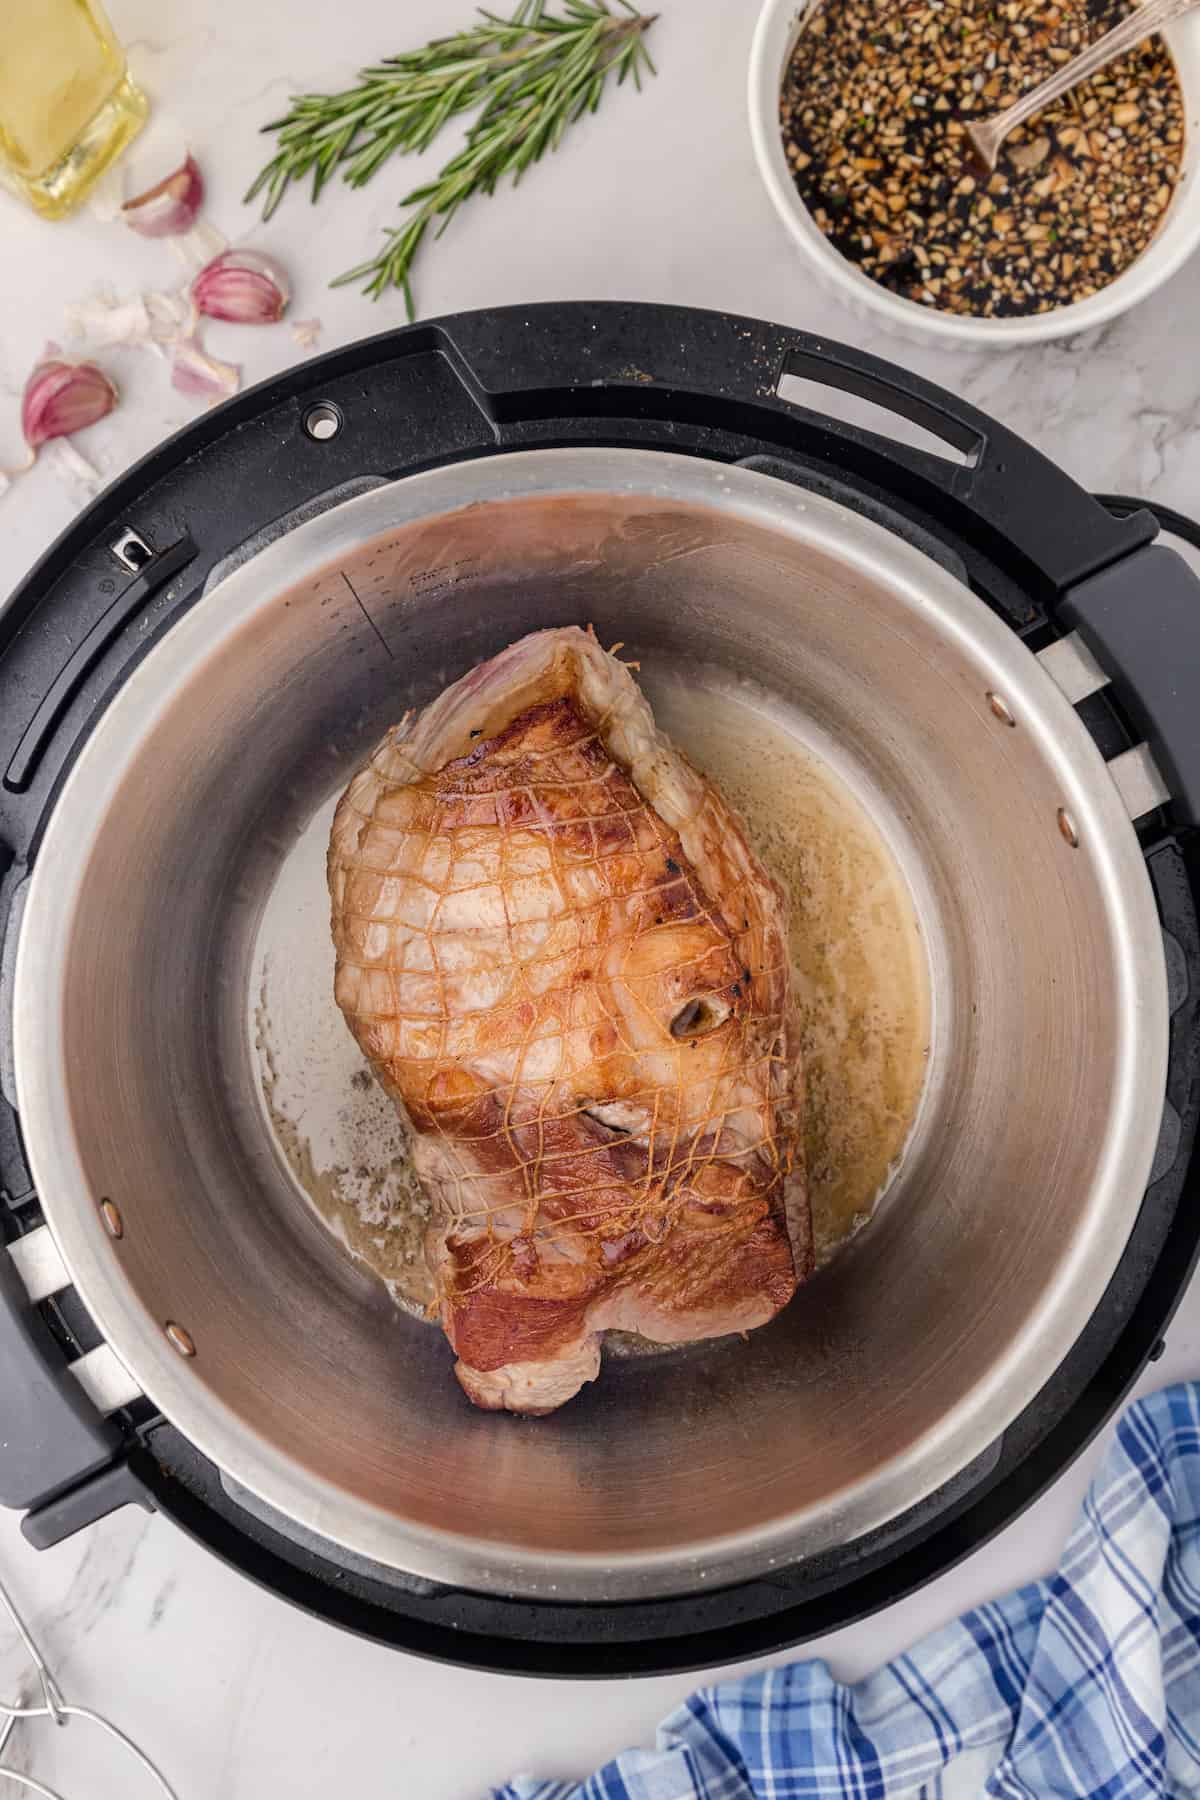
- Heat the Instant Pot to sauté. When the display reads HOT, pour in the oil. Season the pork on both sides with salt and pepper and brown on all sides, approximately 4 minutes per side.
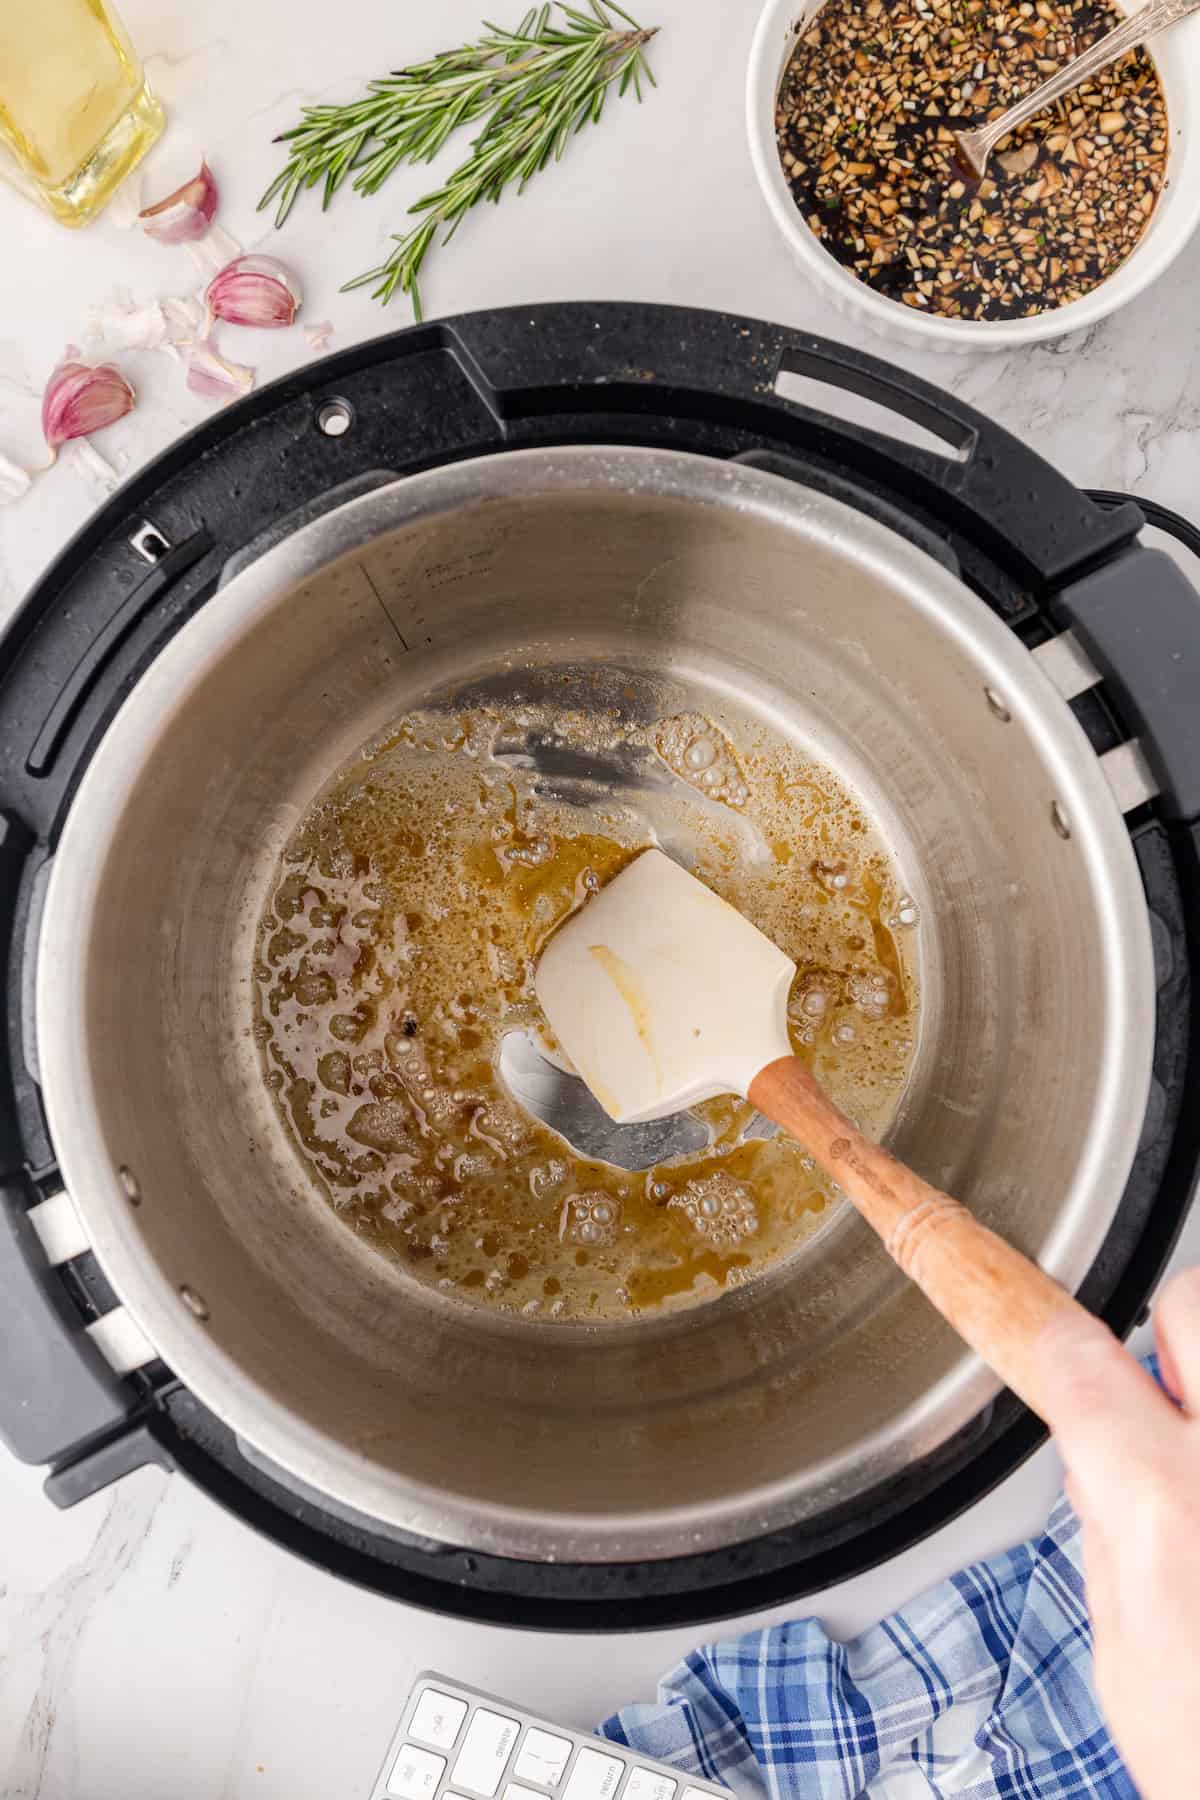
- Turn off the sauté mode, remove the pork, and add the water to the Instant Pot. Use the water to help you scrape up all the brown bits from the bottom of the pot. If you don't do this, you will get a burn warning.
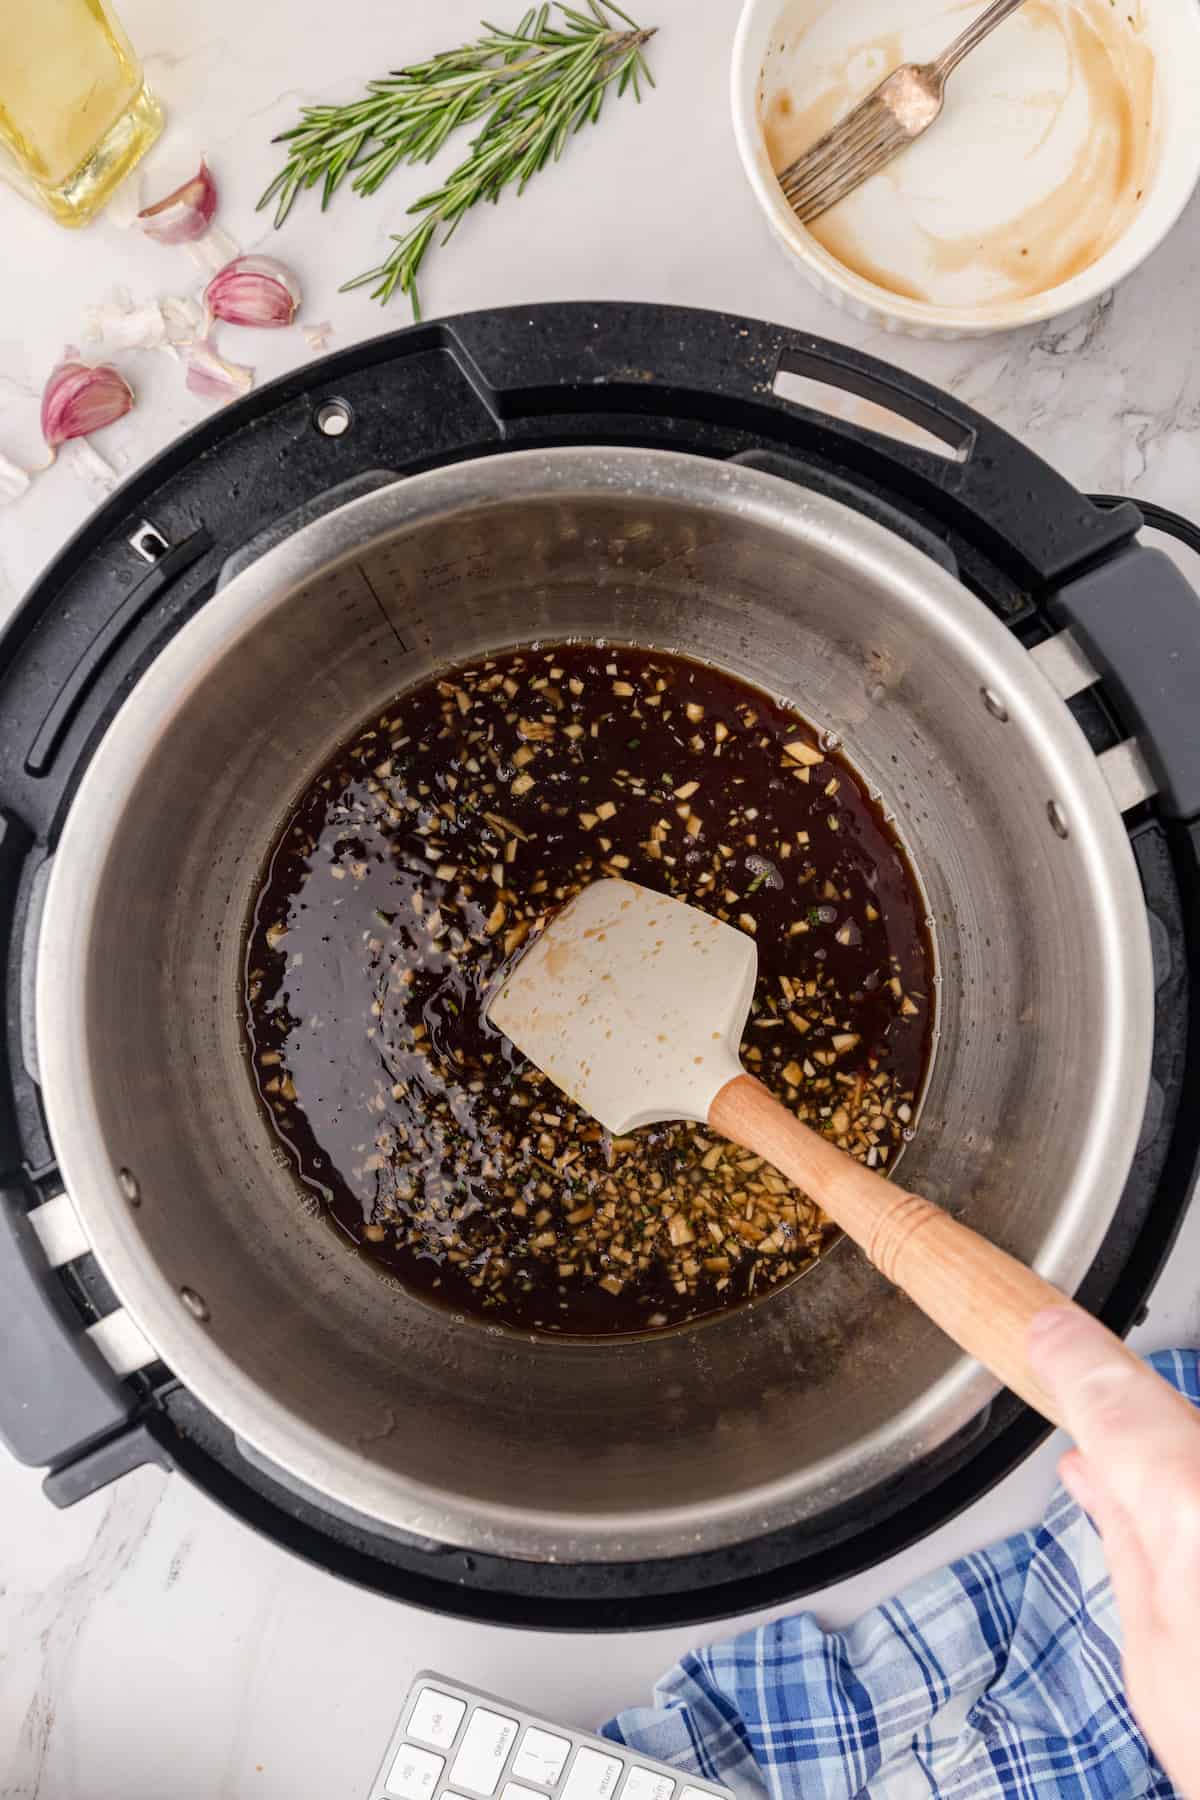
- Add the sauce to the Instant Pot.
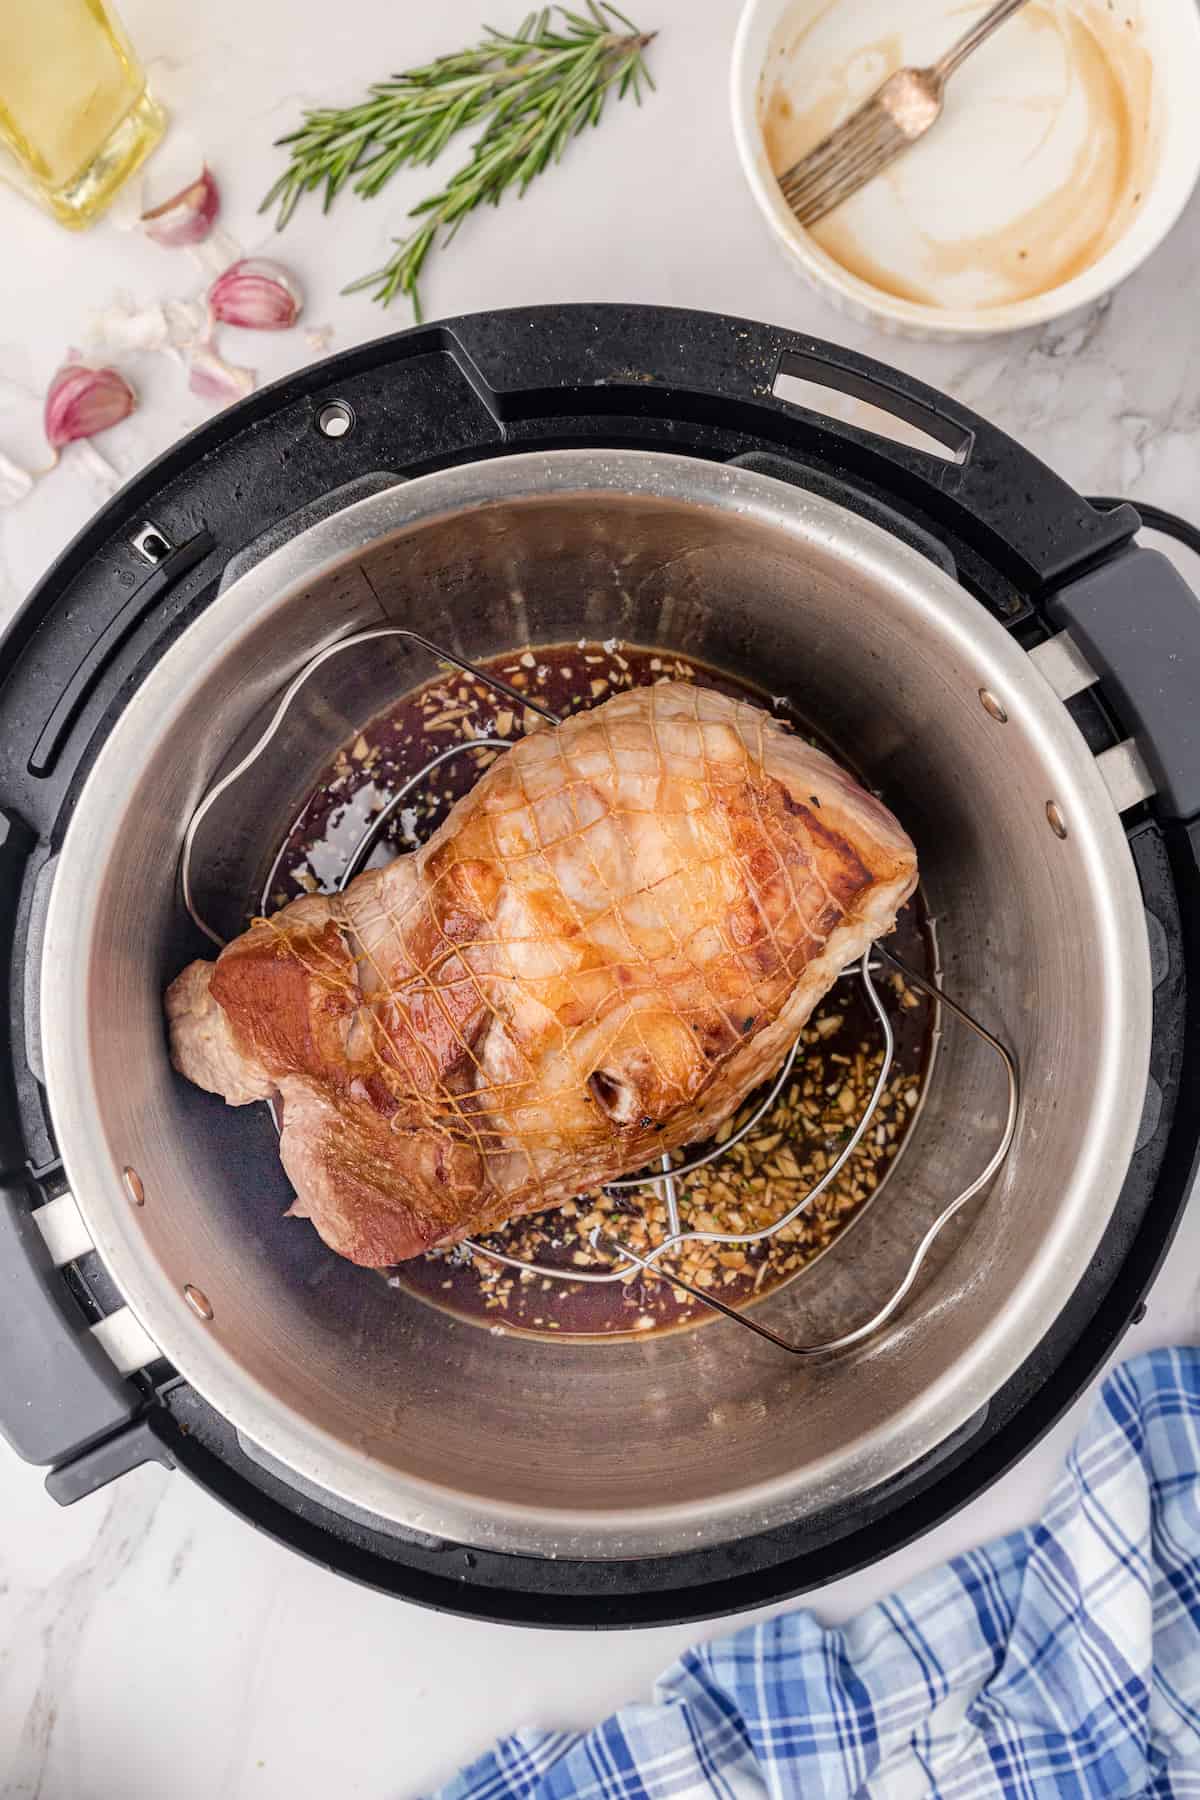
- Place the pork in on top of the trivet. Program Instant Pot to the high pressure or meat setting and cook for 15 minutes per pound. Keep an eye on the Instant Pot during the cooking time as some cooks have had their IP alarm for burning. If this happens, carefully release the pressure, add another ½ cup of water, replace the lid, and repressurize to finish cooking. When the timer beeps, turn it off and let the pressure naturally release before removing the lid.
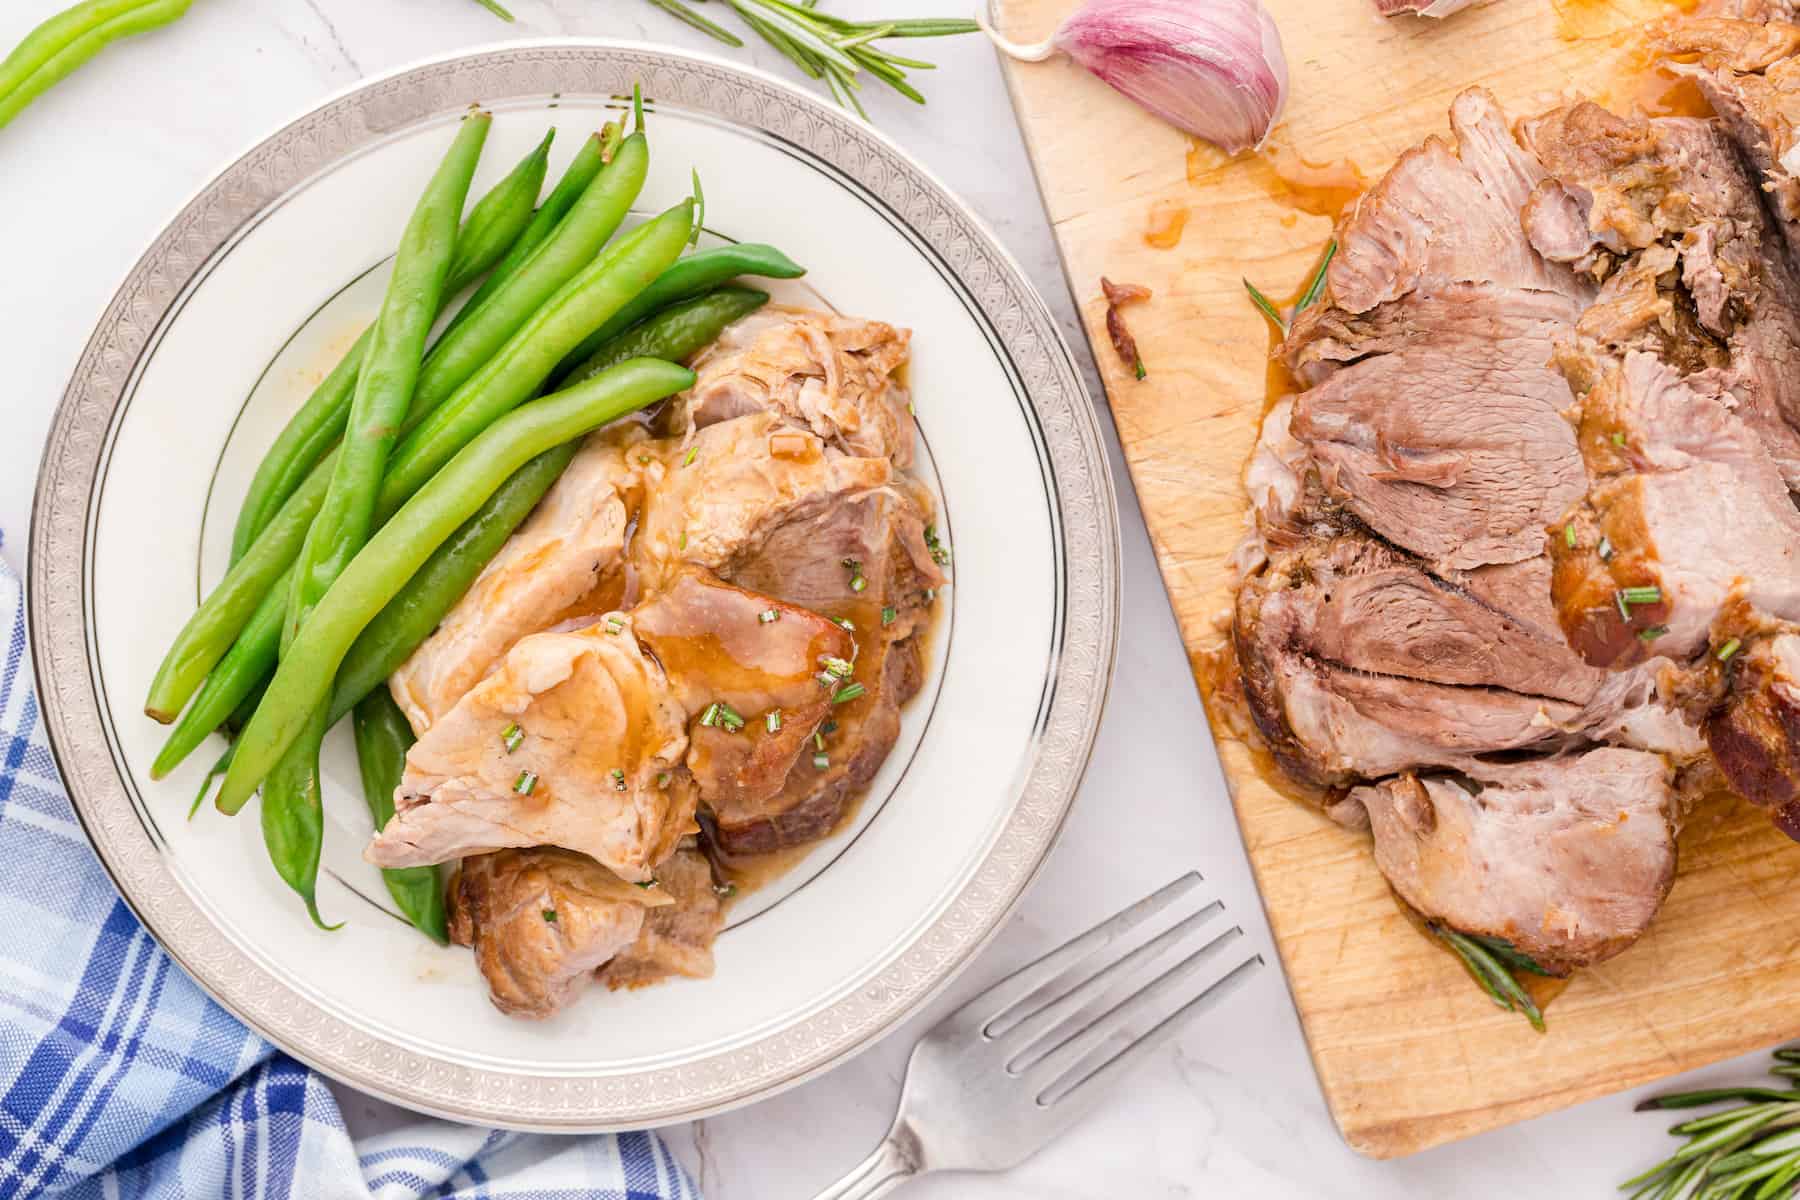
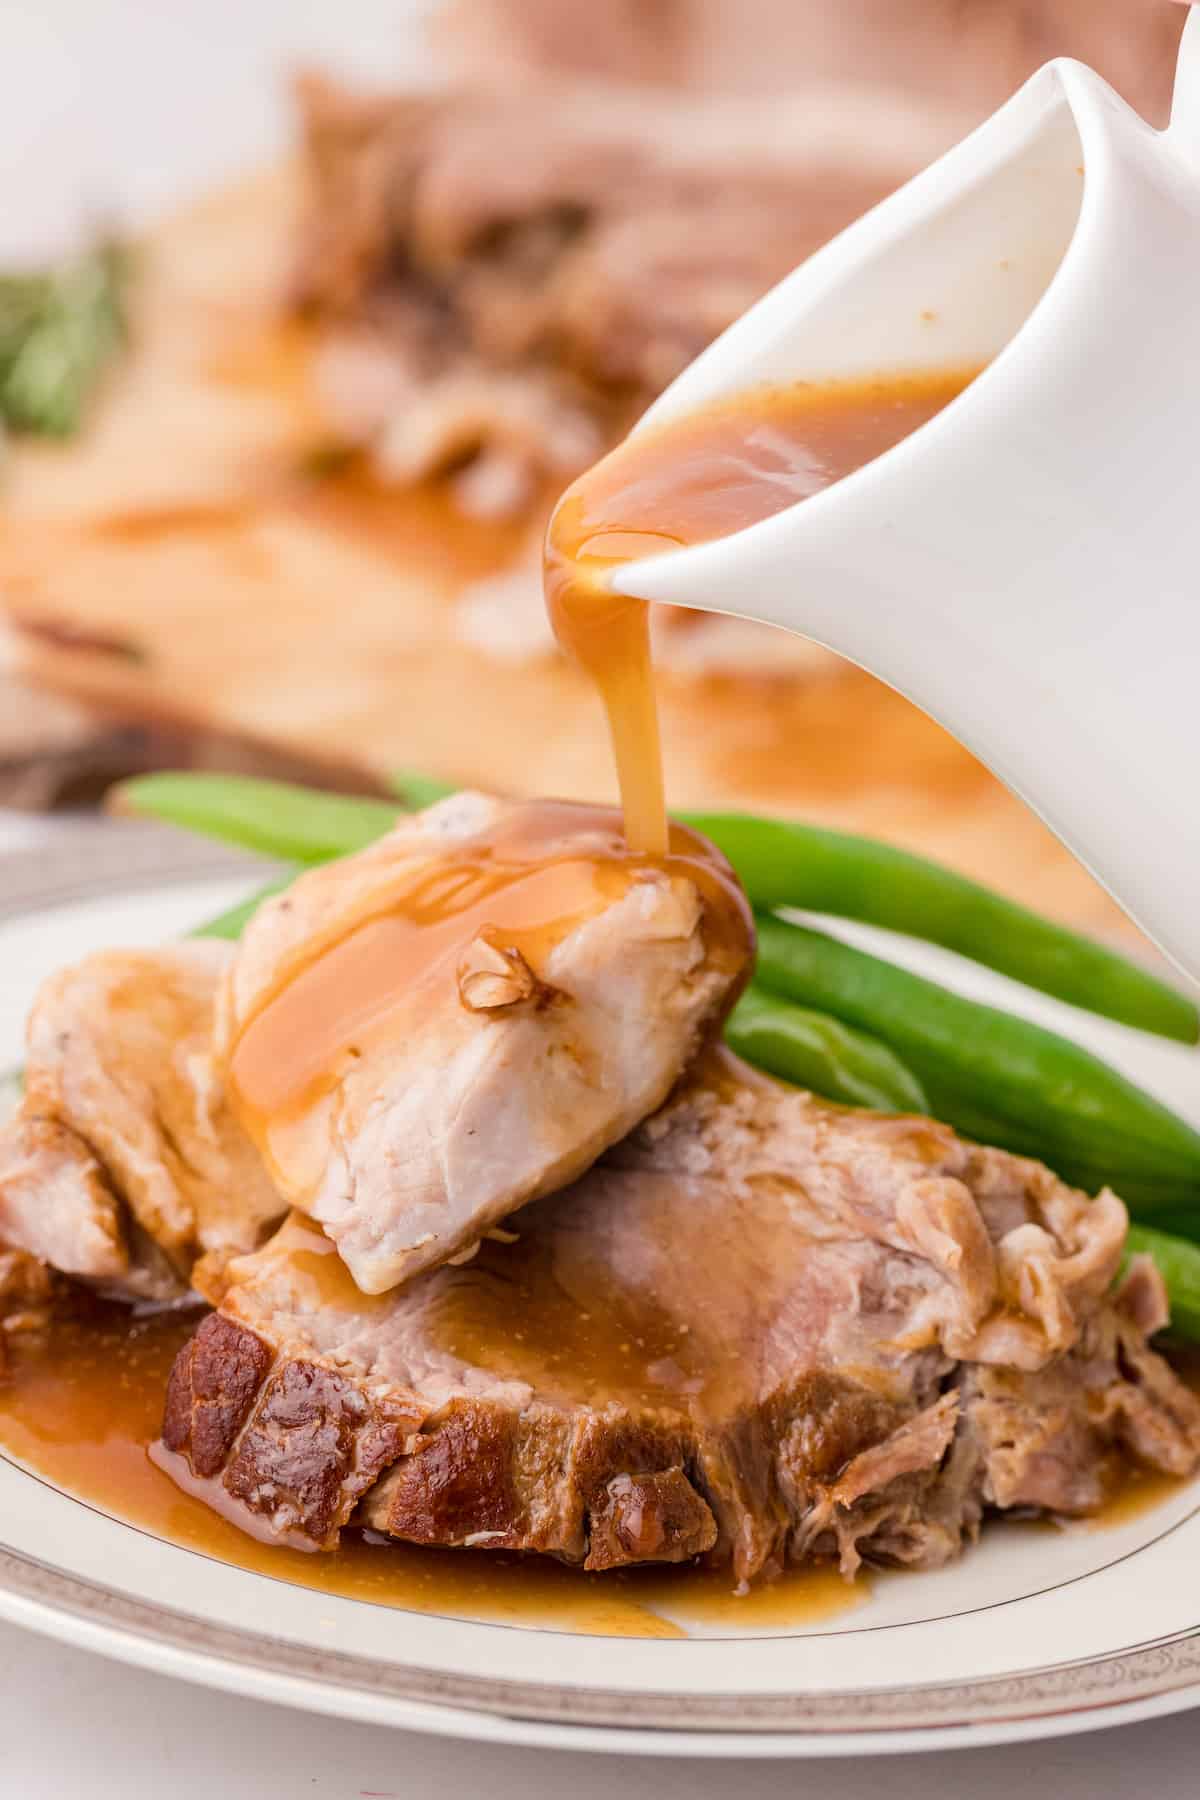
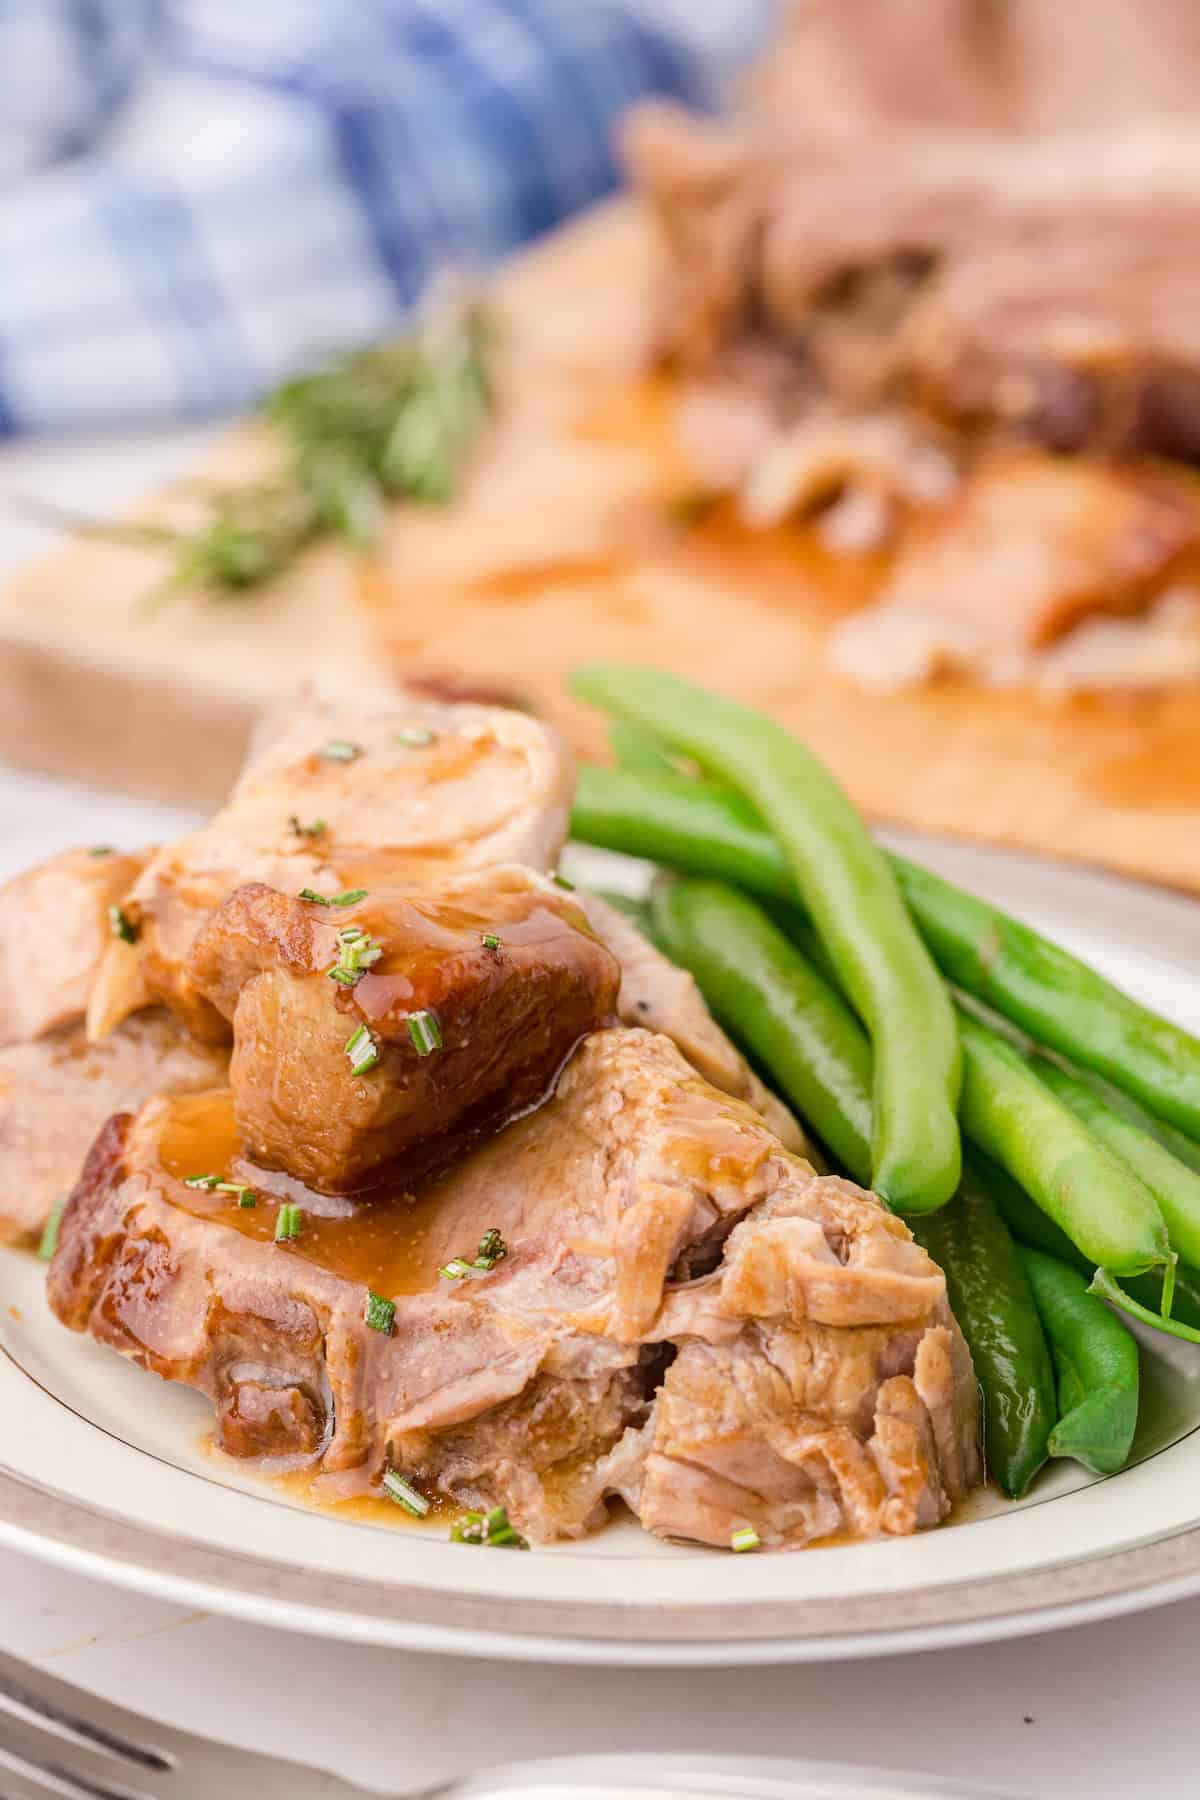
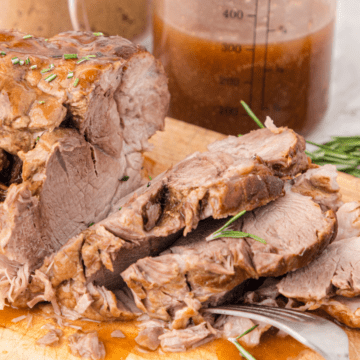
- Slice the pork and serve topped with lots of sauce.
How to prevent a burn warning when cooking this Instant Pot pork roast recipe
*Some commenters have suggested that adding the cornstarch and water before cooking is what causes some people's Instant Pots to give a burn warning.
There are 2 things you can do to prevent this.
First, you could just add additional liquid during cooking, between ½ and ¾ cup.
Second, you can add the cornstarch and water after cooking. Simply remove the pork from the IP and set it to sauté. Mix the cornstarch and 2 tablespoons of water to make a slurry, and pour that into the juices left behind in the pot. Heat on sauté until the sauce boils, about 5-7 minutes. This will thicken the sauce while preventing the burn warning during the initial cooking.
What should I serve with sweet balsamic pork roast?
I personally like to serve this pork roast with slow cooker mashed potatoes, and spoon the gravy over top of the potatoes.
For a vegetable, I prefer roasted asparagus or roasted balsamic beets, but it's my favorite so that's what I serve with pretty much everything. My second choice is either roasted brussels sprouts.
You should check out some other Instant Pot recipes while you're here:
- The best ever Instant Pot pot roast
- Chicken Burrito Bowls in the Instant Pot
- Mongolian Beef in the Instant Pot
- Instant Pot Garlic Chicken
- Easy Shredded Beef Tacos in the Instant Pot
- Instant Pot sloppy joes
- Instant Pot chicken tacos
- Coconut Chicken Curry in the Instant Pot
- Lemon Chicken in the Instant Pot
Recipe
Sweet Balsamic Pork Roast in the Instant Pot
Equipment
Ingredients
- 1 tablespoons olive oil
- 2-3 pound pork roast A tenderloin will give you a more firm, drier texture, and a pork shoulder will give you a more moist, almost stringy texture. I prefer the shoulder.
- Salt & pepper
For the sauce
- 3 cloves garlic pressed with a garlic press
- ¼ cup brown sugar You can substitute this with an equal amount of Splenda or Stevia with very little loss of flavor.
- ¼ cup balsamic vinegar
- ¼ cup water
- 1 tablespoons cornstarch
- 1 tablespoons low sodium soy sauce
- 1 tablespoons dried rosemary chopped
Instructions
- Mix all sauce ingredients in a small bowl.* (See note below about cornstarch.)
- Heat the Instant Pot to sauté. When the display reads HOT, pour in the oil. Season the pork on both sides with salt and pepper and brown on all sides, approximately 4 minutes per side.
- Turn off the sauté mode, remove the pork, and add the water to the Instant Pot. Use the water to help you scrape up all the brown bits from the bottom of the pot. If you don't do this, you will get a burn warning.
- Add the sauce to the Instant Pot and then place the pork in on top of the trivet. Program Instant Pot to the high pressure or meat setting and cook for 15 minutes per pound. Keep an eye on the Instant Pot during the cooking time as some cooks have had their IP alarm for burning. If this happens, carefully release the pressure, add another ½ cup of water, replace the lid, and repressurize to finish cooking. When the timer beeps, turn it off and let the pressure naturally release before removing the lid.
- Slice and serve with plenty of sauce.


Lauren says
This looks scrumptious! I'm assuming it can also be made in the oven?
Tara Ziegmont says
I would think so. Joe has even made the sauce on the stovetop before and tossed it over pulled pork that was already cooked. It's very versatile and SO GOOD!
Sharon says
I had to add liquid because my instant pot warned me that the sauce was burning. Just FYI.
Tara Ziegmont says
Thanks! We didn't have that problem but every cook is different.
Julie says
I had the same thing happen. I just added some chicken broth and scraped the bottom of the pot. Reset and everything was fine.
Crystal says
I had to add water too. I added a half cup of water. Maybe a little less would still have worked. After the meat was cooked, I made more sauce so we had gravy. I just didn’t add the water to it, since it had plenty of liquid.
Renee says
We had this issue too. The instant pot burnt on the bottom. We are now smoking the pork shoulder and I’ll do the sauce on the stove top.
CJ says
I have ALWAYS read DO NOT ADD THICKENERS to the recipe until AFTER! My first thought reading this was... I’m going to get a BURN notice!! I’m making this tonight but will add the corn starch at the end..
Sonya says
That is really good info. Wish I would've read 1st because I got the burn notice as well. I will add in cornstarch after next time
Stephanie says
Thank you for this comment! I just got a burn message so I read down here and added water like you suggested 🙂
Laurie says
High pressure or low on the Instant Pot?
Tara Ziegmont says
We have only ever used our IP on high pressure.
Terry says
I made this tonight for the first time & will definitely make it again! It was easy, super delicious & full of flavor. The meat was so tender & moist! I had plenty of thin liquid making the sauce per the recipe so had no issues at all with burn notice. Thank you for sharing your yummy recipe!
Tara Ziegmont says
I'm so glad you liked it! Thanks for coming back to let me know.
June Mitchell says
This looks delicious! Can this be made with potatoes and carrots in the pot? Or will they become too soft for that length of time?
Tara Ziegmont says
I'm not really sure. We have never tried vegetables in our IP. Maybe another reader would have a suggestion?
Melissa Herrera says
Could I freeze the sauce and pork together, thaw and then toss in the instant pot? Trying to figure our a way to make it a freezer meal...
Tara Ziegmont says
I've never tried that, but we have put frozen pork into the IP and cooked it that way successfully. You just have to cook it longer.
Emily says
I've made this twice now, once with a pork roast and once with a tenderloin. Both turned out great! I cut back on the sugar the second time (added only maybe 1-2 T) to make it tangier, which worked out great. I think this is my husband's new favorite way of cooking pork
Maureen Thompson says
I have a 1.5lb center cut boneless pork roast. Can you give me instructions on cooking time, etc., liquids, and all to make mine which is smaller that your recipe calls for. Thanks!
Clarissa says
Yes put in at least 1 1/2 cups of liquid my IP did the same thing!
JJ says
Hello,
I'm new to cooking and new to instant pots, I'm assuming to cook the meat on meat setting (step4) I use the lid with the pressure valve closed? Also I have double the roast size (5ish lbs), so I'm doubling the sauce recipe and the time. Is that what you would do?
Tara Ziegmont says
To the first part, yes, cook on meet setting with the pressure valve closed. I've never cooked a significantly larger roast though, so I can't help with the second part. I don't think doubling the time would be necessary, but hopefully someone with more Instant Pot knowledge than I have can help.
Kim says
I followed this recipe to exact specifications and my pot also warned me that it was burning. I added another round of sauce mixture and it warned me again. So I just added water this time. Not sure what I can do if it warns me again.
Sonya says
I added broth after scraping the bottom and it came out perfect. No more warnings
Daralyn says
I made this last night using the meat setting as the recipe stated. It's the first time I've used the meat setting as opposed to manually setting the time. The roast came out so horribly tough and dry that we couldn't eat it. It is farm fresh pork (raised in our front yard), so I know it wasn't a problem with the roast. I would like to try it again, but would set the time manually instead of using the meat setting.
Elizabeth says
Yes Daralyn same thing happened to me! Followed recipe exactly minus cornstarch and my roast also came out so though and dry. The sauce/gravy was delicious lipbut, definitely less time I think? I really don't know where it went wrong
Michelle Harrison says
I made this last night for my family and it was delicious. I had about 4 lb pork loin. I used half the brown sugar because we are not huge sweet eaters and it was perfect. To avoid the burn notice, I was taught to always deglaze the pot after searing. I simply removed the roast and added about 1/4 cup bone broth and deglazed. I through the Loin back in along with the sauce minus cornstarch. Once the Loin has a full natural release, I thickened the sauce with a corn starch slurry. It was moist and delicious! Some people may have used a tenderloin instead of Pork Loin and that’s why it turned out dry. We loved this and will certainly make again. Thanks for sharing!
Lisa says
Do you use the little rack to put the pork on?? Or do you just place it right on the bottom?
Tara Ziegmont says
We just put it right on the bottom.
Kendra says
It burned.
Betty says
I made this tonight and it was juicy and delicious. My pork roast was 3 1/2 pounds so I increased the sauce recipe by 50%. I’m so glad I did. I made a slurry of cornstarch and water to thicken the juice at the end. I will have gravy for my leftovers. I also quartered Russet potatoes and peeled fresh carrots to add to the pot before cooking. They were perfect. I will definitely make this again.
John says
Followed the directions and it turned out very dry. Cooked it on high no special setting. Recipe didn’t call out anything specific. No bueno. I was excited for it too.
Kelly says
Had to stop and start over after adding extra water because my pot warned me of food burn, hopefully that takes care of it! Looks delicious, hoping it turns out!
Arbel says
Hi there,
I’m new to The IP and was wondering a couple things before making this:
1. How long do you sauté the meat for? Until it’s just browned on the outside?
2. Why the meat setting instead of pressure cook/manual?
3. How much more liquid should I add for the 8qt duo nova IP?
Thanks!
Tara Ziegmont says
Hi Arbel,
Yes, you sauté just until it's browned on the outside. It will finish cooking during the pressurized cook. I don't think it matters whether you use the meat setting or the manual setting. I would refer to your manual for the extra liquid question. I don't have access to a manual for the 8qt, but I do imagine that it requires more liquid. I would recommend adding water.
Bek says
Thanks for the recipe! But you might want to edit the comment about substituting Stevia for brown sugar. Pure Stevia substitutes at a ratio of 1:32
Pat O'Toole says
This was delicious and definitely a new addition to my instant pot recipes. However, I too had to add an extra half to 1 cup of water.
Nicole says
I think people are having burn issues because there’s not enough liquid in this recipe. The Instant Pot needs a minimum of two cups of liquid to safely pressurize. Check your manual!
I added one can of chicken broth, plus an additional half cup of water, to bring the total up to two cups. I put the meat on the rack, not directly on the bottom of the pot. Did not add cornstarch before cooking as per another comment. Stirred in the cornstarch after cooking while on sauté mode. Needed 3 tbsp of cornstarch to get this amount of liquid semi-thick.
Did not burn. Worked well, tasted good, like a sweet and sour flavour.
Leslie says
Hi All, to avoid the burn notice you must deglaze the pan with a couple tablespoons of stock or water and scrape up all the bits from browning. Burn notice is the instant pot sensing hot spots created by the stuck bits. Pull the roast out briefly and deglaze then continue.
Lili says
Could this this recipe be done on the Slow Cooker?
Tara Ziegmont says
We've never tried it, but I don't know why you couldn't. I might reduce the liquid a bit, but otherwise keep it the same.
Elaine says
Delicious! Will definitely make this again. I have left overs, will reheat with the gravy in the IP then pull the pork & add BBQ sauce. Thank you for a great recipe!
Tara Ziegmont says
I'm so glad you liked it! Thanks for stopping by and leaving a review.
John says
I'm going to attempt this recipe in a regular oven in a roasting pan with rack. I plan on using the same sauce mixture, but after reading the previous comments, I think I'll add some chicken stock to the pan and loosely cover the roast with foil. I'm going to roast the meat at 300°F for about 5 hours like many traditional shoulder recipes. Wish me luck!
Eq4bits says
I made this as written in 6qt IP; had no problem with burn notice appearing. Came out perfect! Delicious!
Kitty says
Okay, I got the burn notice, too. I simply turned the pot off until the pressure
released, removed the roast. Added another cup of broth and scraped the goodies off the bottom.I put the roast back in the pot and finished cooking as the instructions indicated. This was the most tender and most delicious pork I’ve ever eaten! Don’t let the burn notice scare you, it’s not a game changer. Next time you make it, add another cup of broth to begin with. If its too thin at the end make a corn starch slurry for thickening. Guys, this pork roast is phenomenal!
Dee says
No wonder people were getting the burn notice. There's not nearly enough liquid for even a 6 qt pot, there was no mention of deglazing the pot, and you never put your thickening agent in at the beginning. That always comes when it's done.
Kay says
Can I use a bone in pork loin roast?
Tara Ziegmont says
I have never tried it, but it should work and may even leave you with a better tasting piece of meat. Typically, when you cook a bone-in piece of meat, you cook it at the same temp as boneless but for a longer time (because the bone is more dense than the meat and absorbs some of the heat). I wasn't sure exactly how much time to tell you to add, so I went to https://instantpot.com/instantpot-cooking-time and found the recommended cooking times there. It says for pork roast, you should cook 20 minutes per pound. I know from personal experience that a 3 pound boneless pork loin will cook in 35 minutes at high pressure, and I honestly thing the recommendations in that table might be too long, but it says you should cook a bone-in pork loin for 40 (2 lbs) to 60 (3 lbs) minutes. You will have to do a bit of experimentation to find the right time - leaving your roast moist and as tender as possible. I don't think it would dry out just because of the nature of the cooking method, but I'm sure it would taste better and have a better texture if it was not overcooked.
Definitely use a thermometer to check the internal temperature of the roast before you eat it; it needs to reach 145ºF to be fully cooked. If it gets close but not quite high enough (above 125-130), you can probably just put it back in the IP with the lid on for 10 minutes or so and let the residual heat of the machine finish cooking. If it's below that, you'll have to pressure cook it a bit longer. You definitely don't want to take a chance on undercooked pork; it can make you very sick. Always take the temperature before slicing.
I hope this helps! If you try it with a bone-in roast, please come back and let me know how it went!
Donna says
Thank you for clarifying the time needed to cook. I’m cooking this tonight with potatoes and carrots in the pot too. Looking forward to serving this my hungry men.