
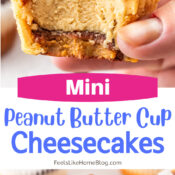
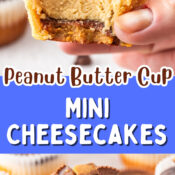
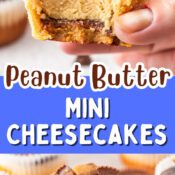

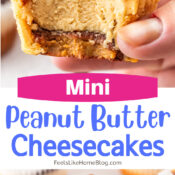
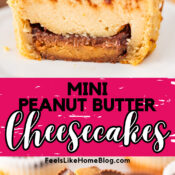
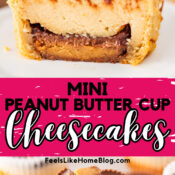
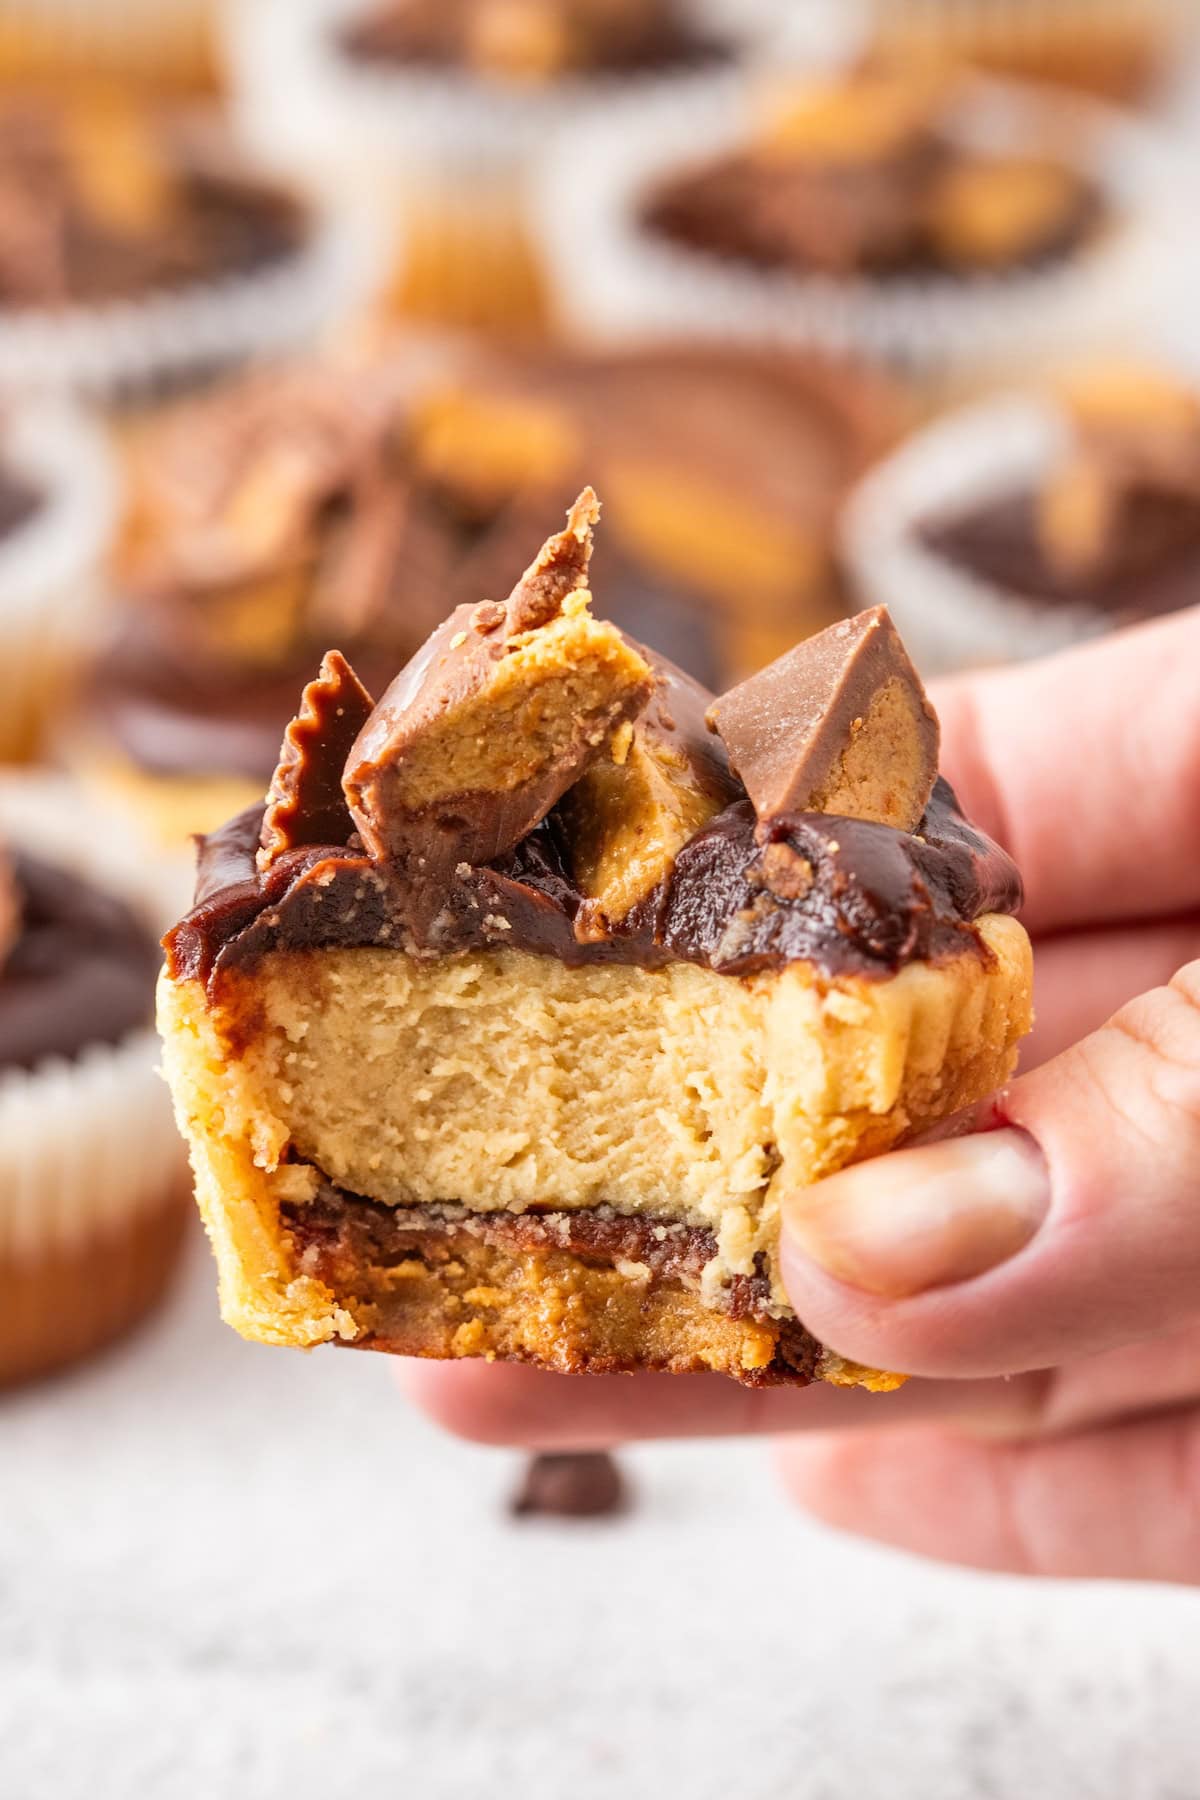
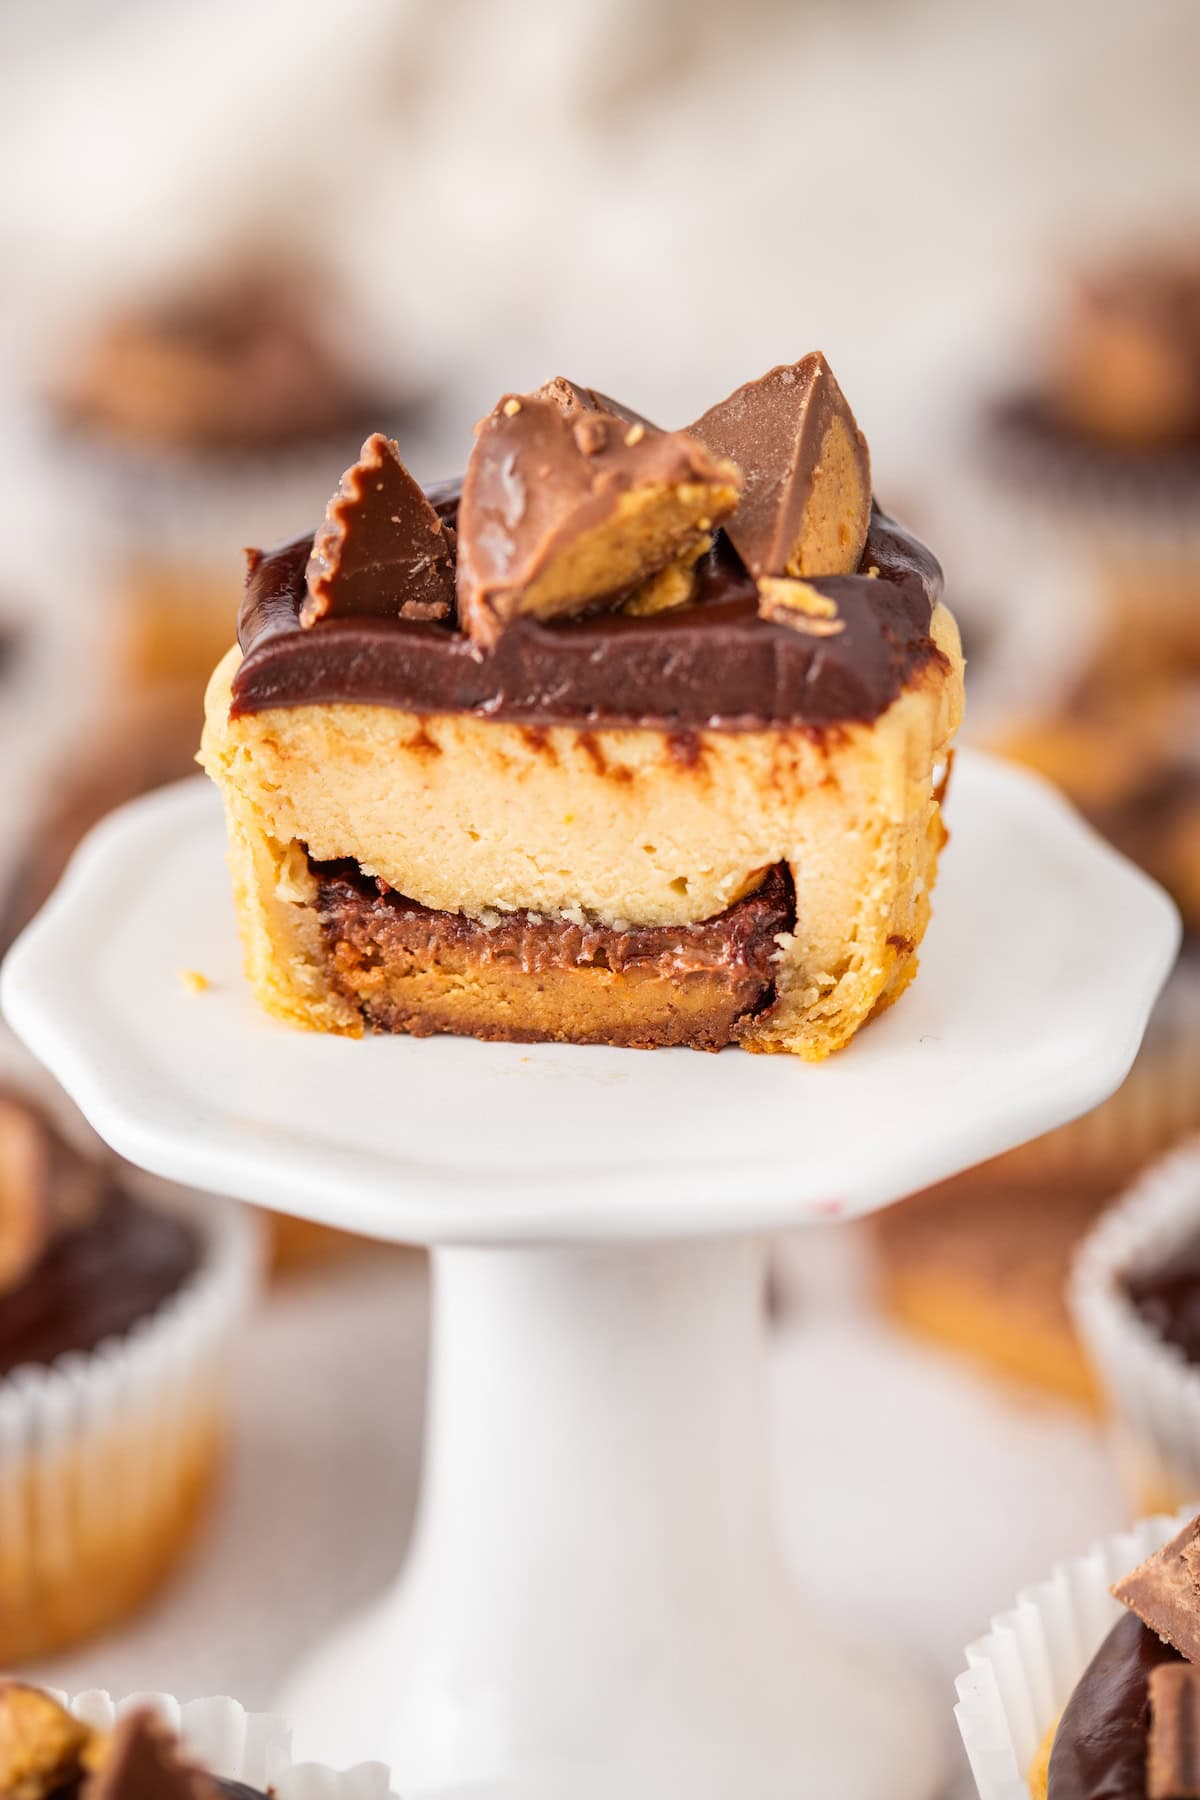
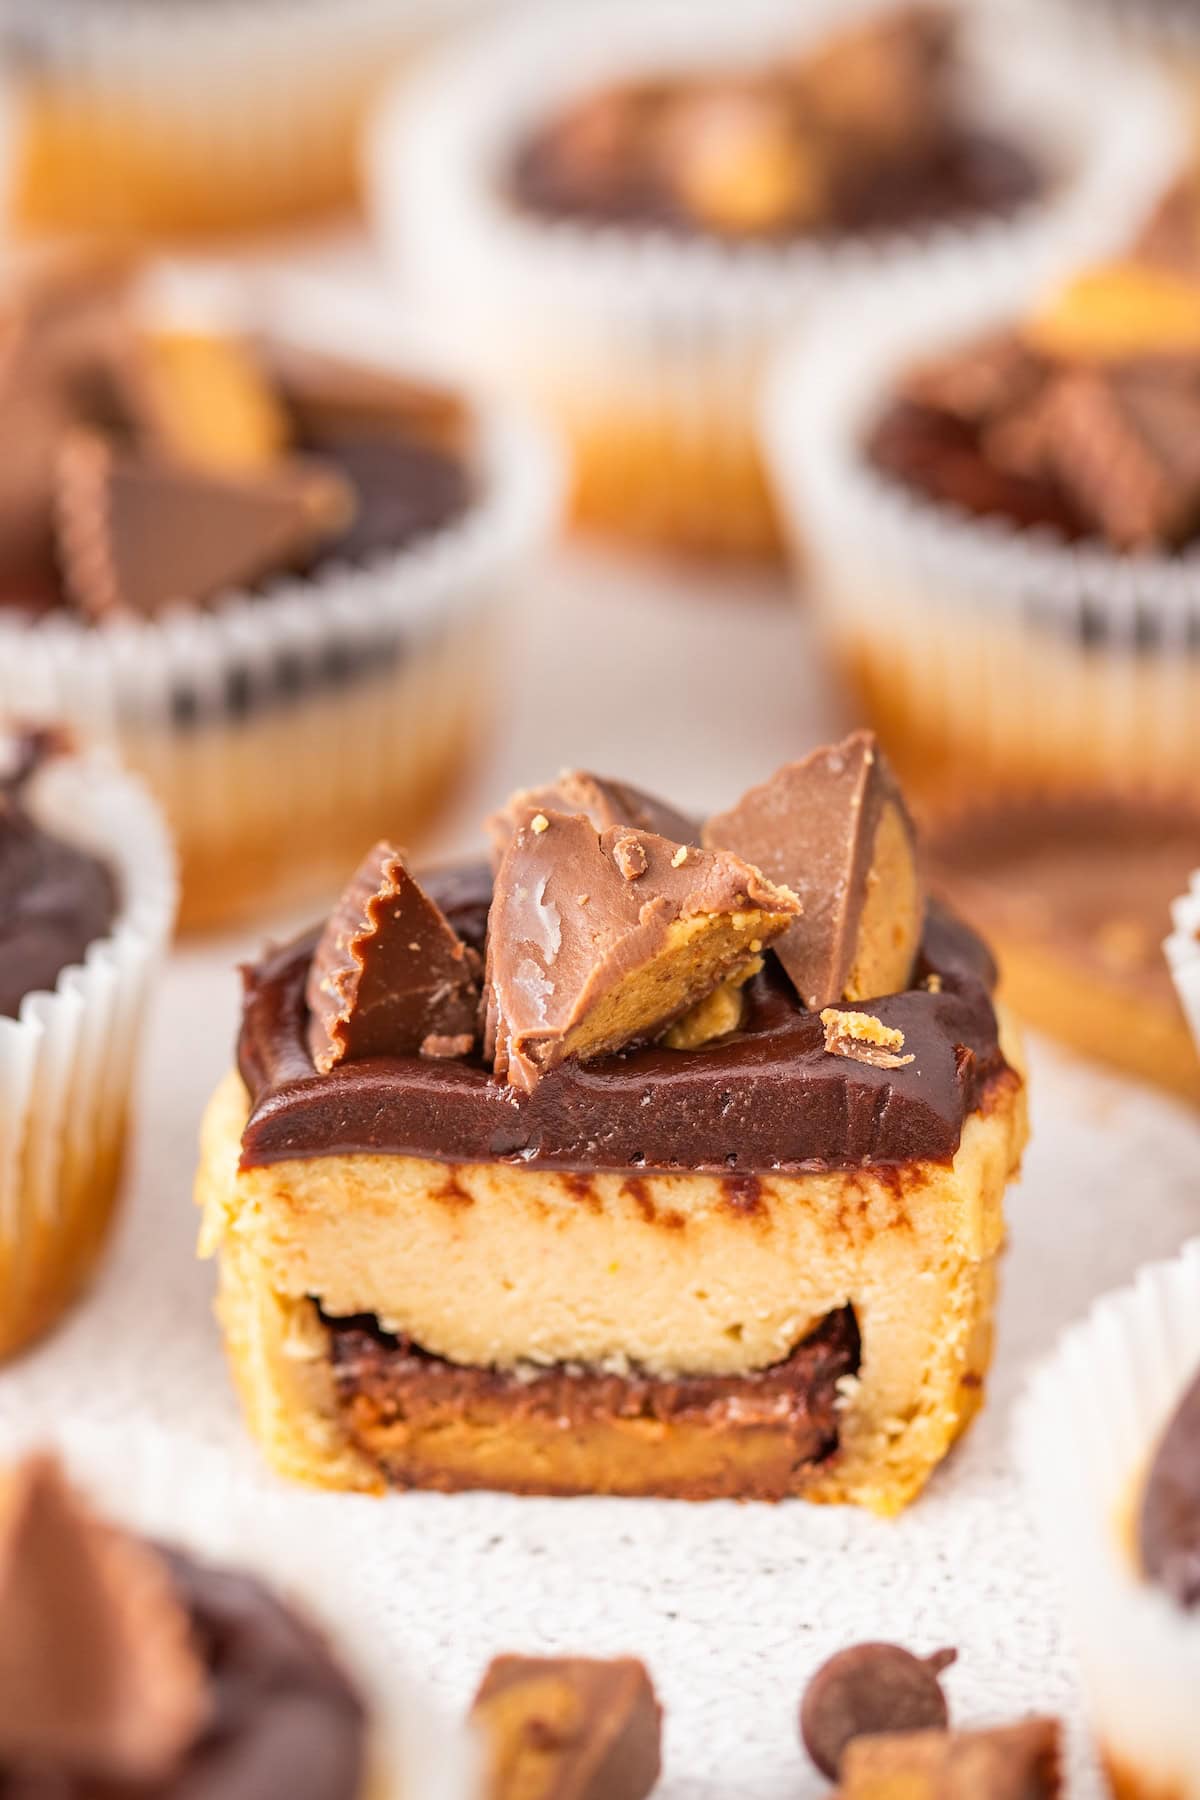
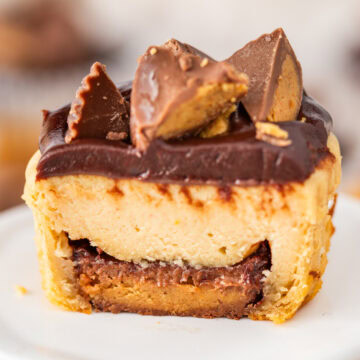
These mini peanut butter cup cheesecakes are rich, creamy, and loaded with chocolate peanut butter flavor. Each bite features a Reese's peanut butter cup base, a smooth peanut butter cheesecake filling, and a decadent chocolate topping. Get an easy, gluten-free recipe for the best ever peanut butter cup cheesecake cupcakes-a must-try for cheesecake lovers and fans of dessert bites. Pin these mouth-watering peanut butter pie cupcakes now before they disappear!
Why this is the best mini peanut butter cup cheesecakes recipe
This decadent dessert is delicious! Everyone loves cheesecake, and everyone loves peanut butter cups, and these treats will delight both kids and adults alike.
This is an easy dessert. Unwrap the peanut butter cups, mix the filling, fill the cupcakes, then bake. That's all there is to it!
The ingredients for this easy recipe are very common. You probably have most of the simple ingredients already in your pantry, and the remaining couple are available in every grocery I've ever visited. The exception is vanilla bean paste, but that is readily available on Amazon if not in your grocery store (larger ones do typically have it though). And if you need to, you can use vanilla extract in place of the vanilla bean paste.
It's an irresistible flavor combination! The combination of tangy cheesecake and rich peanut butter cups is always a crowd-pleaser.
What you'll need to make mini Reese's peanut butter cup cheesecakes
Equipment
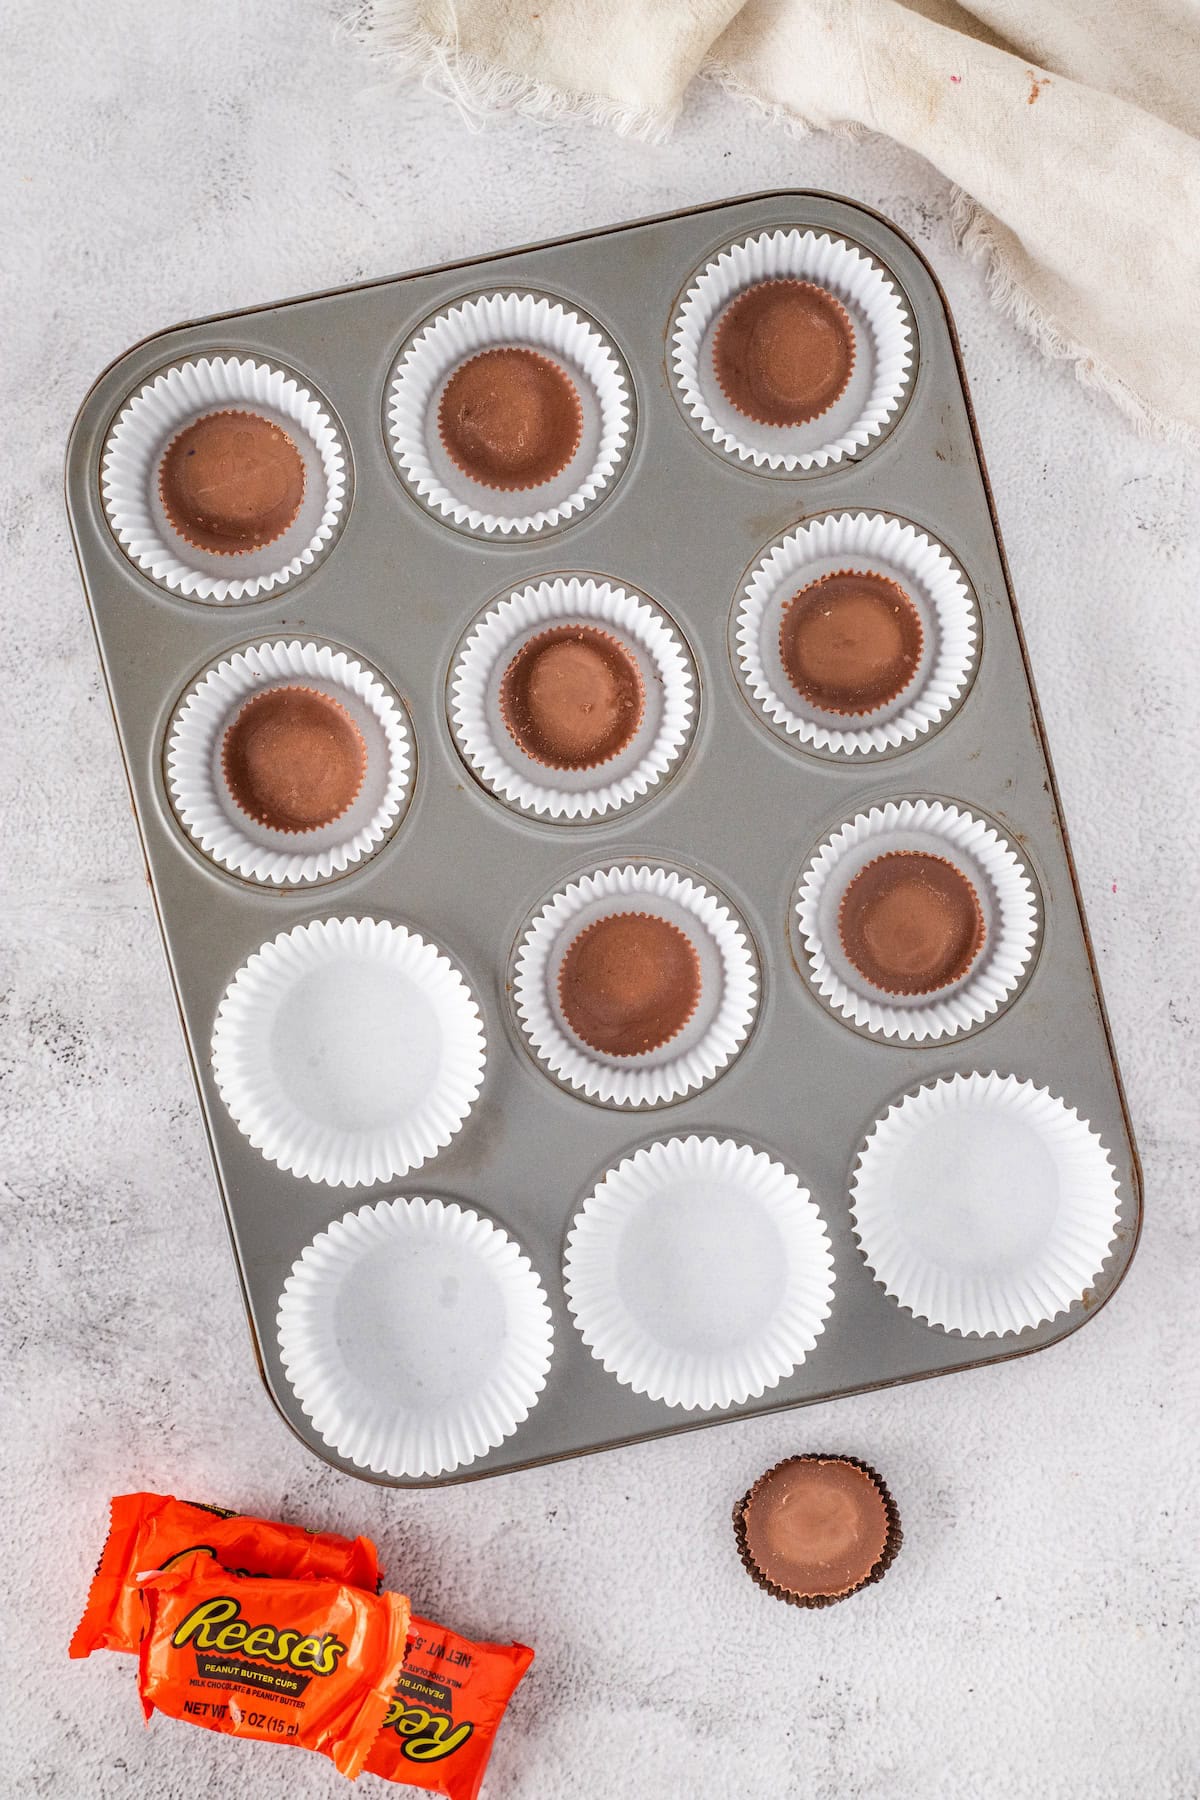
- Muffin tin - This recipe makes 24 mini cheesecakes, so you will need two standard 12-well muffin pans, or you can bake in two batches. If you do batches, make sure that the pan is completely cooled to room temperature before baking the second batch. Otherwise, the peanut butter cups will melt, and the cheesecakes might over-bake.
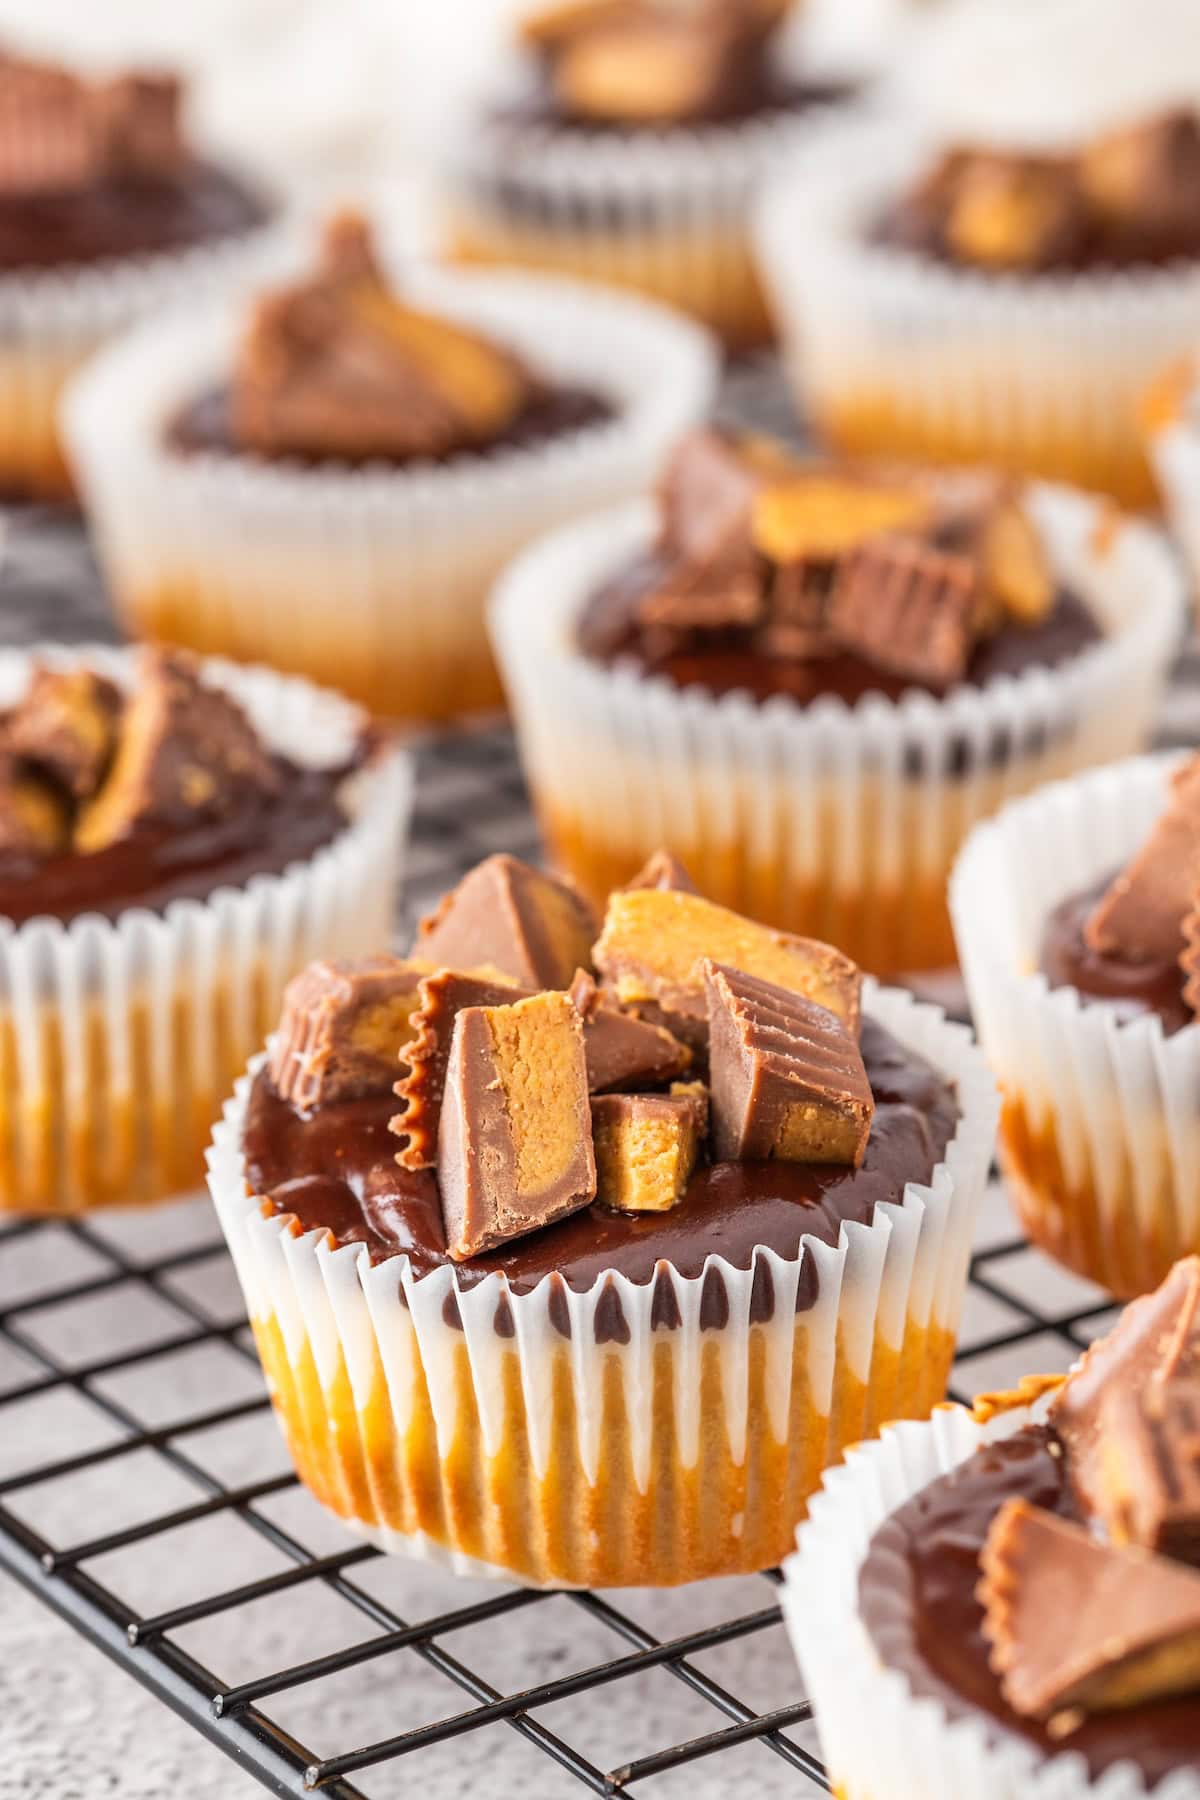
- Foil cupcake wrappers - These release from the cheesecakes much easier than traditional paper liners do. I've used both, and I definitely prefer the foil ones. (Paper shown in the photos below - which is how I learned my lesson!)
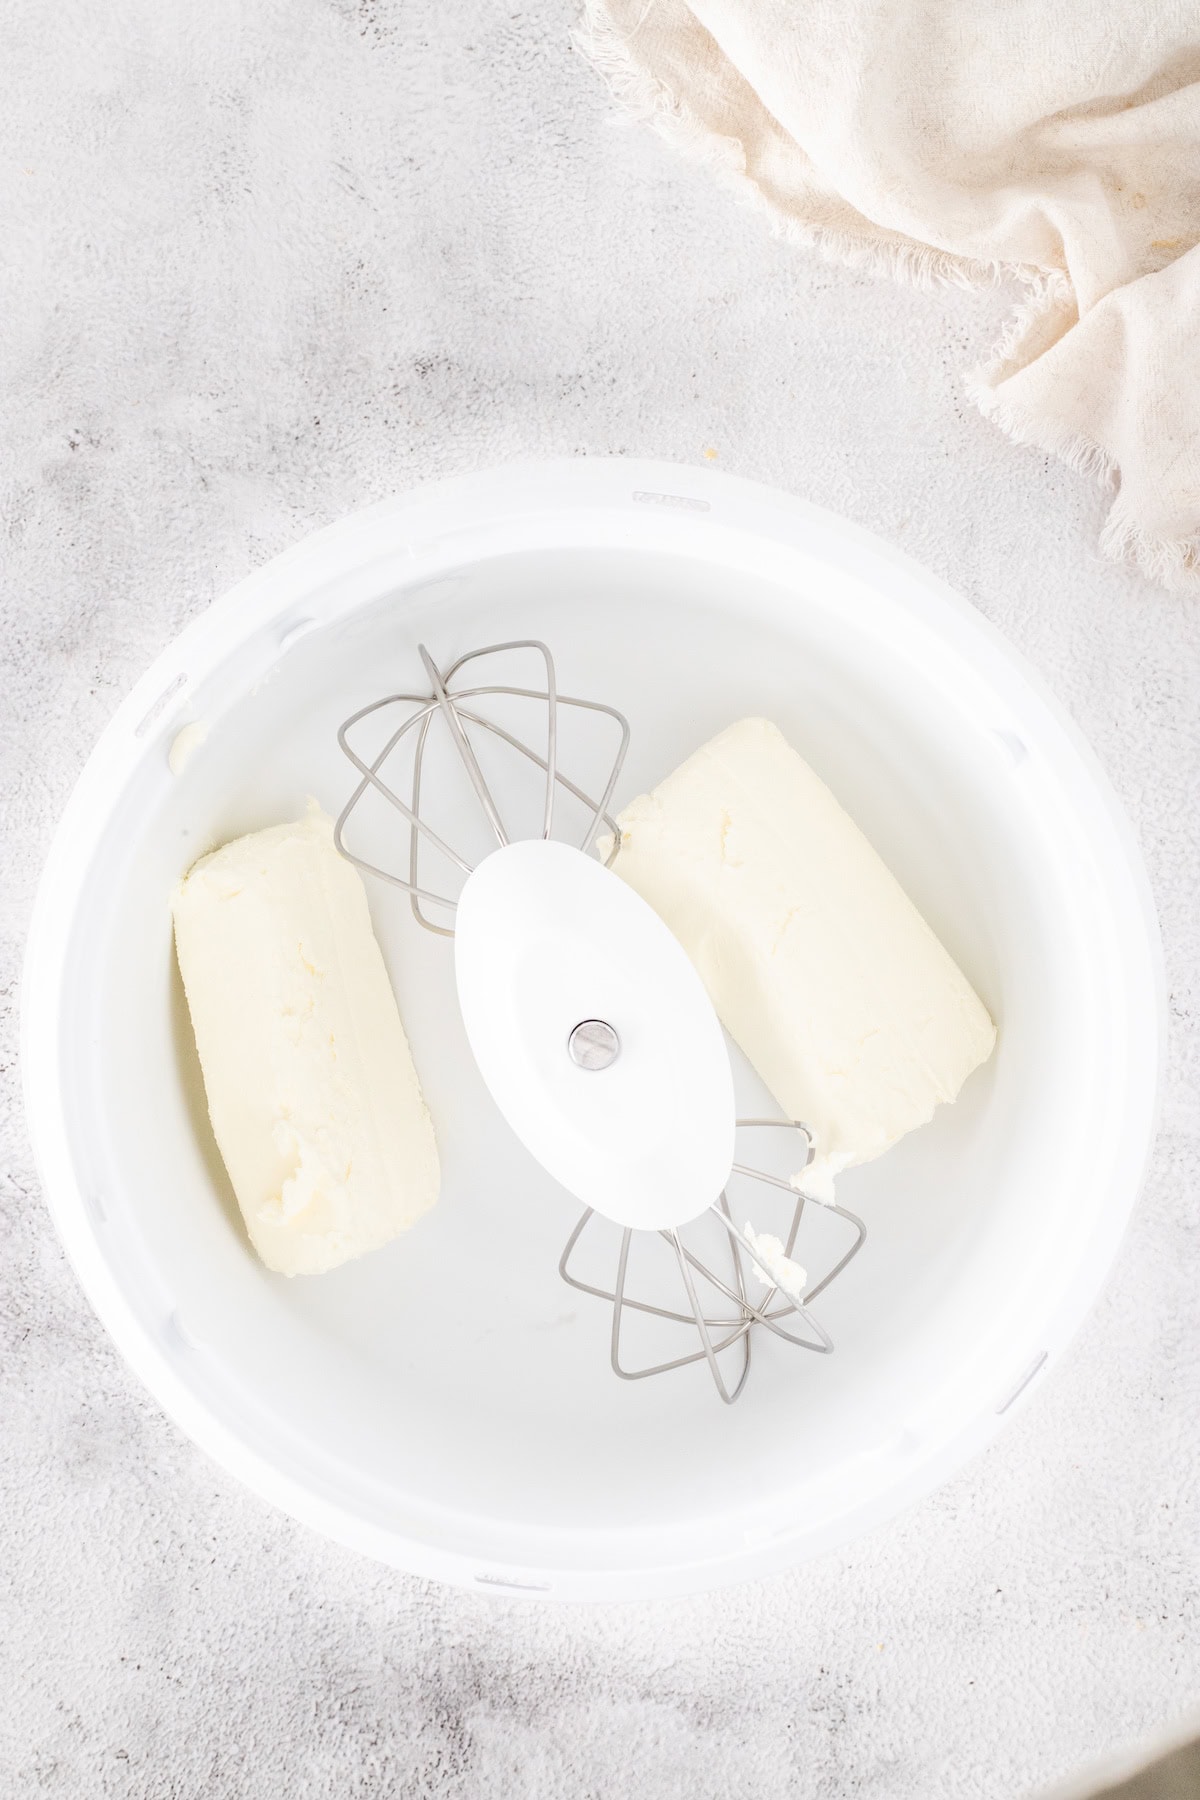
- Electric mixer - You could also use a stand mixer.
- Wire rack - This is to place the cupcakes on to cool.
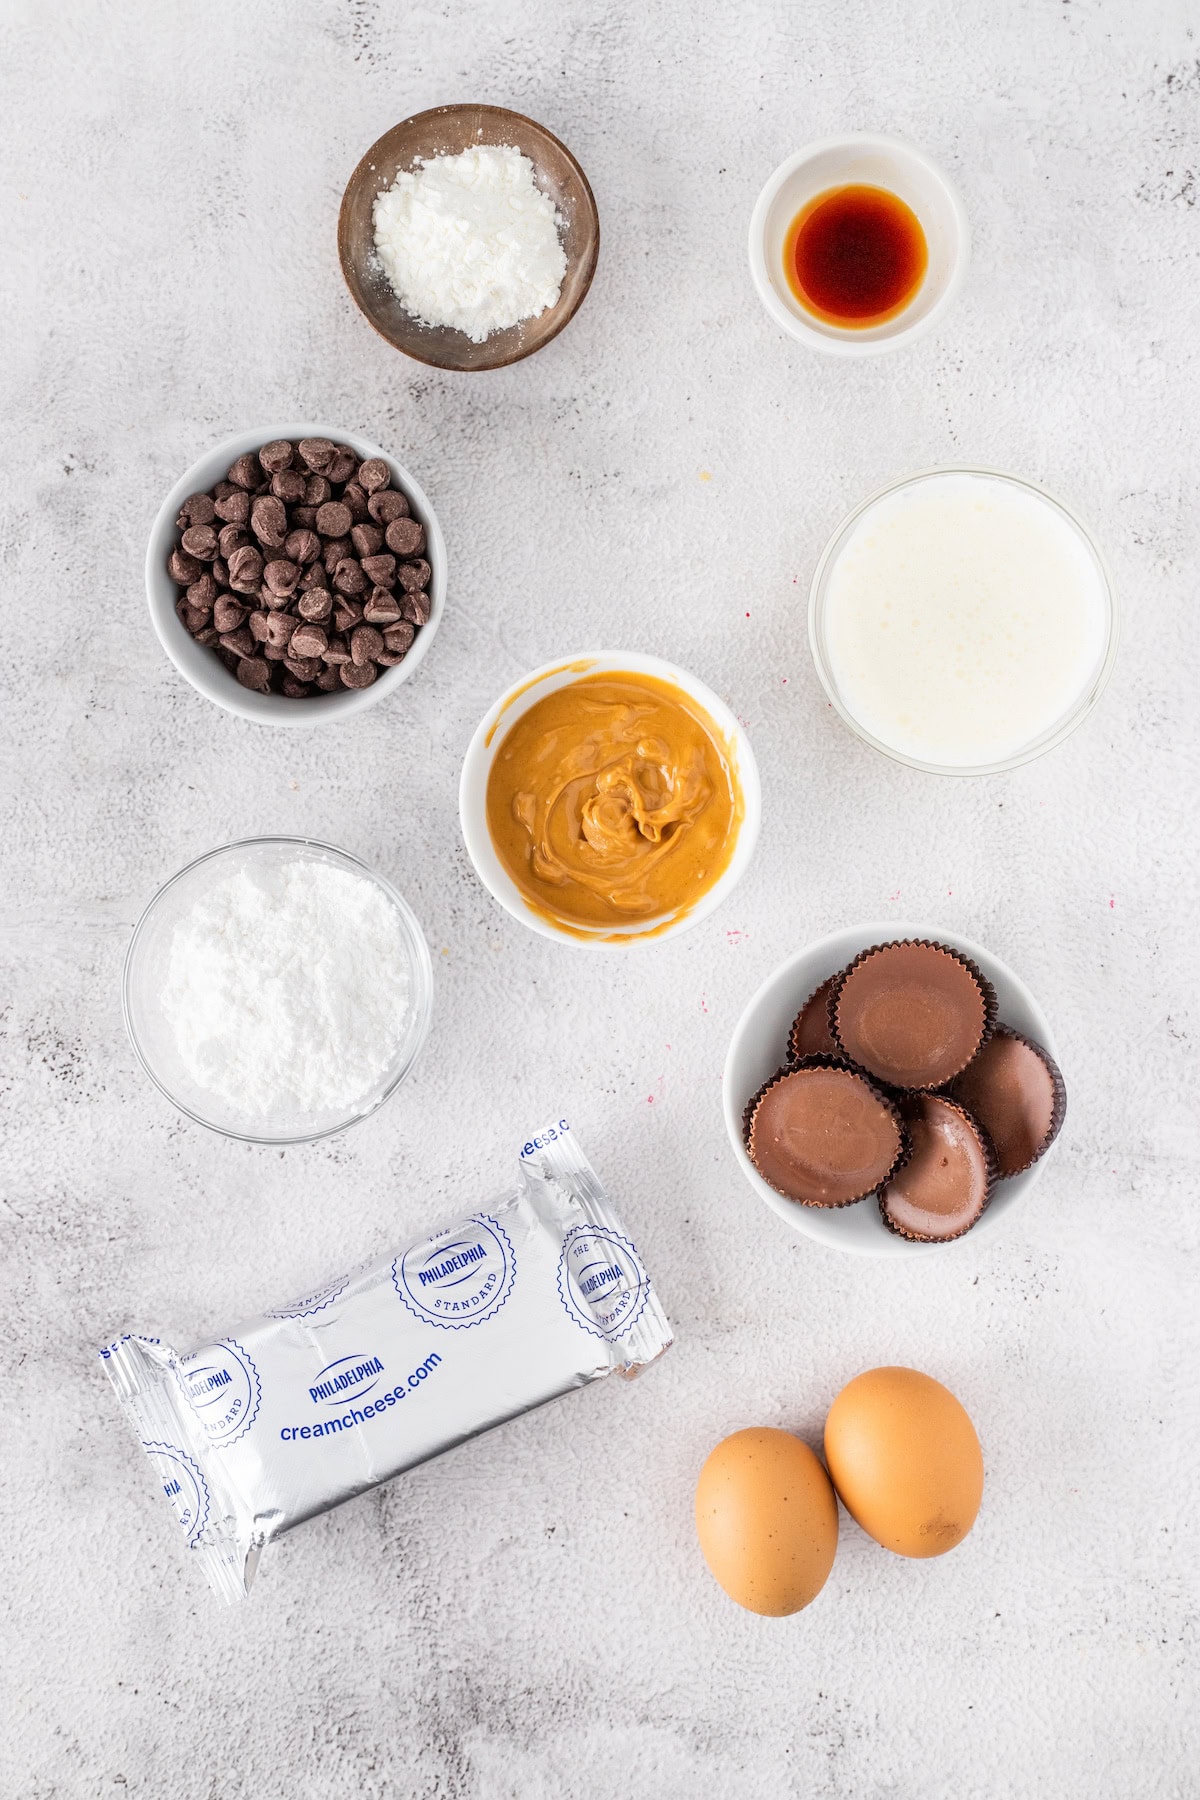
Ingredients
See the printable recipe card at the bottom of the page for all measurements and nutrition facts.
For the peanut butter cup cheesecakes
- Standard size Reese's Peanut Butter Cups - I suppose you could use Big Cups if you wanted to, and that would be VERY tasty, but it would also be very expensive. The standard-sized cups are pricey, too, but not as much as the Big Cups.
- Full-fat cream cheese - You should never ever use low-fat cream cheese in cheesecakes. You will taste the difference. Always go for the full-fat version in a recipe like this.
- Powdered sugar - This may be labeled confectioners sugar, icing sugar, or 10x sugar. It's all the same thing. It sweetens the cream cheese without making it grainy.
- Creamy peanut butter - I suppose you could use crunchy if that's all you had, but I think it would be weird to have crunchy bits in your cheesecake.
- Cornstarch - This helps bind the cheesecake filling together.
- Vanilla bean paste - I prefer vanilla bean paste over plain vanilla extract for two reasons. The paste has a much more potent and robust vanilla flavor, so I think that's important, but also, vanilla bean paste has actual vanilla beans crushed up in it. Vanilla extract is made by soaking vanilla beans in alcohol and then removing the beans. Vanilla bean paste is made from concentrated vanilla extract that has had crushed up vanilla beans added to it. If you don't want to get vanilla bean paste, you can use an equal amount of pure vanilla extract.
- Room temperature eggs - These bind the cheesecake filling together to make a cake rather than a puddle of cream cheese.
For the chocolate ganache topping
- Semi-sweet chocolate chips - You could use dark chocolate chips, but I do not recommend using milk chocolate chips. They are too sweet.
- Heavy cream - This may be labeled heavy whipping cream.
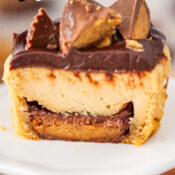
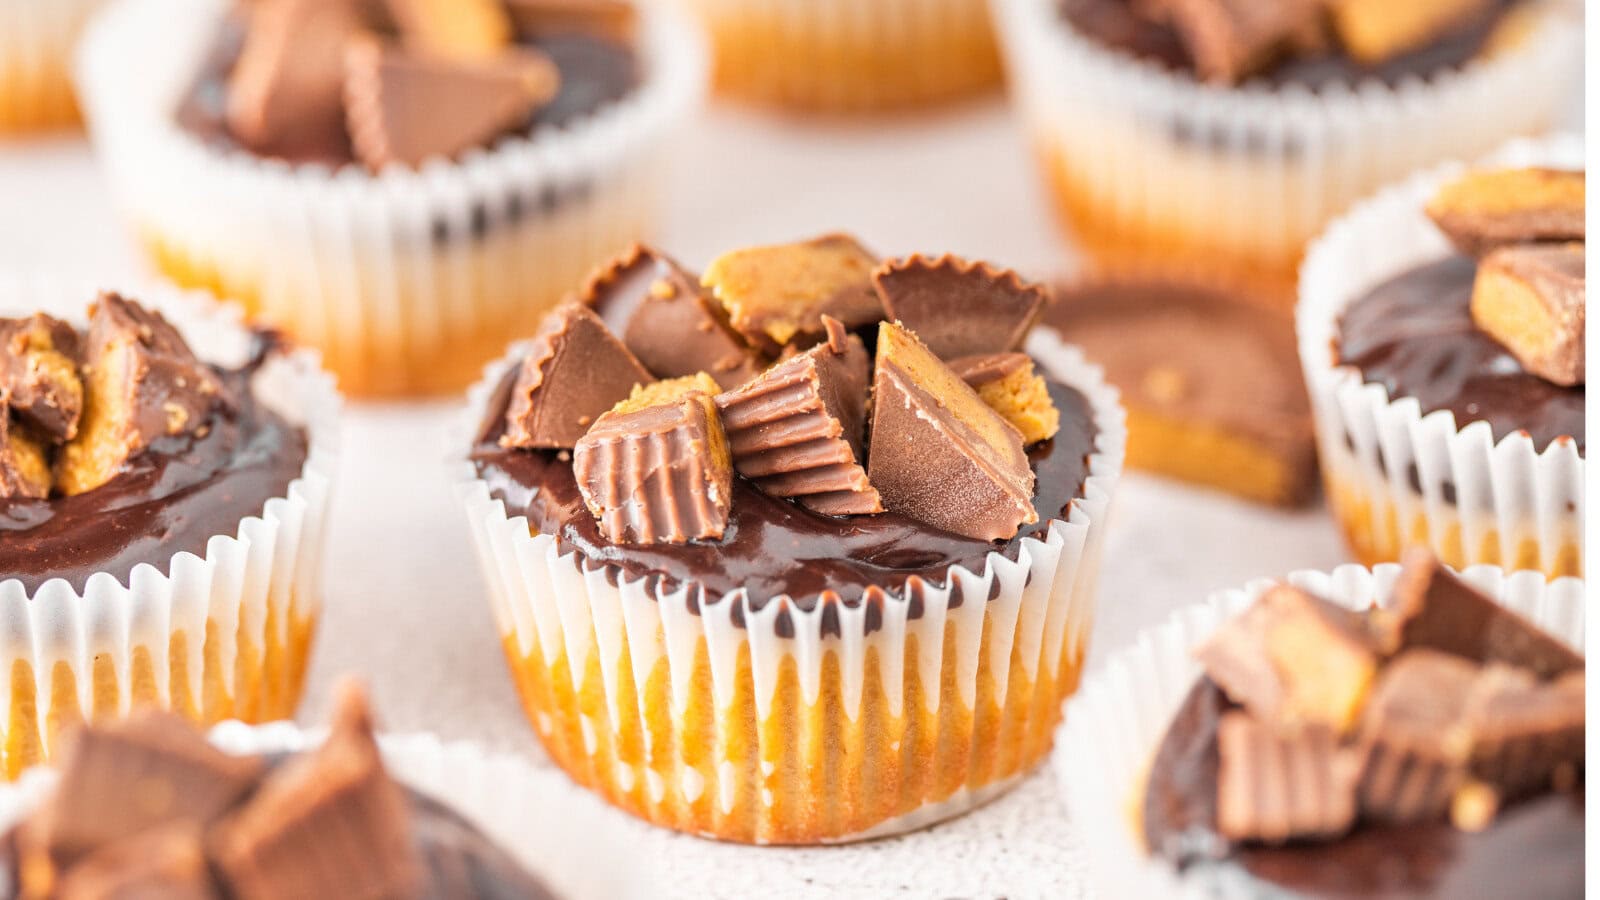
- Mini peanut butter cups - The photo above shows full-sized peanut butter cups, and you can use those for the topping, but I think it's easier to use the minis for this. Also, the minis are cheaper, if that makes a difference to you.
How to make Reese's mini peanut butter cheesecakes
For the peanut butter cup cheesecakes
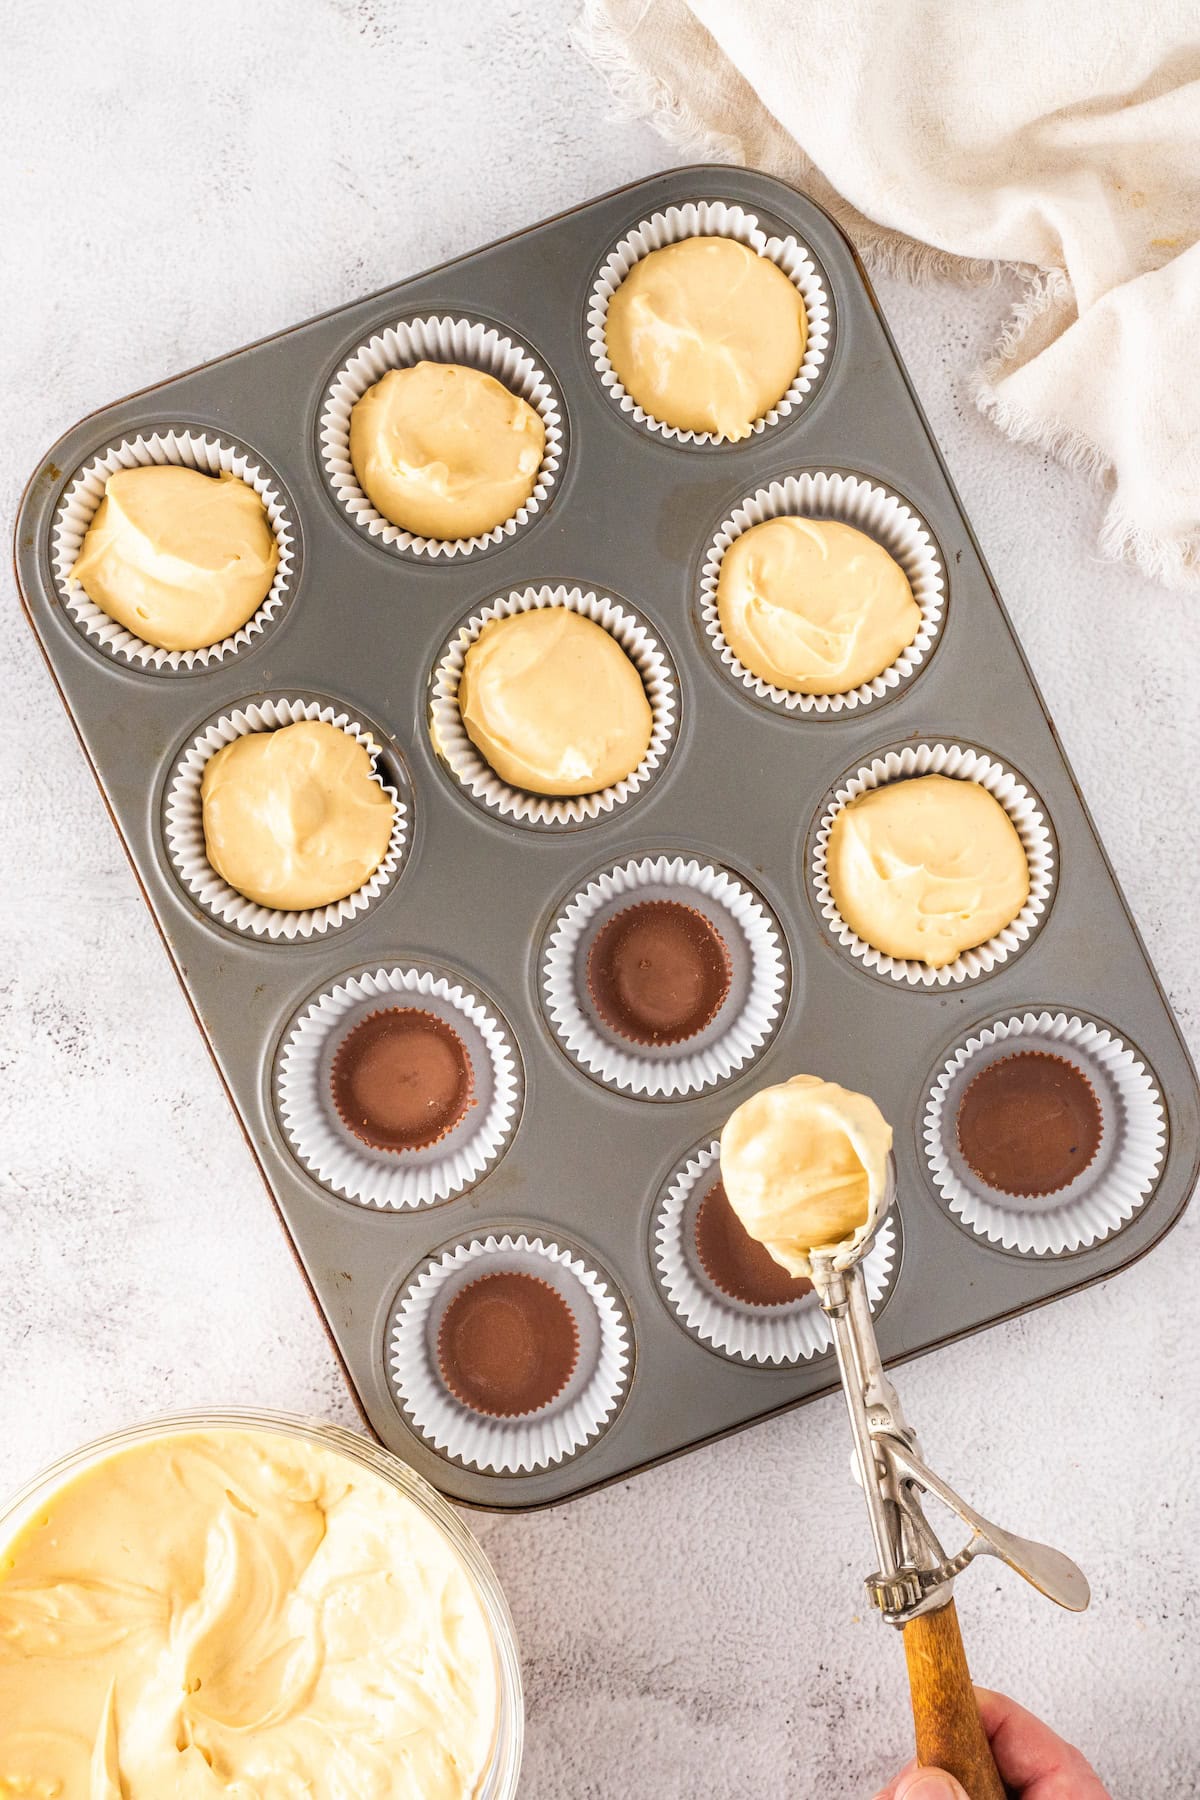
- Preheat oven to 350ºF. Line the muffin pans with 24 foil liners. Place a Reese's Peanut Butter Cup in the bottom of each liner.

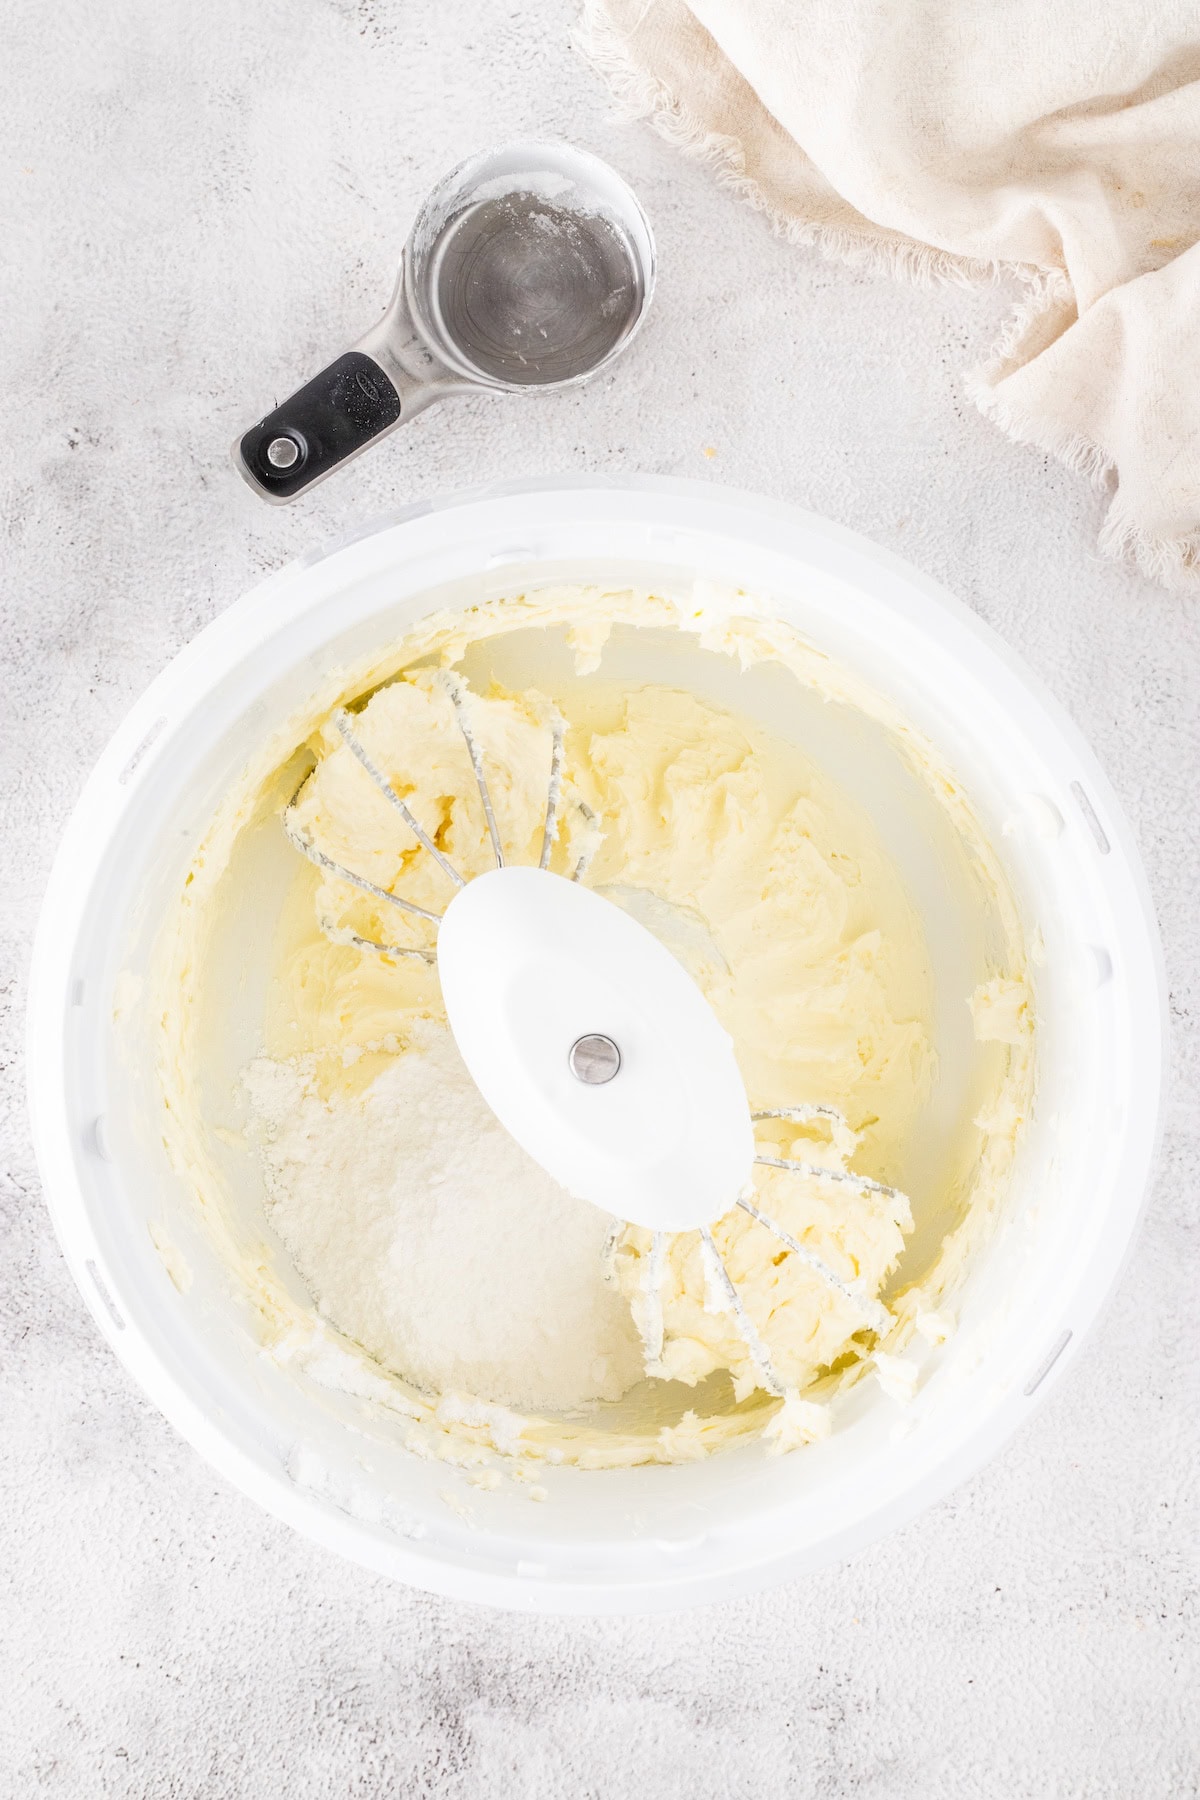
- Add softened cream cheese to a large mixing bowl and beat with an electric mixer until smooth.
- Add powdered sugar and mix until smooth.
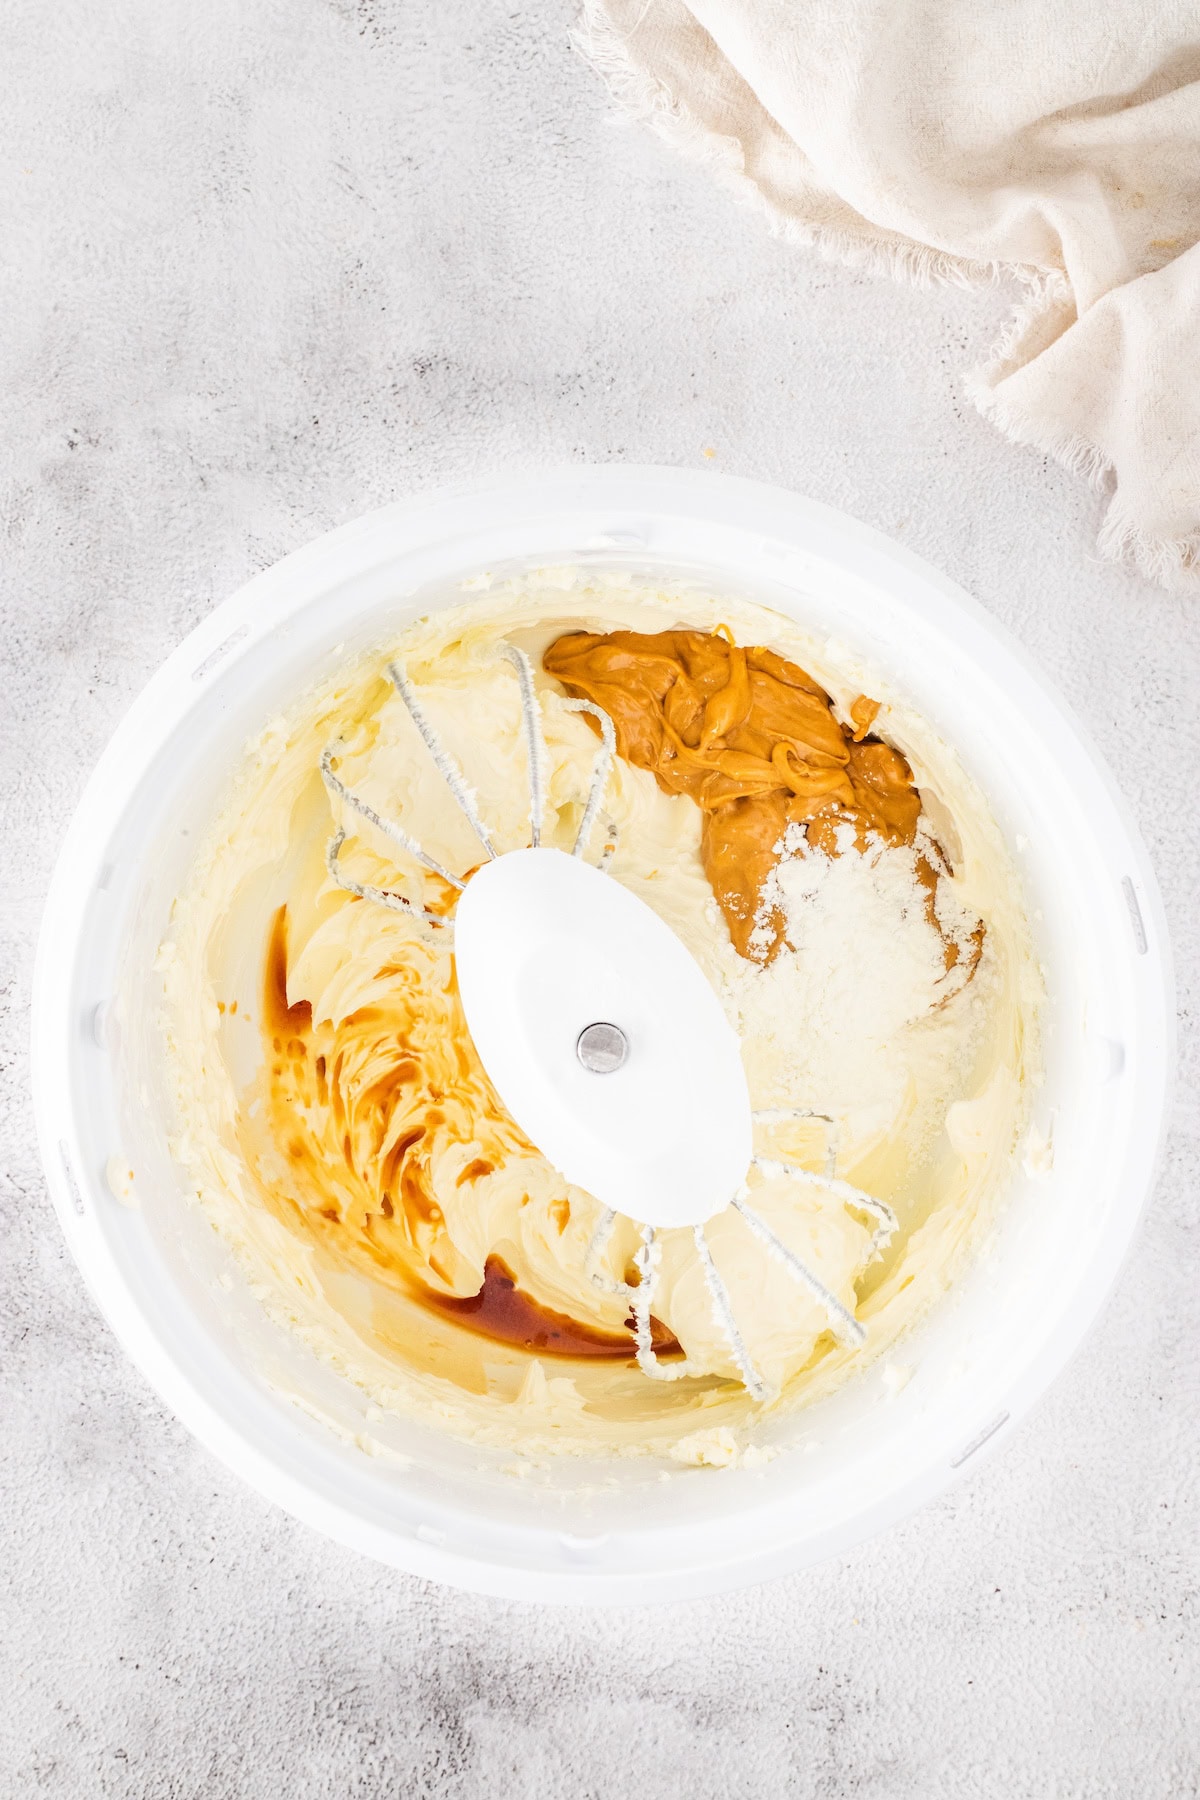
- Add peanut butter, cornstarch, and vanilla bean paste to the cream cheese mixture, and blend.
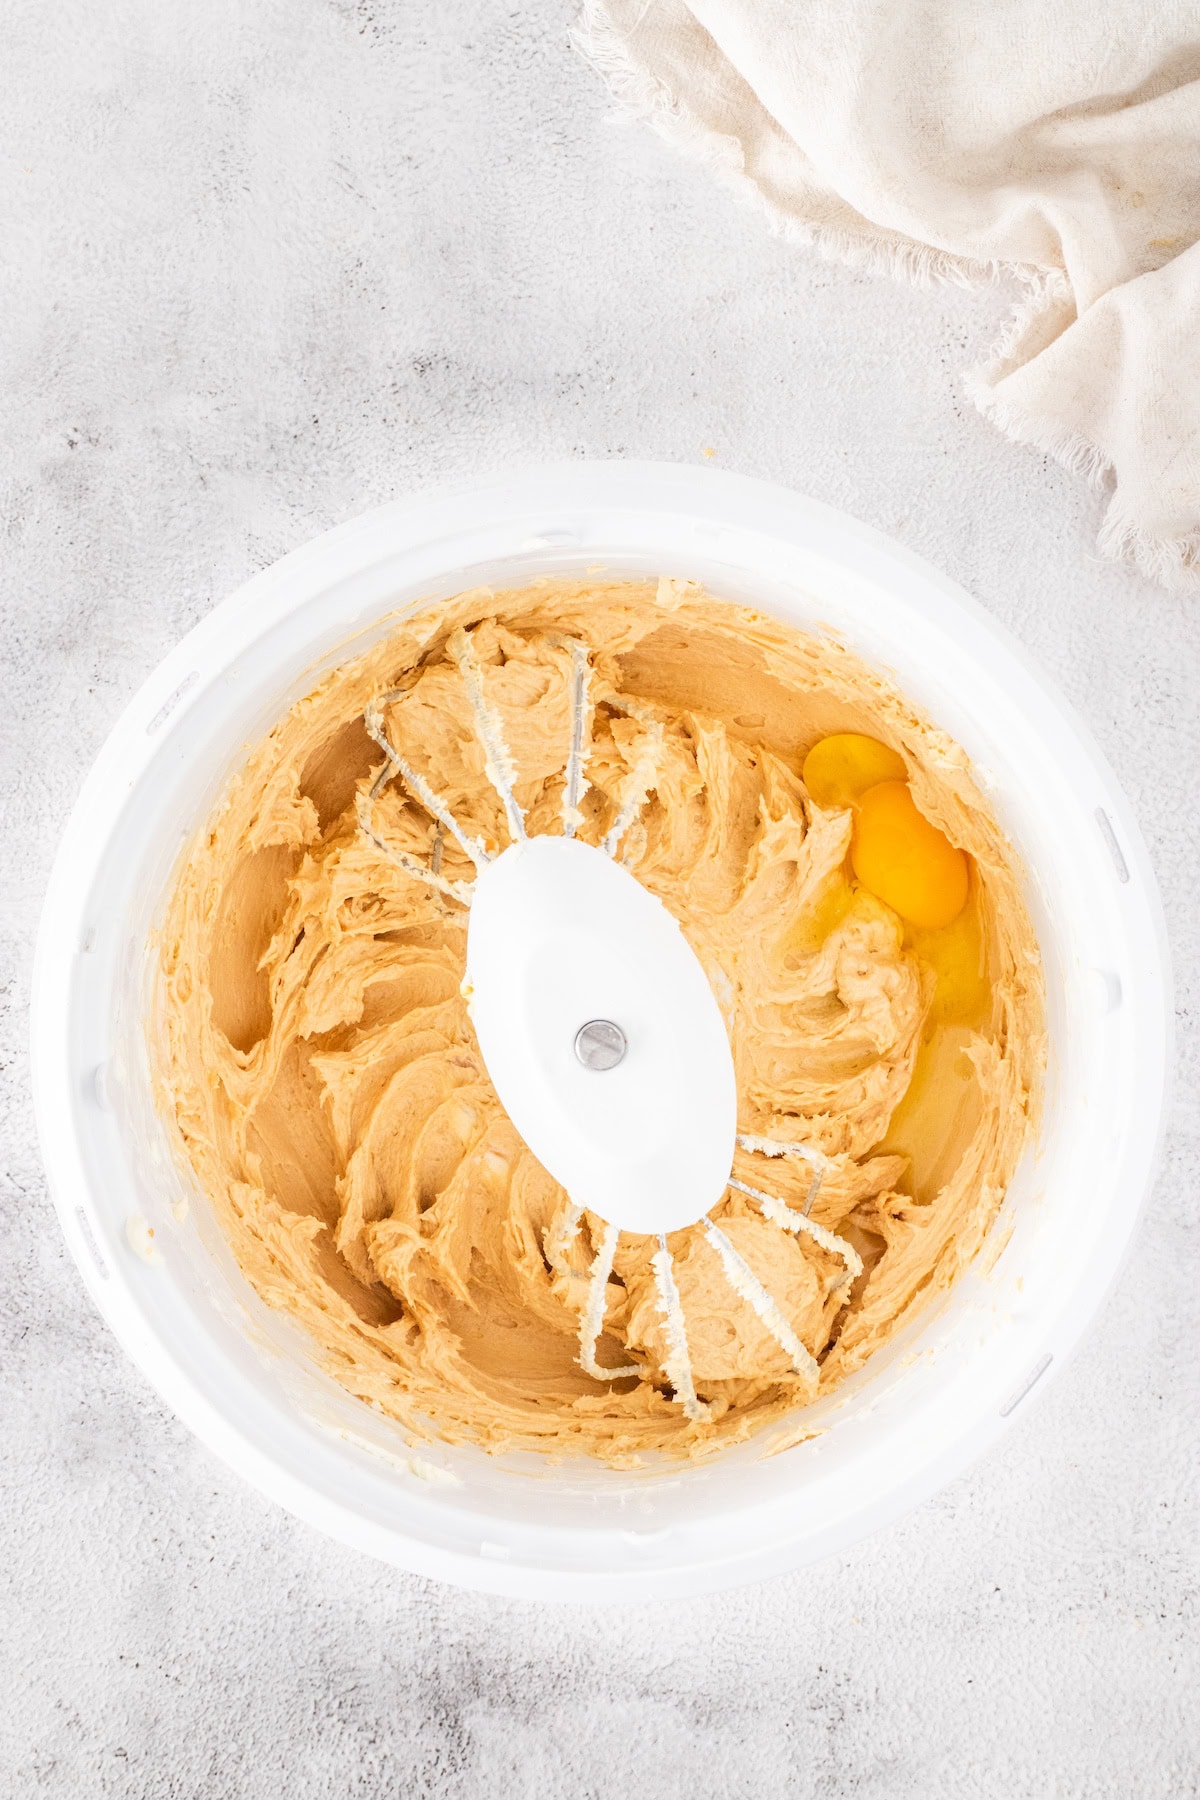
- Add eggs, and mix until just combined. Be sure not to over-mix at any point in the process.
- Use a small scoop to distribute the cheesecake mixture evenly between the cupcake liners in the muffin pan. Gently tap the pan on the countertop to level the cheesecake batter and remove any air bubbles.
- Place the mini cheesecakes in the preheated oven and bake for 15-18 minutes, until the tops are no longer glossy. The centers should still jiggle a little, but the edges should be set. Tops may crack, which is normal.
- Remove the mini cheesecakes from the oven. Let cool on a wire cooling rack for 20 minutes, then refrigerate for 60 minutes. Your cheesecakes may sink in the middle slightly when cooling. This is also normal.
For the chocolate ganache topping
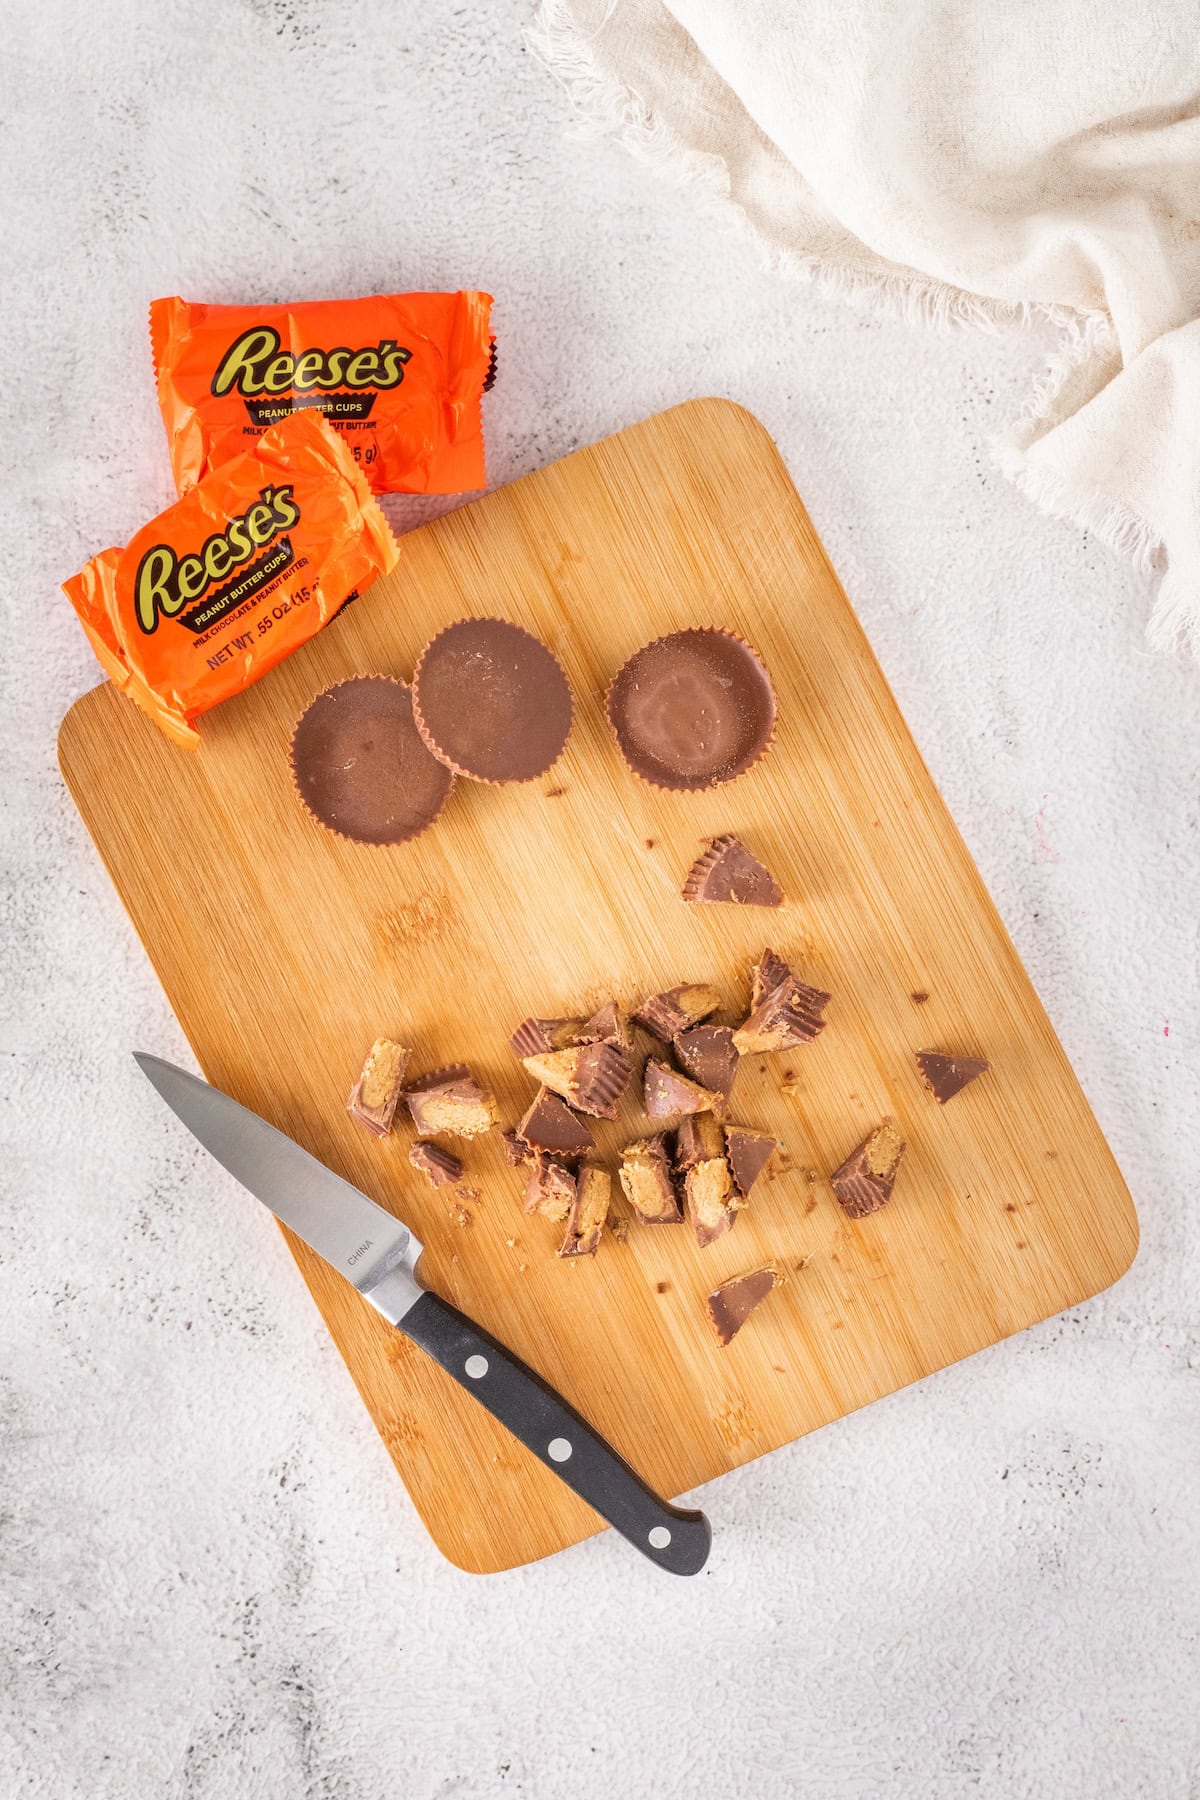
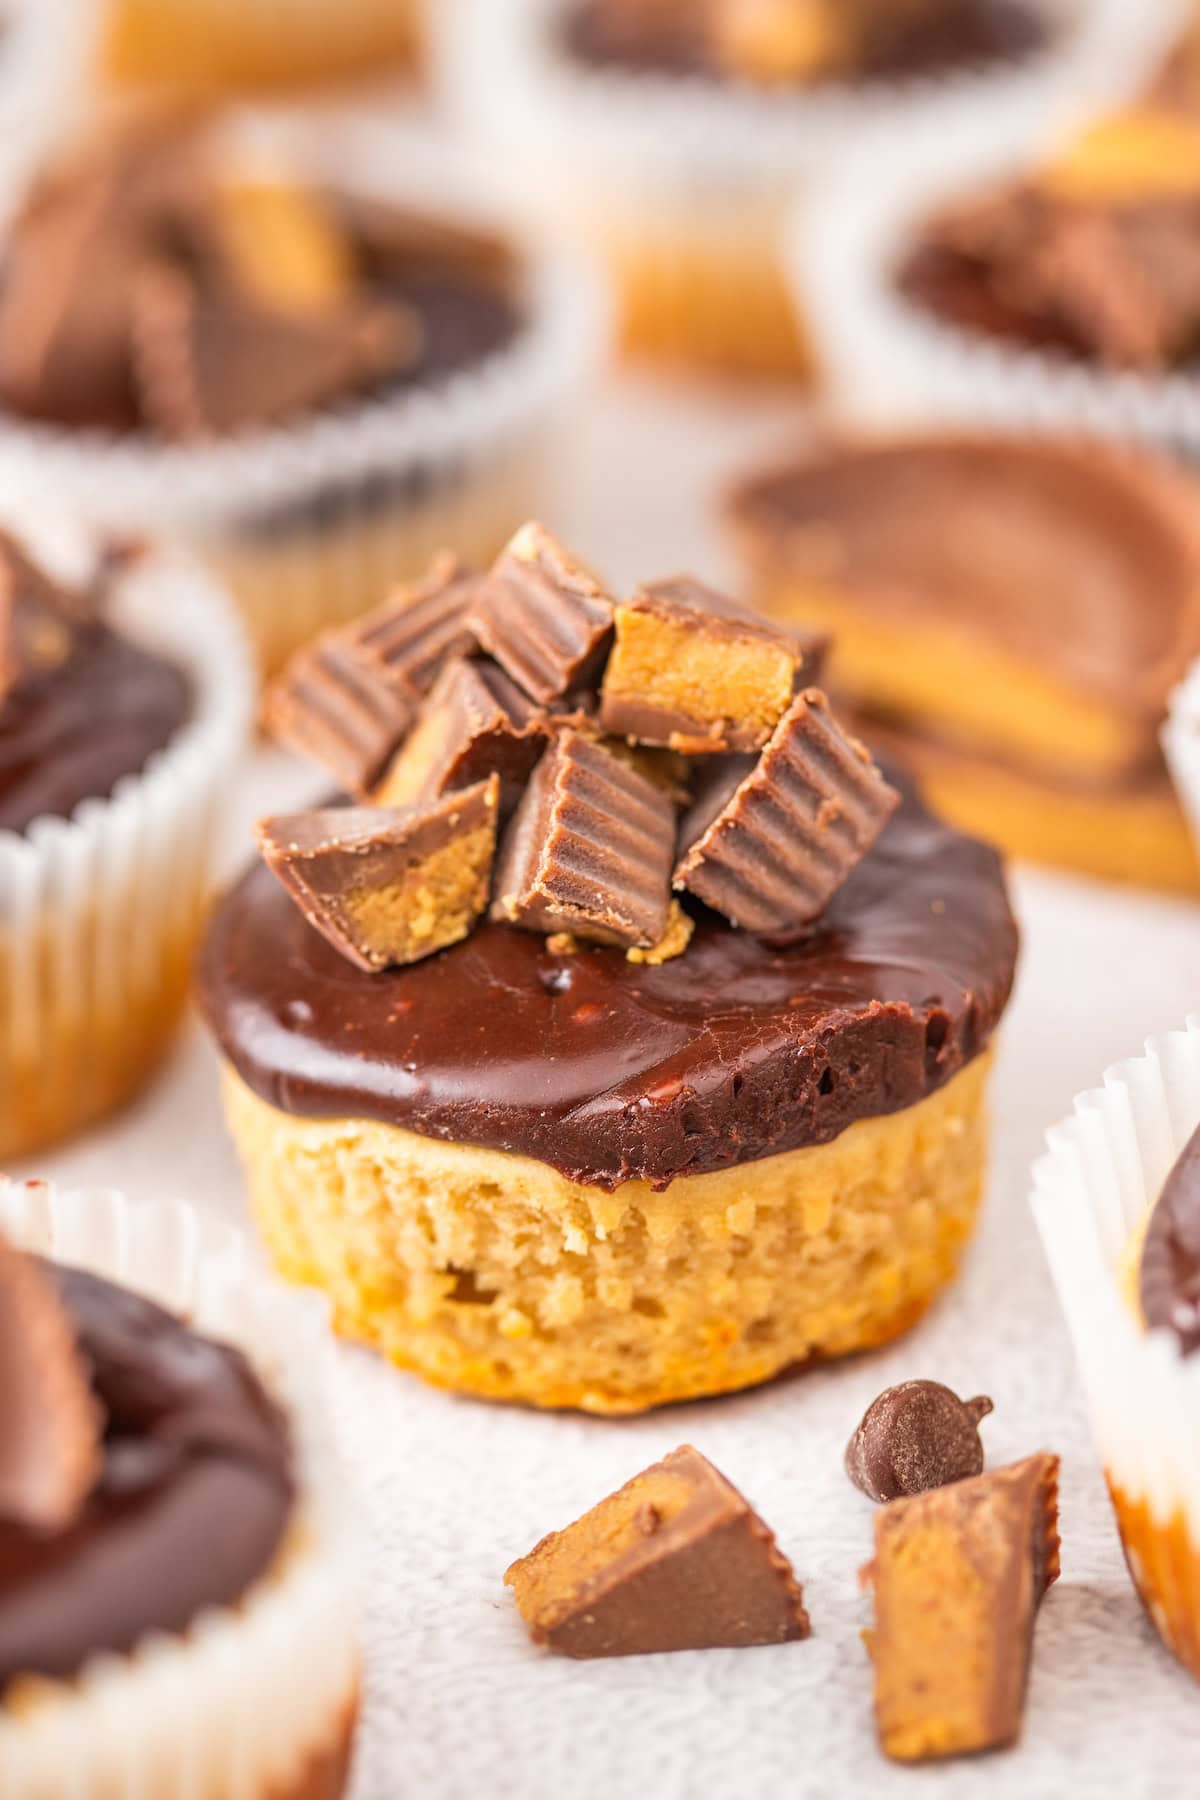
- Chop 10 Reese's peanut butter cups or a couple of handfuls of mini peanut butter cups.
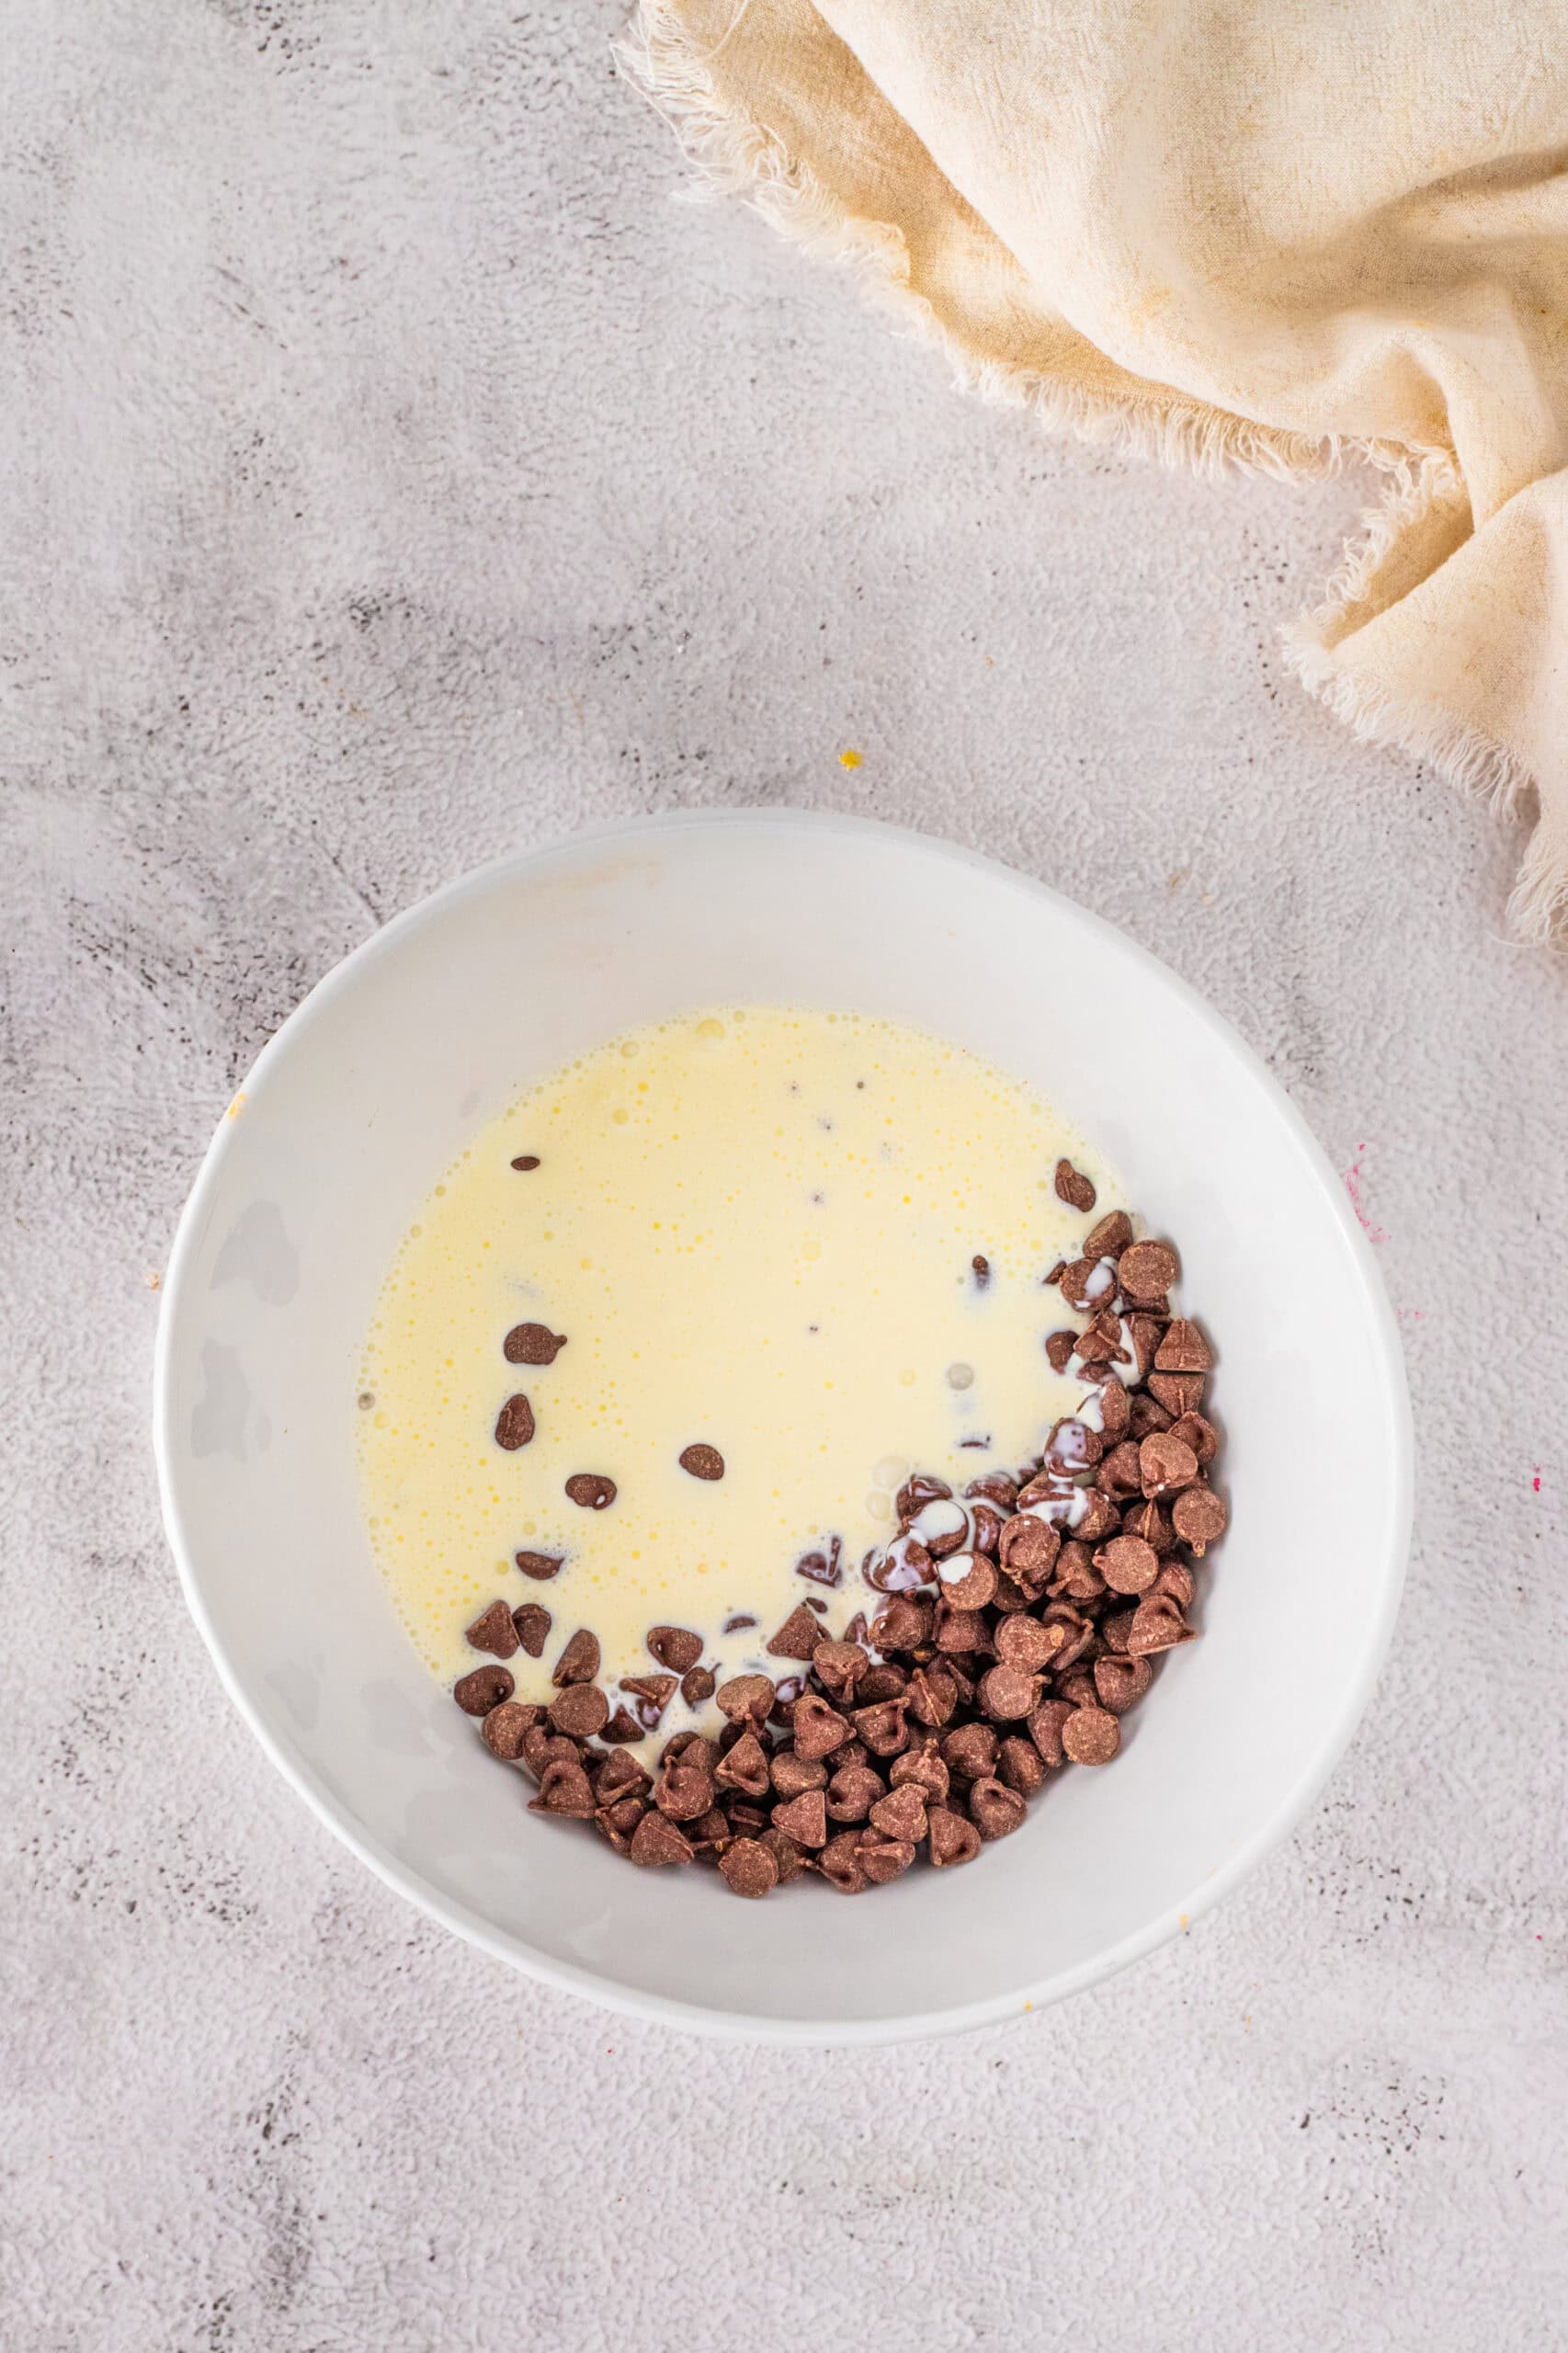
- Pour the chocolate chips and heavy cream into a small microwave-safe bowl. Microwave in 20-second bursts, stirring well each time, until melted. Chocolate chips look like they're not melted, but they actual are if you stir them vigorously. Continue to stir until smooth. It should take only a minute or so. Do not over-heat. You can't fix it if the chocolate turns grainy or re-hardens. You'll have to throw it out and start over.

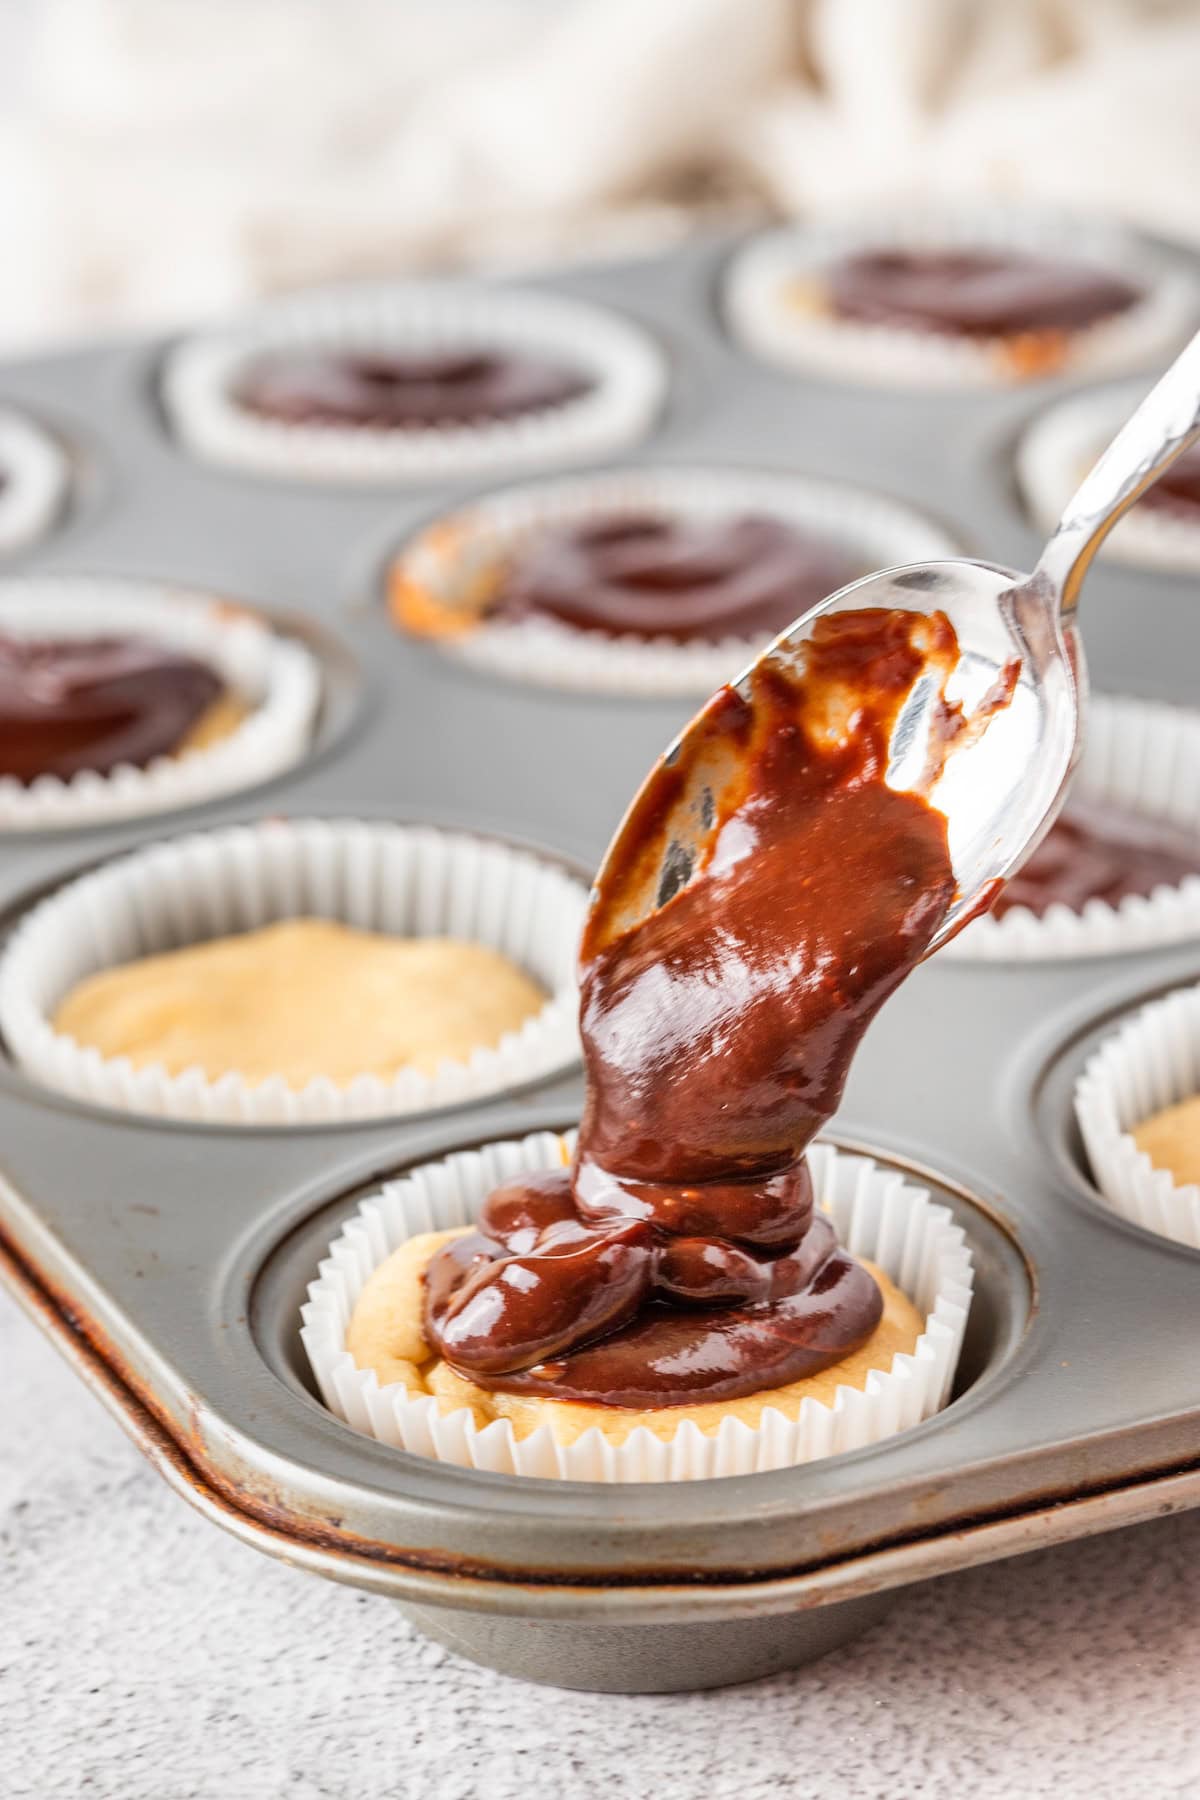
- Spoon the chocolate ganache topping over each mini cheesecake. Tilt from side to side until the entire top is coated.
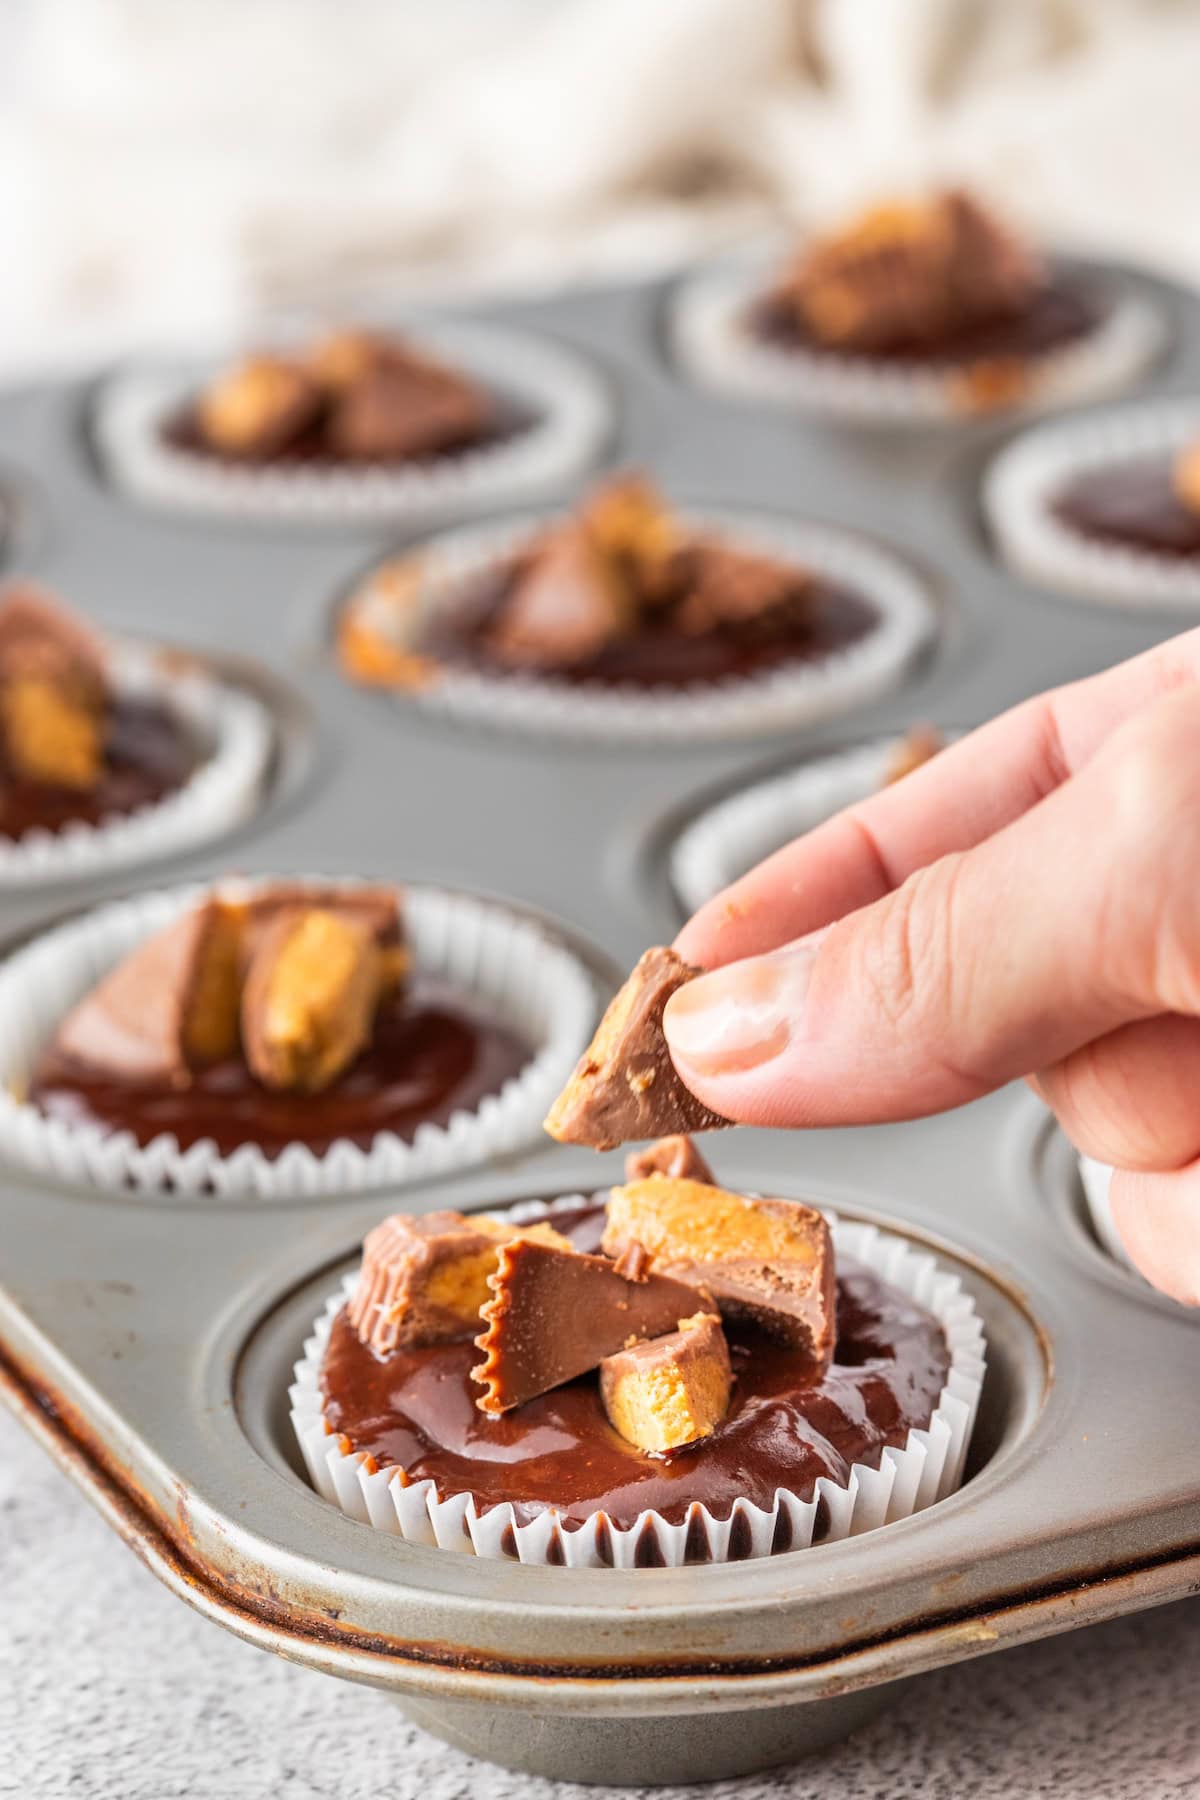
- While the ganache is still warm, add chopped Reese's Peanut Butter Cups to garnish. Refrigerate until set.
- Store in an airtight container in the refrigerator until ready to serve. Serve chilled.
Baker's tips
Use room temperature ingredients except for one thing. If you've ever eaten room temperature peanut butter cups, you know that half of them usually sticks to the wrapper, but you can prevent this by putting your Reese's peanut butter cups in the fridge overnight before unwrapping them. If they are well chilled, the papers will peel right off, and none of the peanut butter cup will stick.
If you forget to put your cream cheese out to warm up, you can microwave it in short 30-second bursts, stirring in between, until it's soft enough to work with.
I wrote this above in the instructions, but it bears repeating: Stir the chocolate chips well after each time you microwave them, until they are melted and smooth. Chocolate chips look like they're not melted, but they actual are if you stir them vigorously. You should stir for at least 30 seconds between each microwave burst, and continue to stir until the chocolate is smooth. It should take only a minute or so. Do not over-heat. You can't fix it if the chocolate turns grainy or re-hardens. You'll have to throw it out and start over.
Try not to over-bake the cheesecakes. If you do, the cheesecake part will have more of the texture of a cupcake than a cheesecake. It will still taste really good but it will just have a different consistency than you're looking for. Also, the peanut butter cups may get crispy on the bottom.
Variations & substitutions
This is not a very adaptable recipe being that it starts with peanut butter cups. I suppose you could probably use Rollos or Carmello sections in place of the peanut butter cups and then use caramel sauce or melted caramels in the cheesecake filling and the chocolate ganache on top. Actually, I think I just talked myself into trying that. Mini chocolate caramel cupcakes sound pretty tasty!
Do not use low-fat cream cheese, or you will be sorry. Low-fat cream cheese tastes weird in cheesecake.
This is not a sponsored post, but I do not recommend using an off-brand peanut butter cup. Reese's is the brand that's going to give you the flavor you're looking for.
The brand of the peanut butter is unimportant, I think, but I personally used Jif and thought it tasted great.
Storing leftovers
Cheesecake always needs to be refrigerated. You can store leftover mini cheesecakes in the fridge for up to five days.
You can also freeze leftover cheesecake. Place the individual cheesecakes in a plastic freezer bag and store in the freezer for up to two months.
To serve frozen cheesecake, transfer it to the refrigerator overnight before serving. Keep them chilled until you're ready to serve.
Try these other peanut butter desserts:
- Ultimate Peanut Butter Skillet Cookie
- No Bake Peanut Butter Pie
- Peanut Butter and Jelly Pie
- Inside Out Peanut Butter Cup Cookies
- Easy Chocolate Peanut Butter Balls
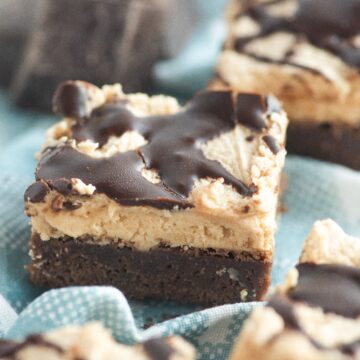
- Peanut Butter Cheesecake Brownies (AKA PB Cream Cheese Brownie Bars)
- 4 Ingredient Peanut Butter Marshmallow Fudge
And try these cheesecake recipes:
- Cherry Cheesecake Brownies (no bake cheesecake)
- Chocolate Cherry Cheesecake
- Chocolate Peppermint Cheesecake
- Chocolate Orange Cheesecake
- Candy Cane Kisses Cheesecake
- S'mores Cheesecake
- Gluten-Free Cheesecake with a Pecan Crust
- No Churn Cheesecake Ice Cream
- Strawberry Cheesecake Ice Cream
Recipe
Mini Reese's Peanut Butter Cup Cheesecakes
Equipment
- Muffin tin you will need 2 or you can bake in batches
- Electric mixer Could also use a stand mixer
Ingredients
For the peanut butter cup cheesecakes
- 24 Reese's Peanut Butter Cups standard size
- 16 ounces cream cheese full fat
- ½ cup powdered sugar
- ¾ cup peanut butter creamy
- 1 tablespoon cornstarch
- 1 teaspoon vanilla bean paste
- 2 large eggs room temperature
For the chocolate ganache topping
- 1 cup semi-sweet chocolate chips
- ½ cup heavy cream
- 1 bag mini peanut butter cups chopped
Instructions
For the peanut butter cup cheesecakes
- Preheat oven to 350ºF. Line the muffin pans with 24 foil liners. Place a Reese's Peanut Butter Cup in the bottom of each liner.
- Add cream cheese to a large mixing bowl and beat with an electric mixer until smooth. Add powdered sugar and mix until smooth. Add peanut butter, cornstarch, and vanilla bean paste, and blend. Add eggs, and mix until just combined. Be sure not to over-mix at any point in the process.
- Use a small scoop to distribute the batter evenly between the cupcake liners. Gently tap the pan on the countertop to level the batter and remove any air bubbles.
- Place the mini cheesecakes in the preheated oven and bake for 15-18 minutes, until the tops are no longer glossy. The centers should still jiggle a little, but the edges should be set. Tops may crack, which is normal.
- Remove the mini cheesecakes from the oven. Let cool on a wire cooling rack for 20 minutes, then refrigerate for 60 minutes. Your cheesecakes may sink in the middle slightly when cooling. This is also normal.
For the chocolate ganache topping
- Chop 10 Reese's peanut butter cups or a couple of handfuls of mini peanut butter cups.
- Add the chocolate chips and heavy cream to a small microwave-safe bowl. Microwave in 20-second bursts, stirring well each time, until melted. Stir until smooth. It should take only a minute or so. Do not overheat. You can't fix it if the chocolate turns grainy or re-hardens.
- Spoon the chocolate ganache topping over each mini cheesecake. Tilt from side to side until the entire top is coated.
- While the ganache is still warm, add chopped Reese's Peanut Butter Cups to garnish. Refrigerate until set.
- Store in an airtight container in the refrigerator until ready to serve. Serve chilled.
Amy Carter says
My kids LOVED these! They're a perfect size and soooo delicious.
Georgia says
My family loved this!