
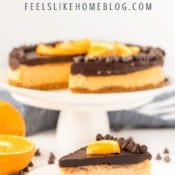


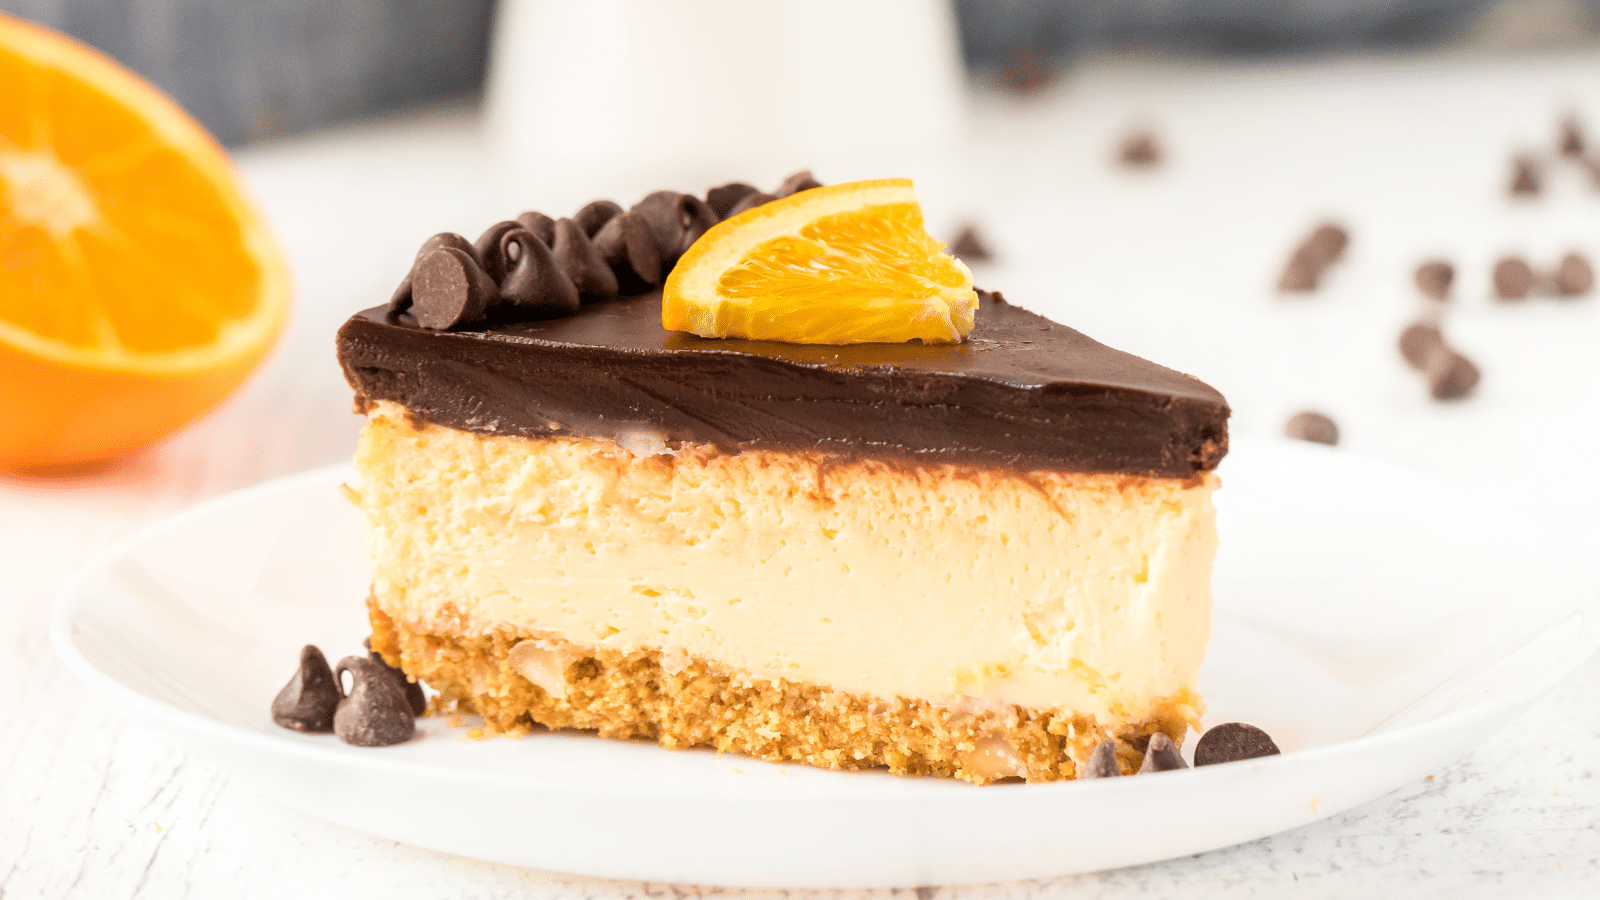
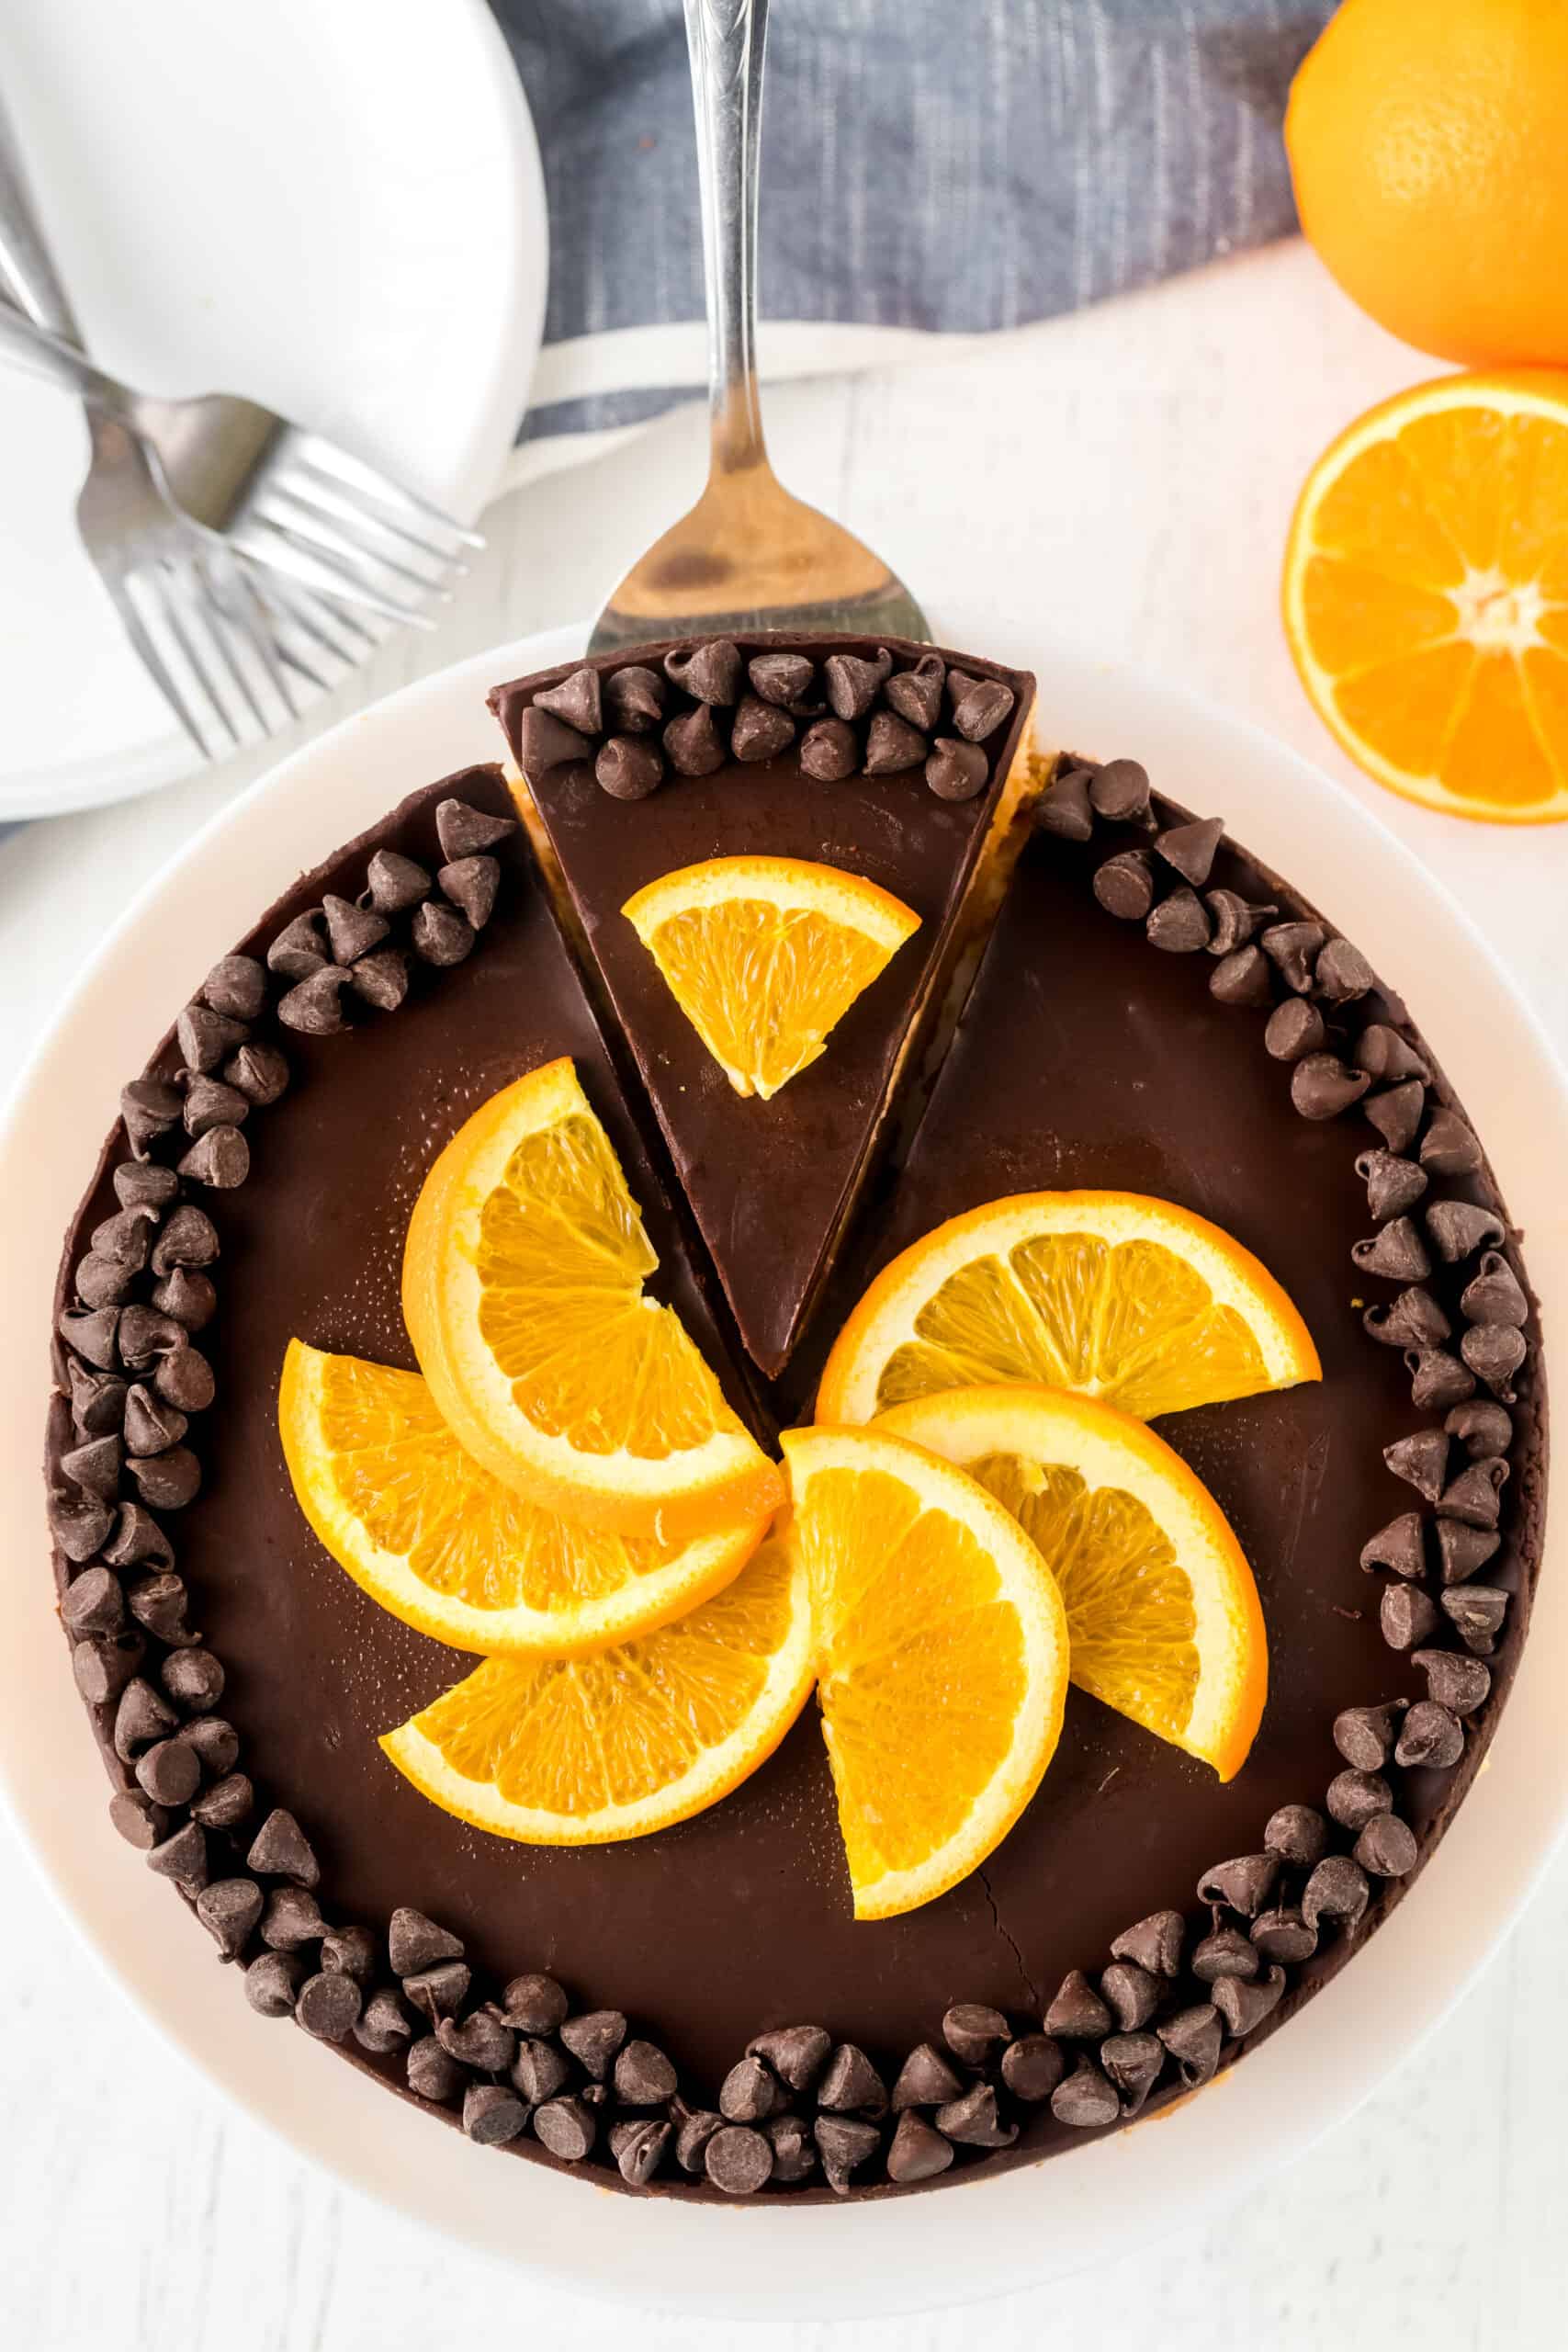
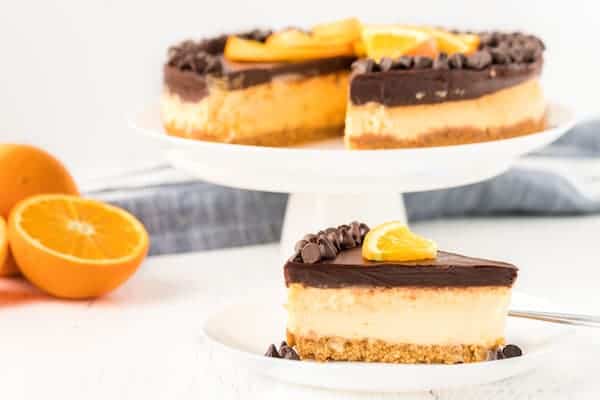
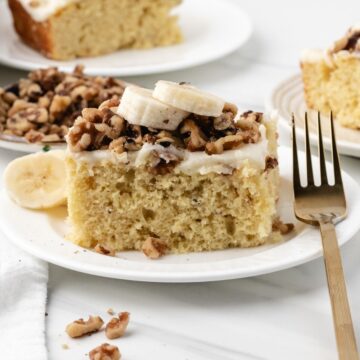
Inspired by Terry's, this orange cheesecake is topped with a thick layer of rich chocolate ganache. Chocolate Orange Cheesecake is so rich and decadent! This chocolate orange cheesecake is my favorite and is great for holiday meals.

I love cheesecake. It may even be my favorite dessert. My favorite cheesecake has always been served at a diner not far from our home. It's amazing.
I think I might have a new favorite now.
I've never before tried to make a cheesecake, and I found the idea a bit daunting. Jenny from JennyBakes.com proposed that I make her cheesecake, but she challenged me to make it a cheesecakes show stopper.
I tried. How's that fellow to the right? He's a show stopper, all right.
I jest. The cheesecake was a little ugly, but I doctored it with a thick layer of chocolate ganache (that I also messed up), and the whole concoction was fabulously delicious.
The results? I LOVED this cheesecake, and everyone else did too. Chocolate and orange are two of my favorite flavors, and this was a heavenly combination.
Incidentally, Terry's Chocolate Oranges are pretty much the finest food on earth, but they are only available where I live during the Christmas season. When I was in Europe last year, there was chocolate orange everything everywhere, and I was in heaven.
What you'll need to make the best chocolate orange cheesecake recipe
EQUIPMENT
- Springform pan - You can't really make a cheesecake without a springform pan. This is a special kind of round pan, usually with a glass bottom, and then with sides that ratchet open and closed.
- Electric mixer - You don't need both a handheld and a stand mixer; one or the other will be great. And I suppose you could make a cheesecake without an electric mixer, but it would be pretty challenging.
- Stand mixer
- Deep 9x13 pan - You're going to need to put your cheesecake in a water bath. The easiest way to do that is to use your deepest 9x13 pan, place the springform pan (wrapped tightly with aluminum foil!) in the pan, and then pour boiling water into the 9x13 pan.
INGREDIENTS
See printable recipe card at the bottom of the page for all measurements and nutritional information.
For the crust
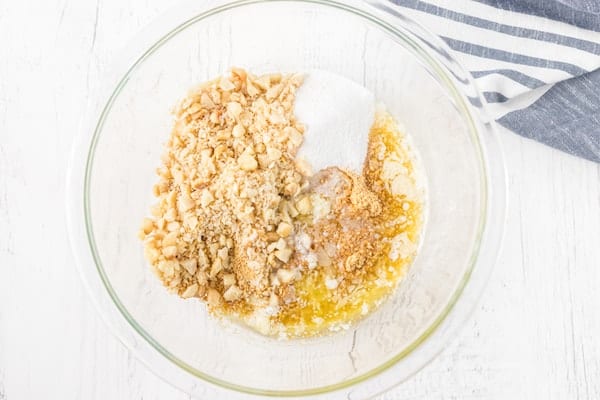
- Graham cracker crumbs - You can easily make these yourself by putting graham crackers in a zippered plastic bag and using a rolling pin to crush them.
- Coarsely chopped macadamia nuts - These add a special flavor to the crust.
- Melted butter - It doesn't matter whether you use salted or unsalted butter.
- White sugar
- Vanilla extract - I prefer vanilla bean paste, which is thicker and richer with a stronger vanilla flavor, but you can use extract if that's what you have.
Filling
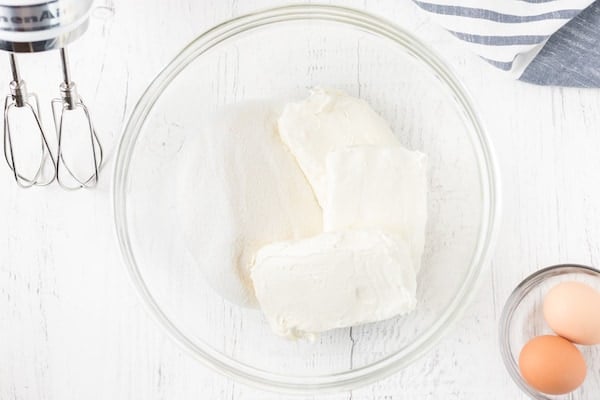
- Full fat cream cheese - Do not skimp on calories here. Your cheesecake will not be as good if you use low fat cream cheese! This needs to be room temperature. If you've forgotten to set it out (like I always do), you can microwave each block separately for about 30 seconds.
- White sugar
- Large eggs
- Heavy whipping cream
- Orange extract - You can also add orange zest if you want to get fancy. I'd recommend 2 tablespoons of zest if you're using it.
- Vanilla extract - See note above about vanilla bean paste.
- Orange food color - optional. Use as much as necessary to get the color you desire.
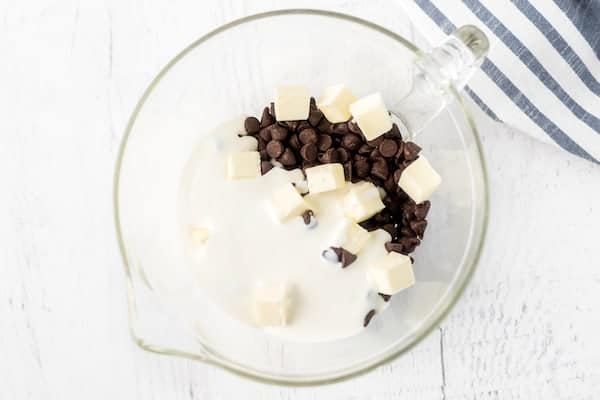
Chocolate ganache topping
- Semi-sweet chocolate chips
- Heavy cream
- Cubed butter - This will melt with the chocolate chips.
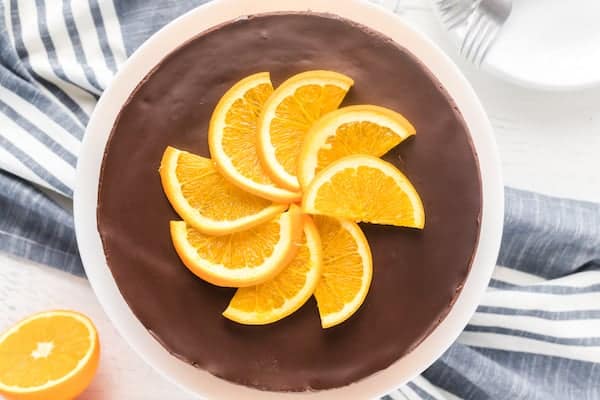
- Orange slices - These are optional but can be used to garnish the top of the cheesecake.
How to Make a Chocolate Orange Cheesecake
- Preheat the oven to 350º F. Begin to boil a large pot of water for the water bath.
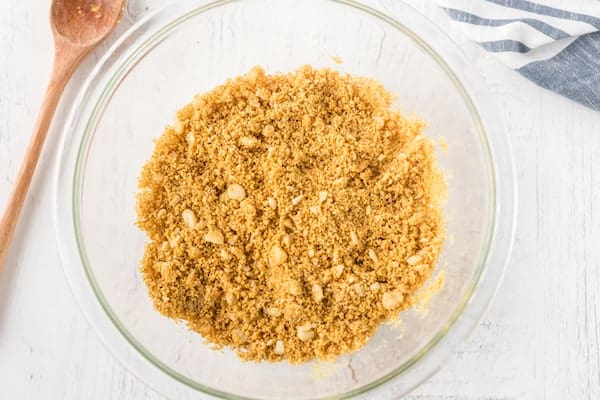
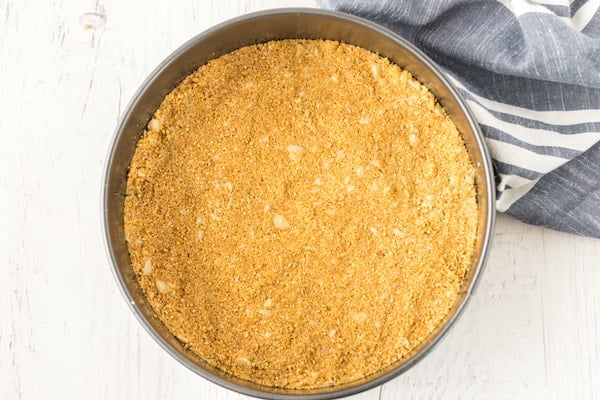
- Make the crust. Mix together the graham cracker crumbs, chopped macadamia nuts, butter, sugar, and vanilla. Press into the bottom and slightly up the sides of a 9-inch springform pan. Set crust aside.

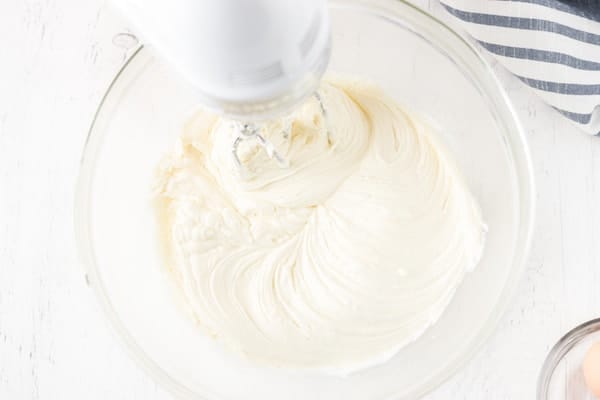
- Prepare the cheesecake batter. Soften the cream cheese by placing one block at a time in the microwave for about 30 seconds. Do another 15 seconds if it's not soft enough after the first go 'round.
Combine the softened cream cheese and sugar with an electric mixer (or in a stand mixer) and cream together until smooth.
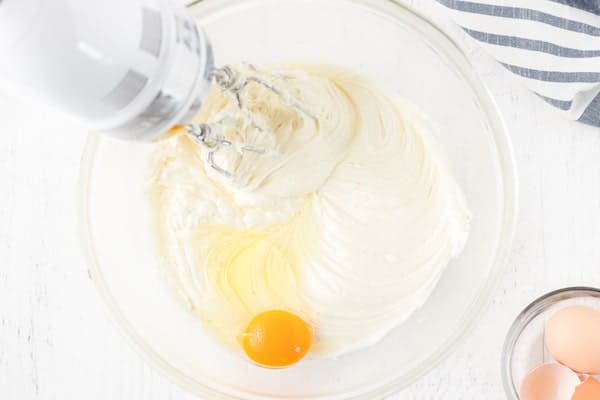
Add eggs, one at a time, fully incorporating each before adding the next. Make sure to scrape down the bowl in between each egg.
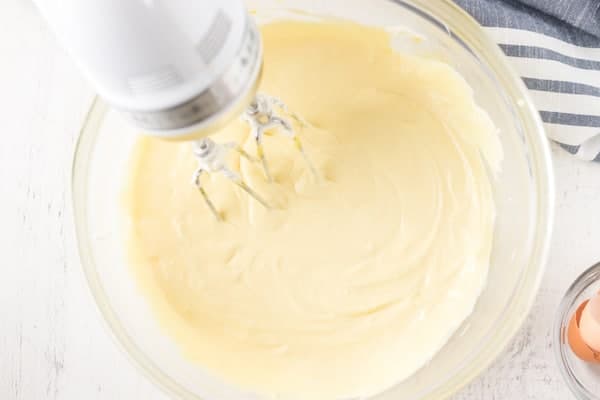
Add heavy cream, vanilla, extracts, and food color and blend until smooth and creamy.
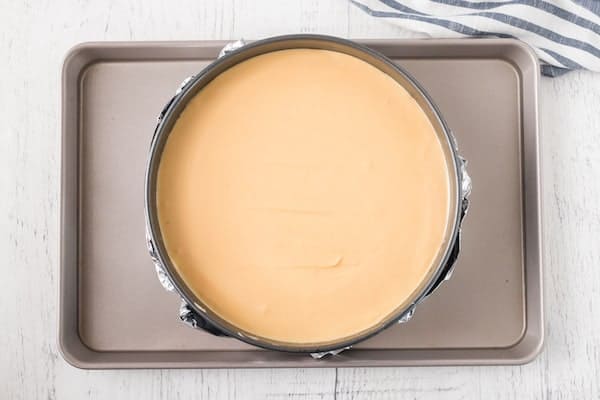
Here's a side note: I learned (after the first time making this) that over-beating the cheese mixture during step three will lead to an excess of air in the batter, which leads to excessive puffiness during baking and the dreaded chasm across the top when the puffiness falls during cooling. Mix it just enough to incorporate all of the ingredients, and then stop. I mixed my filling until it was well blended, then I decided to add food coloring to make it more orange and mixed even more. No wonder the Grand Canyon opened up as it cooled! A crack isn't the end of the world, but it makes me feel much better when my cheesecake comes out crack-free. - Prepare to bake the cheesecake. Pour the batter into the prepared crust and tap the pan on the counter a few times to bring all air bubbles to the surface.
- Place the cheesecake in the water bath. If your cheesecake pan is not airtight (or if you're not sure), cover the bottom securely with foil before adding to the water bath. Place your springform pan into a larger pan and pour boiling water into the larger pan until it is halfway up the side of the cheesecake pan. This is a very important and necessary step; don't skip it!
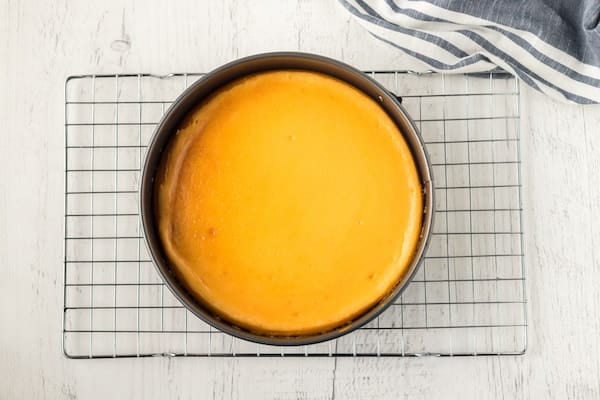
- Bake the cheesecake. Bake at 350º for 45 to 55 minutes, until it is almost set. This can be hard to judge, but you're looking for the cake to hold together, but still have a lot of jiggle to it in the center. You don't want it to be completely firm at this stage. Close the oven door, turn the heat off, and let rest in the cooling oven for one hour. This lets the cake finish cooking and cool down gently enough so that it won't crack on the top. After one additional hour, remove the cheesecake from the oven and lift it carefully out of water bath. Let it finish cooling on the counter.
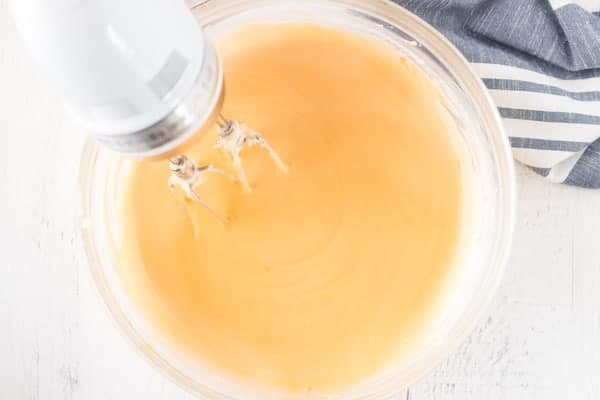
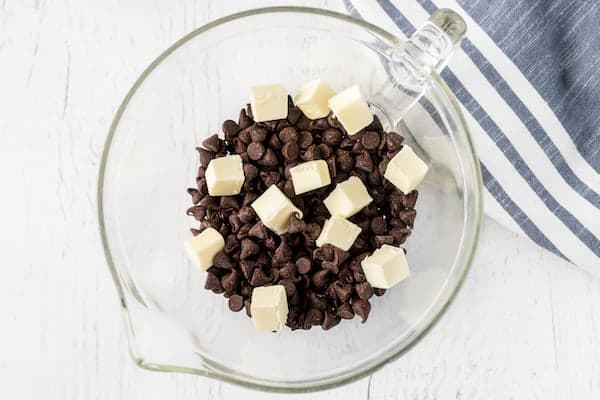
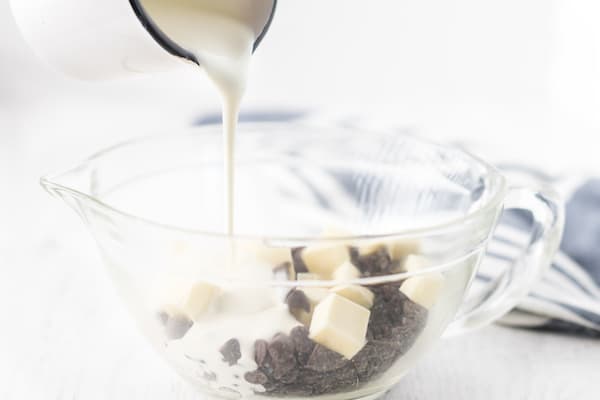
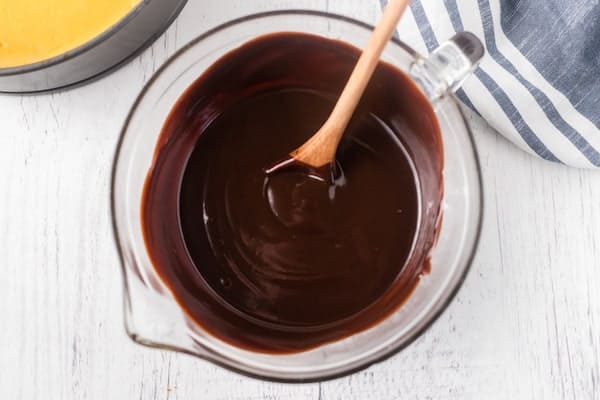
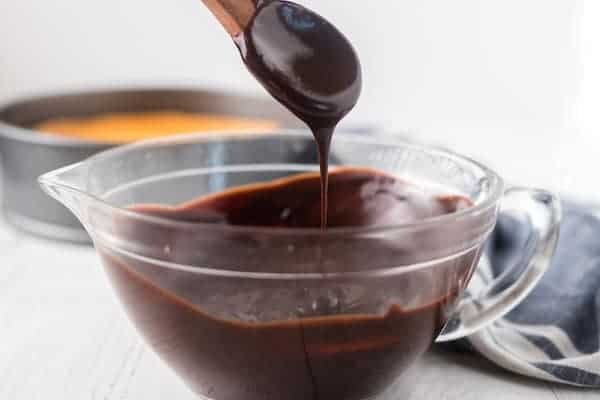
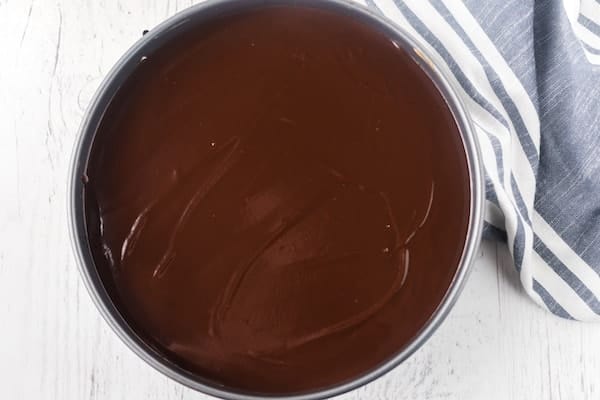
- Prepare the chocolate ganache. While the cake is cooling on the counter, prepare the chocolate ganache. In order to do this, heat chocolate chips, butter (cut into small cubes), and heavy cream in a pan in the microwave in 30 second increments. Continue to heat for 30 seconds at a time, then stir well, then heat for 30 seconds and stir well. Do that three or four times, until the chocolate is very smooth and creamy. The chocolate may become too runny to spread on your cheesecake, so you may have to let it sit on the counter for a while, until it cools and thickens enough to spread.
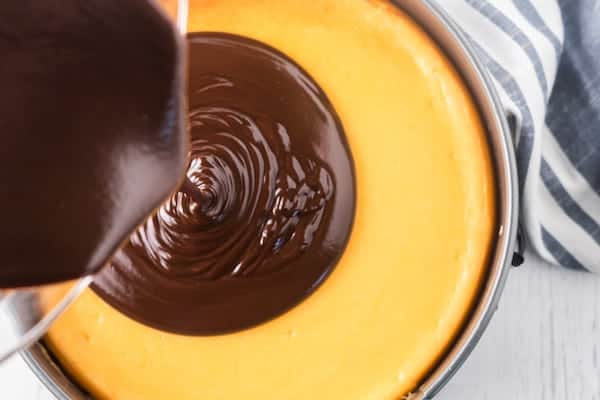
- Chill the cheesecake. Once the cheesecake and the chocolate ganache are sufficiently cool, pour the ganache over the top of the cheesecake, still in the springform pan. Put the whole thing in the fridge to chill over night. Once fully chilled, loosen the edges of the pan, and the cheesecake is ready to serve.
Do I need a springform pan for this cheesecake?
Yes, you need a springform pan if you're going to make a cheesecake. The sides of a springform pan expand and can be removed so that you can slide a slice of the cake out easily. I honestly don't know what you could use if you don't have a springform pan. If you don't use one, you're going to have a huge mess on your hands when you try to cut the cheesecake.
Is a water bath necessary for this cheesecake?
Some recipes will tell you that a water bath is essential for baking a cheesecake. They claim that a cheesecake baked without a water bath will be dry, overly dense, or cracked. I have not found this to be the case with any cheesecake I've ever baked.
I personally think that water baths are risky because, if you don't get the springform pan wrapped tightly enough, the water will leak in and ruin your crust. I had that happen several times in my early cheesecake baking days.
After giving up on the springform-pan-in-the-water water bath, I used to put a pan of water on the rack below the cheesecake, allowing the steam to fill the oven. However, one time I forgot to do it, and guess what! The cheesecake was awesome. So now, I never use one because I have found that it is just not necessary. Why do the extra work if you don't need to?

Why did my cheesecake crack?
The most common reason for a cracked cheesecake is over beating the filling, resulting in an excess air in the batter. Extra air is the enemy of a cheesecake because it makes the filling puff up in the oven, and then it cracks as it cools and sinks.
You should never use a whisk to mix cheesecake filling. Don't use the whisk attachment on your mixer, either. If you're using a stand mixer, use the paddle attachment. If you're using a hand mixer, the beaters are good. And of course, if you're doing it by hand, go for a spatula instead of a whisk.
Even if you use a paddle attachment or the beaters, you could still add too much air if you beat and beat and beat the filling. So, never mix more than is absolutely necessary.
If you aren't sure if you've beaten it long enough, turn off the mixer and use a spatula to turn the filling over a few times and look for pockets of unmixed ingredients. If it's evenly mixed, don't beat any more.
One good thing about this cheesecake is that you're going to cover it with chocolate ganache, so even if it does crack, no one will know.
More tips for the best Chocolate Orange Cheesecake
Use quality ingredients - Try to stick with the name brand ingredients, because the quality of your ingredients will make a huge difference in your finished cheesecake.
Keep the oven door closed - Don't peek at your cheesecake while it's baking. The cold air can shock the cheesecake and make it crack.
Likewise, when the cook time is done, and you've jiggled it to make sure the edges are set, put it back into the hot oven with the door cracked an inch or two, and let it cool in there for an hour. This also helps to prevent cracking.
Don't over bake - Don't over bake your cheesecake. Turn the heat off and crack the door open as soon as the outer edge is set. The center should be jiggly.
Try these other delicious cheesecake recipes while you're here:
- Chocolate Cherry Cheesecake
- Chocolate Peppermint Cheesecake
- S'mores Cheesecake
- Pecan Crust Cheesecake (Naturally Gluten-Free)
- Candy Cane Swirl Cheesecake
- Peanut Butter Cheesecake Brownies
- No Churn Cheesecake Ice Cream
Recipe

Chocolate Orange Cheesecake
Ingredients
Crust
- 1 ½ cups graham cracker crumbs
- ½ cup macadamia nuts coarsely chopped
- 4 tablespoons butter melted
- 2 tablespoons sugar
- 1 teaspoon vanilla bean paste
Filling
- 3 blocks cream cheese full fat version, 24 oz in total
- 1 cup sugar
- 3 large eggs
- 1 cup heavy cream
- 2 tablespoons orange extract
- 1 tablespoons vanilla bean paste
- orange food color optional, as much as necessary to get the color you desire
Chocolate ganache topping
- 8 ounces semi-sweet chocolate chips
- ½ cup heavy cream
- 3 tablespoons butter melted
Instructions
For the crust
- Preheat oven to 350ºF. Begin to boil a large pot of water for the water bath.
- Mix together the crust ingredients and press into the bottom of a 9-inch springform pan. Set crust aside.
For the filling
- Combine cream cheese and sugar in the bowl of a stand mixer and cream together until smooth. Add eggs, one at a time, fully incorporating each before adding the next. Make sure to scrape down the bowl in between each egg. Add heavy cream, vanilla, extracts, and food color and blend until smooth and creamy.
- Pour batter into prepared crust and tap the pan on the counter a few times to bring all air bubbles to the surface.
- If cheesecake pan is not airtight, cover bottom securely with foil before adding water. Place pan into a larger pan and pour boiling water into the larger pan until halfway up the side of the cheesecake pan.
- Bake 45 to 55 minutes, until it is almost done - this can be hard to judge, but you're looking for the cake to hold together, but still have a lot of jiggle to it in the center. You don't want it to be completely firm at this stage. Close the oven door, turn the heat off, and let rest in the cooling oven for one hour. This lets the cake finish cooking and cool down gently enough so that it won't crack on the top. After one hour, remove cheesecake from oven and lift carefully out of water bath. Let it finish cooling on the counter.
For the chocolate ganache topping
- While the cake is cooling on the counter, prepare the chocolate ganache. In order to do this, heat chocolate chips, butter (cut into small cubes), and heavy cream in a bowl in the microwave in 30 second increments. Continue to heat for 30 seconds, then stir well, then heat for 30 seconds and stir well. Do that three or four times, until the melted chocolate is very smooth and creamy. The chocolate may become too runny to spread on your cheesecake, so you may have to let it sit on the counter for a while, until it cools and thickens enough to spread.
- Once the cheesecake and the chocolate ganache are sufficiently cool, pour the ganache over the top of the cheesecake, still in the springform pan. Put the whole thing in the fridge to chill over night. Once fully chilled, loosen the edges of the pan, and the cheesecake is ready to serve.

Kayla says
Hello!
I see lemon juice in the directions, but I don’t see how much in the ingredients. Can you tell me how much lemon juice to add? Thank you!
Tara Ziegmont says
I took it out of the recipe because I like the cheesecake better without it. I just forgot to take it out of the instructions. Sorry about that!
William Davies says
Thanks for the update
Carolyn says
Your narrative says not to worry if it cracks as you cover it with marshmallows-yet I don't see anything about marshmallows?
Tara Ziegmont says
I have no idea how or why I wrote marshmallows! This cheesecake gets covered in chocolate. Thanks for calling it out so I could fix it.
William Davies says
confused about lemon juice in the directions . Also 1 cup of heavy cream has me wondering. Hopefully all works out. Seems very soupy. unlike other cheesecake recipes. Will repost when completely done.