


These Instant Pot eggs come out perfectly cooked with easy peel shells that slide off every time. Using the simple 5-5-5 method, they're quick, easy, and ready for deviled eggs, egg salad, or holiday meals like Easter, Thanksgiving, and Christmas. You'll learn how to cook eggs that are the best for meal prep and breakfast ideas without the struggle of peeling. Pin this recipe now so you'll always know how to make hard boiled eggs that turn out just right.
My hard boiled eggs used to be terrible.
I'm not alone. A study conducted by the American Egg Board in February 2010 showed that fewer than 30% of us hard cook our eggs properly.
I color my eggs nicely, aside from the times when the dye gets spilled all over the place. But peeling them is a pain and they all end up in egg and olive salad.
Nobody notices the hunks missing from the eggs when they're all cut up in egg salad.
In theory.
This post was not intended to confess my inadequacies. I'm supposed to be learning how helping you to make hard boiled eggs, so let's get to that.
Lest I ruin someone else's deviled eggs, I consulted the American Egg Board for help with the hard cooking.
How To Stop Screwing Up Your Hard Boiled Eggs
- Hard COOKED, not hard BOILED
Apparently, I've been cooking the eggs the wrong way. While the cooking water must come to a full boil in the stove top method, the pan is immediately removed from the heat so that the eggs cook gently in the hot water. Hard-cooking produces tender eggs and minimizes cracking.
- Hard-cooked eggs in the shell can be refrigerated safely for up to one week
Peeled hard-cooked eggs should be eaten the same day.
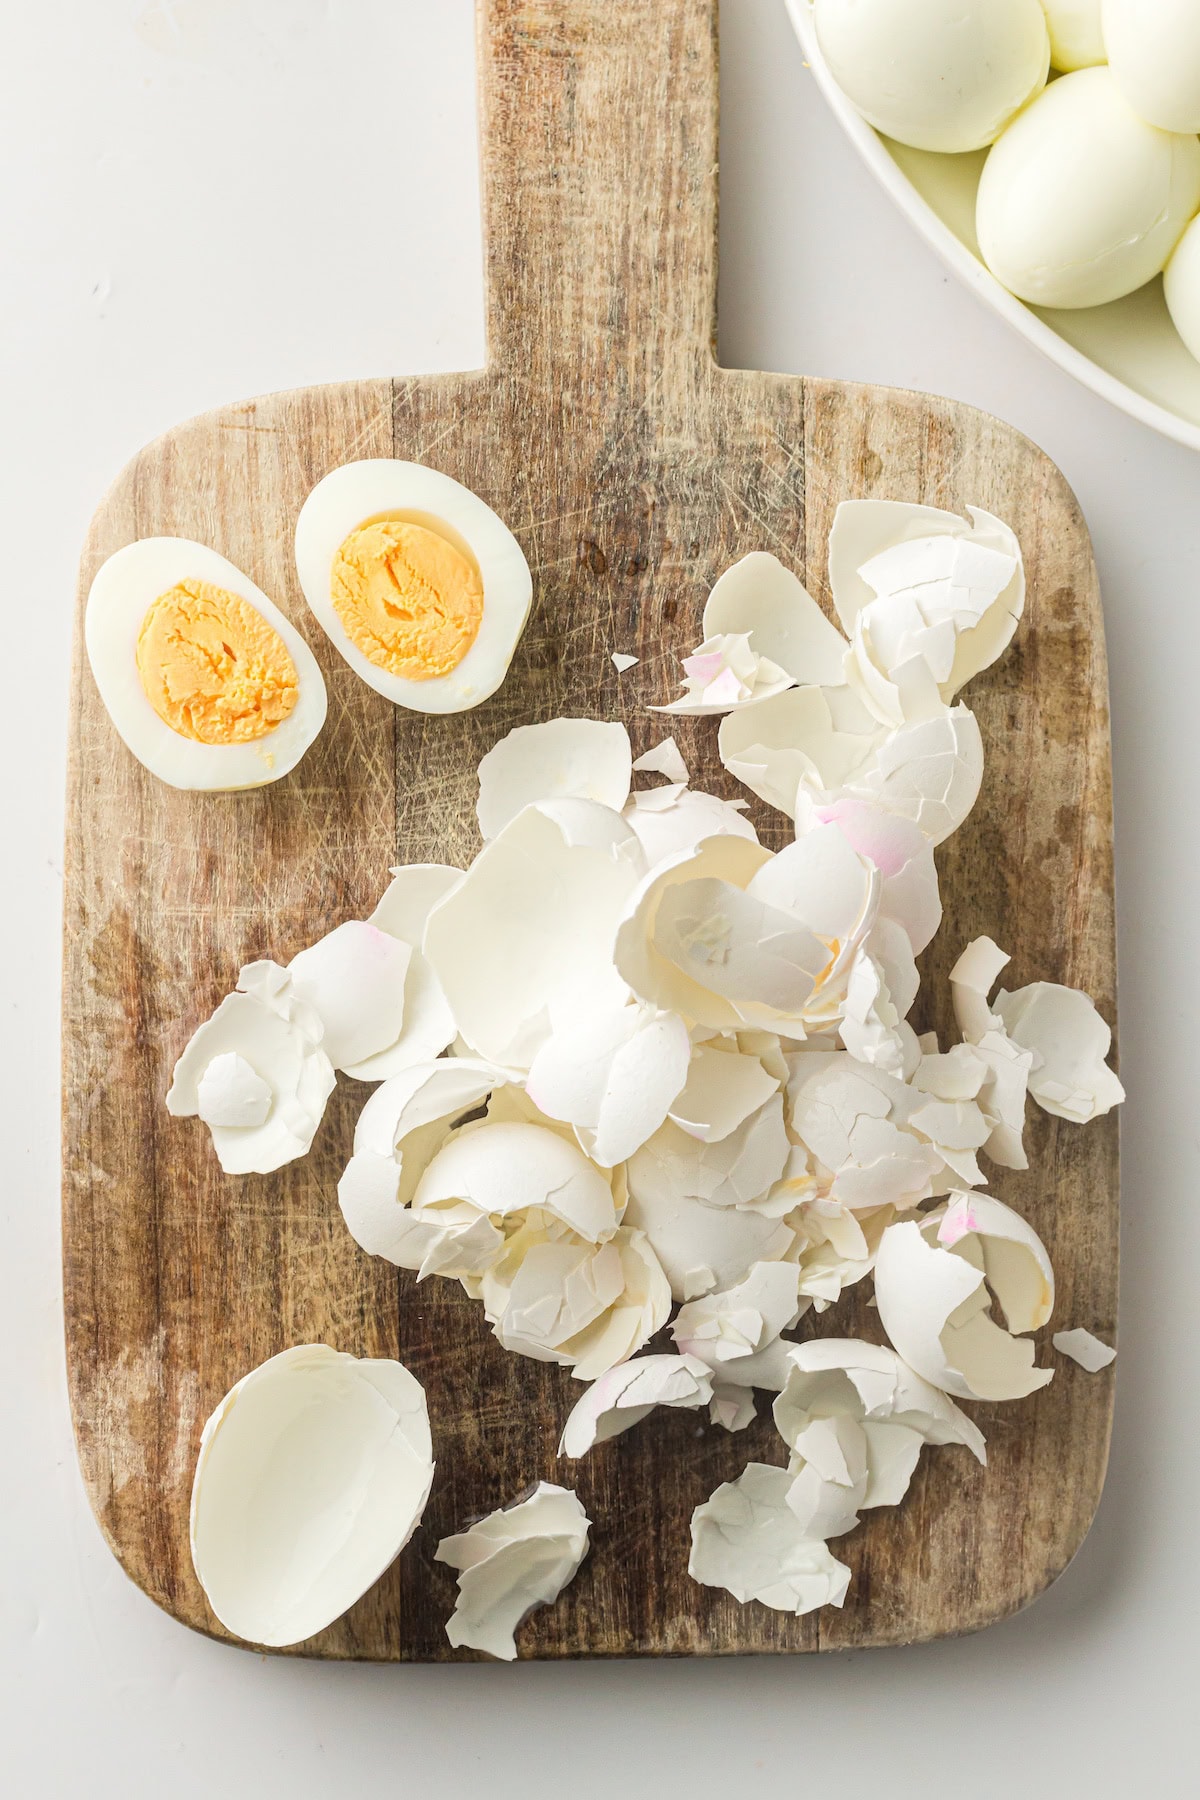
- How to peel a hard-cooked egg:
 Gently tap egg on countertop until the shell is finely cracked all over. Roll egg between your hands to loosen shell. Peel starting at the large end and hold the egg under cold running water to help ease the shell off.
 - Banish the greenish ring.
This harmless but unsightly discoloration that sometimes forms around hard-cooked yolks results from a reaction between sulfur in the egg white and iron in the yolk. It occurs when eggs have been cooked for too long or at too high a temperature.
- Very fresh eggs can be difficult to peel.
Buy and refrigerate your eggs a week to 10 days in advance of cooking them to make the peeling process easier. This brief "breather" allows the eggs time to take in air, which helps separate the membranes from the shell.
- Hard-cooked eggs are easiest to peel just after cooling.
Cooling causes the egg to contract slightly in the shell.
- Prepare a dozen hard-cooked eggs on Sunday so you'll have an all-natural, high-quality protein option on hand for your family during the busy week ahead, either for an on-the-go breakfast or after-school snack.

So here's the info that you've been waiting for. Get your eggs ready.
How to Make Perfect Hard Boiled Eggs in the Instant Pot
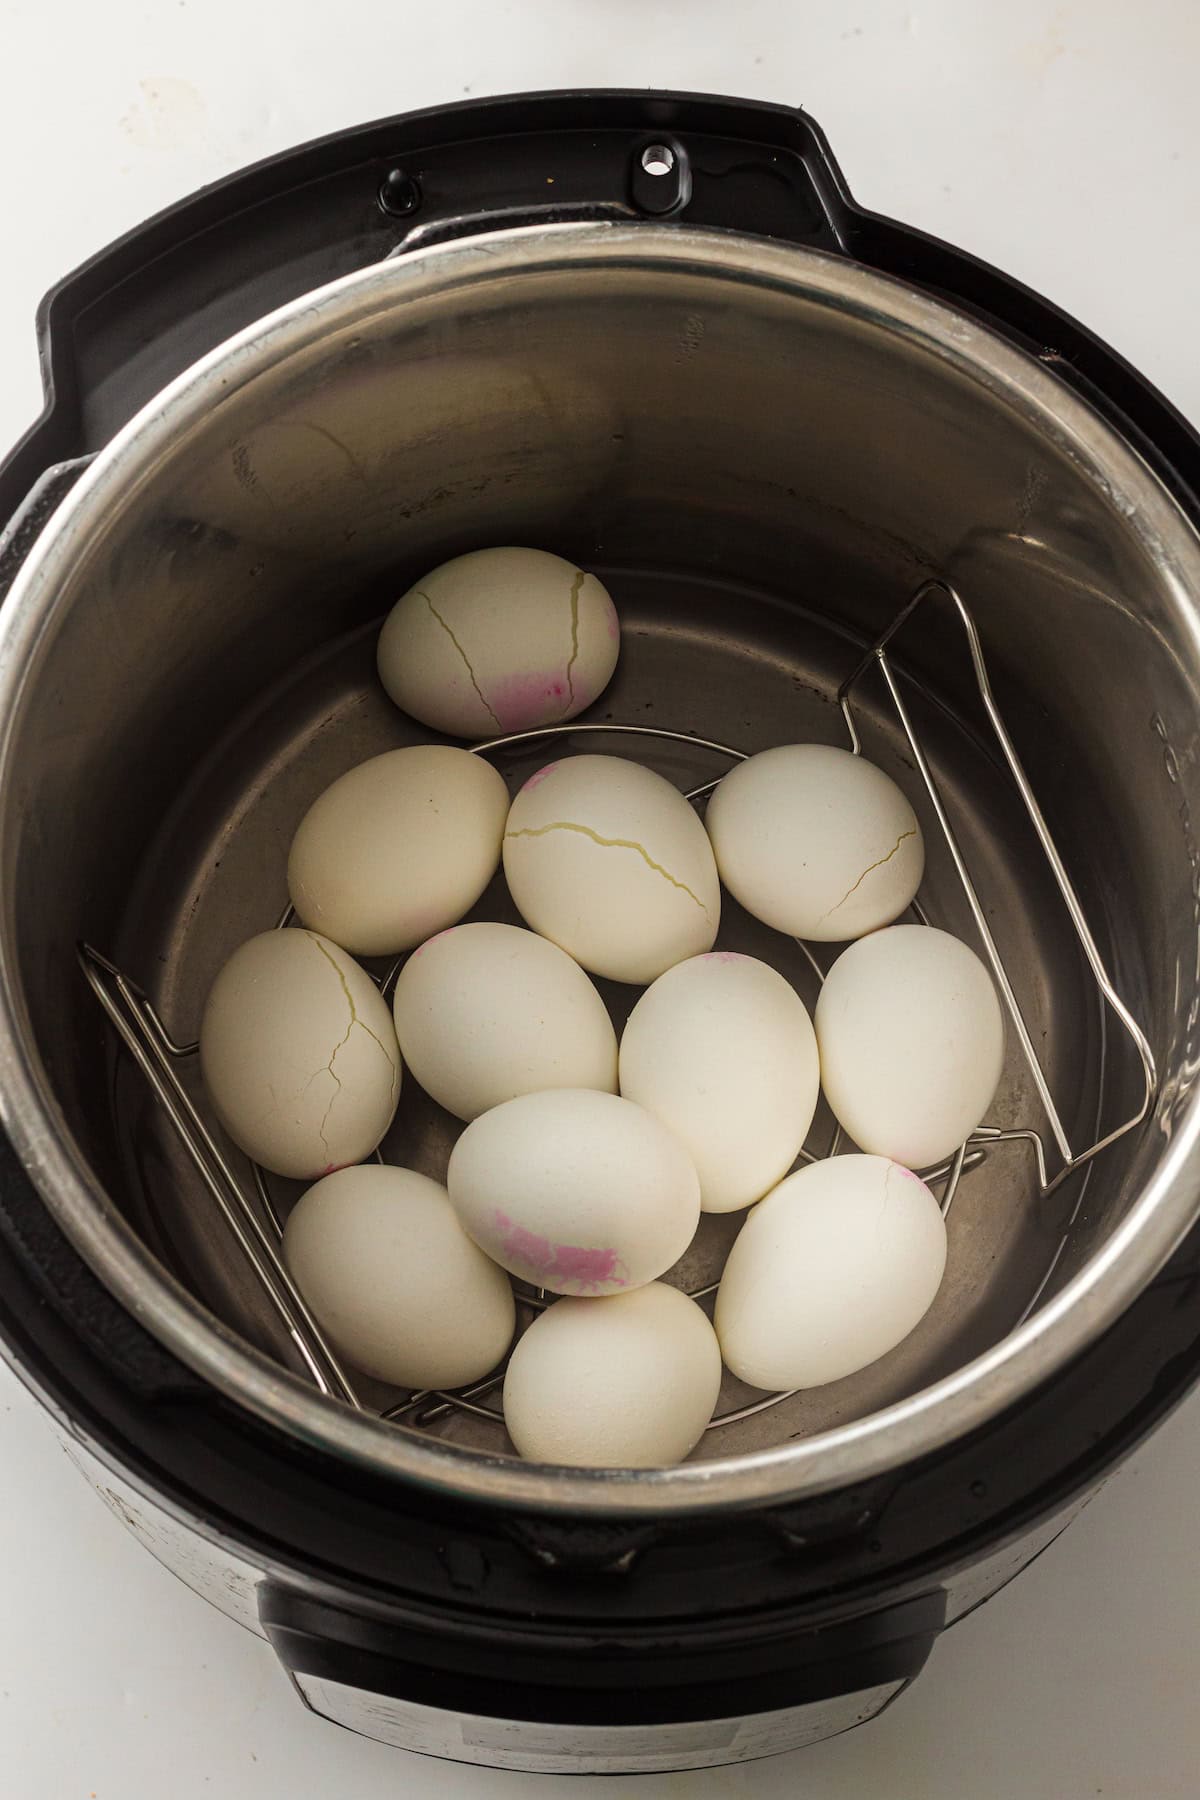
The Instant Pot makes hard boiled eggs so easy if you just remember the 5-5-5 rule.
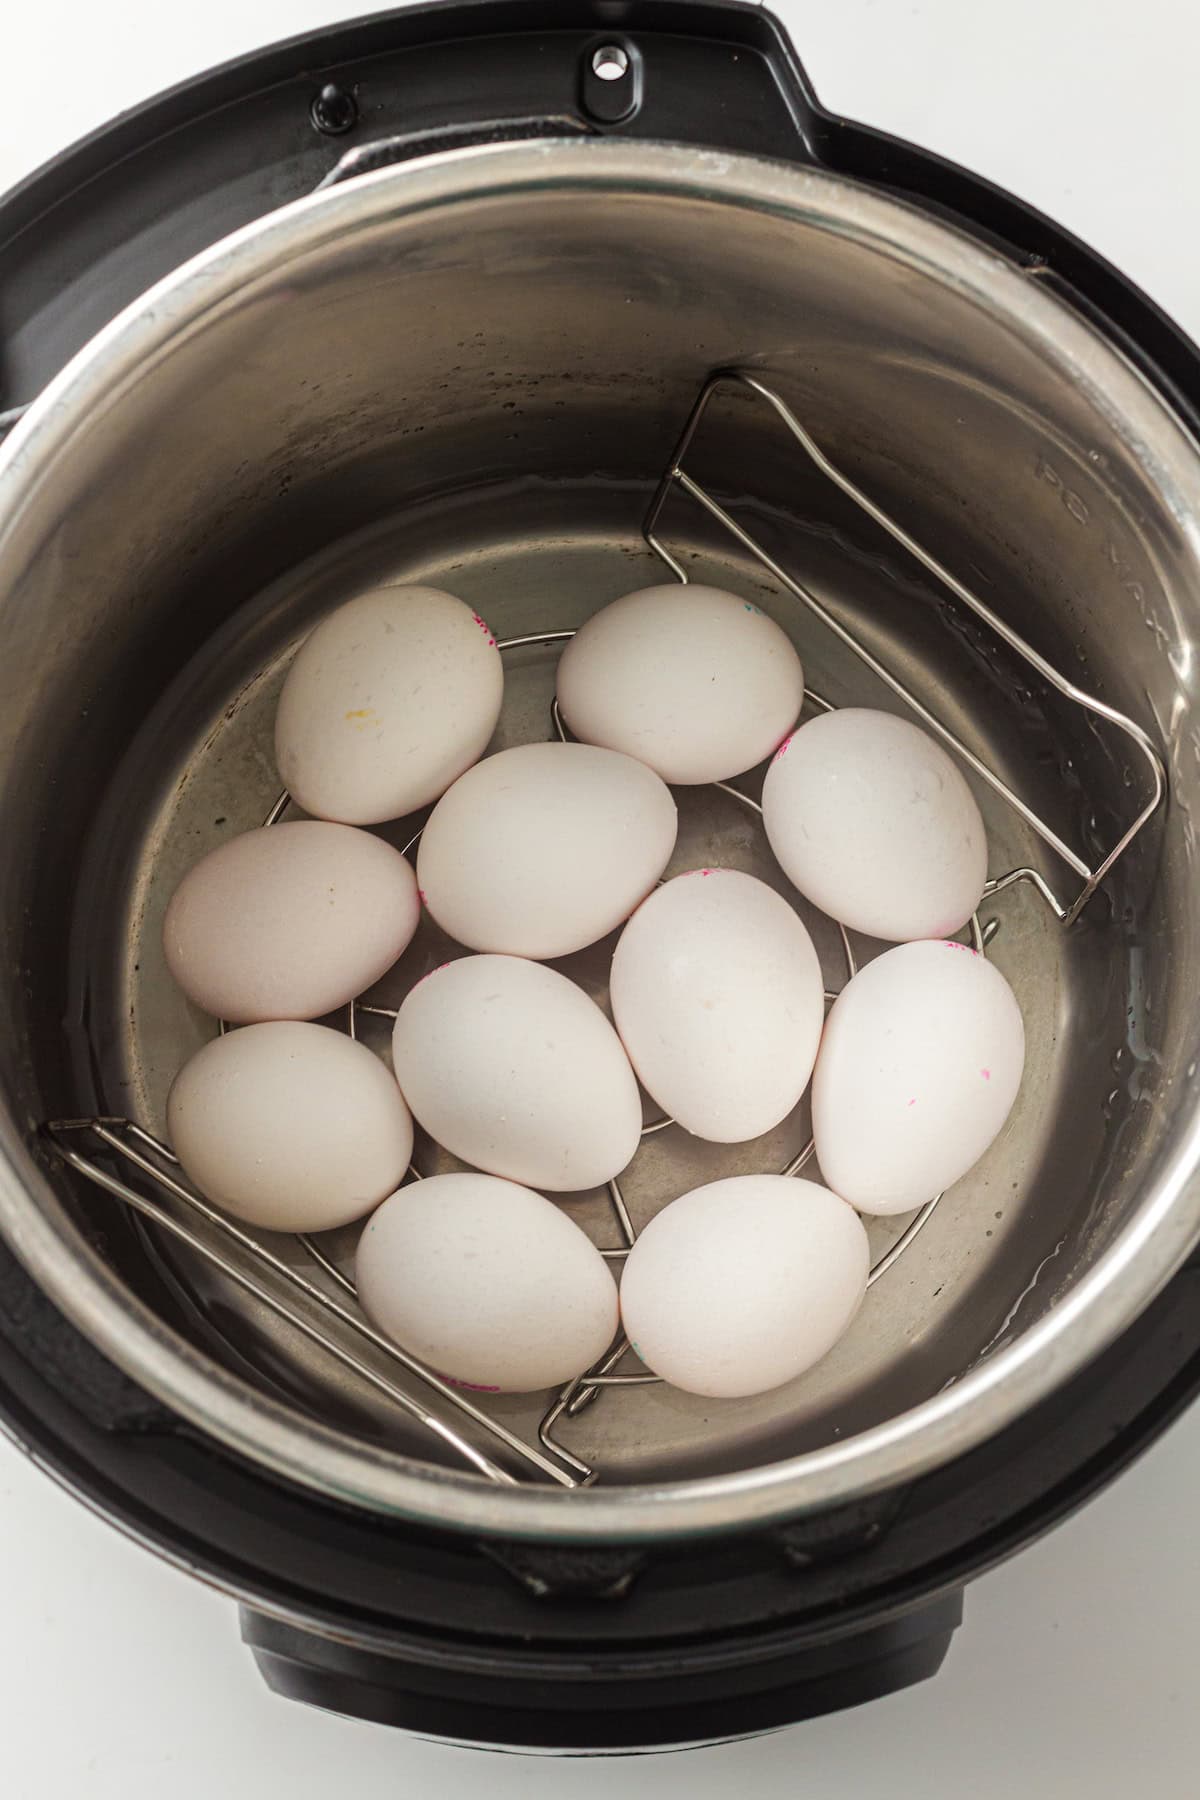
- Add the eggs and 1 cup of water to the pot. Cook the eggs on high pressure for 5 minutes.

- Allow the pressure to release naturally for 5 minutes.
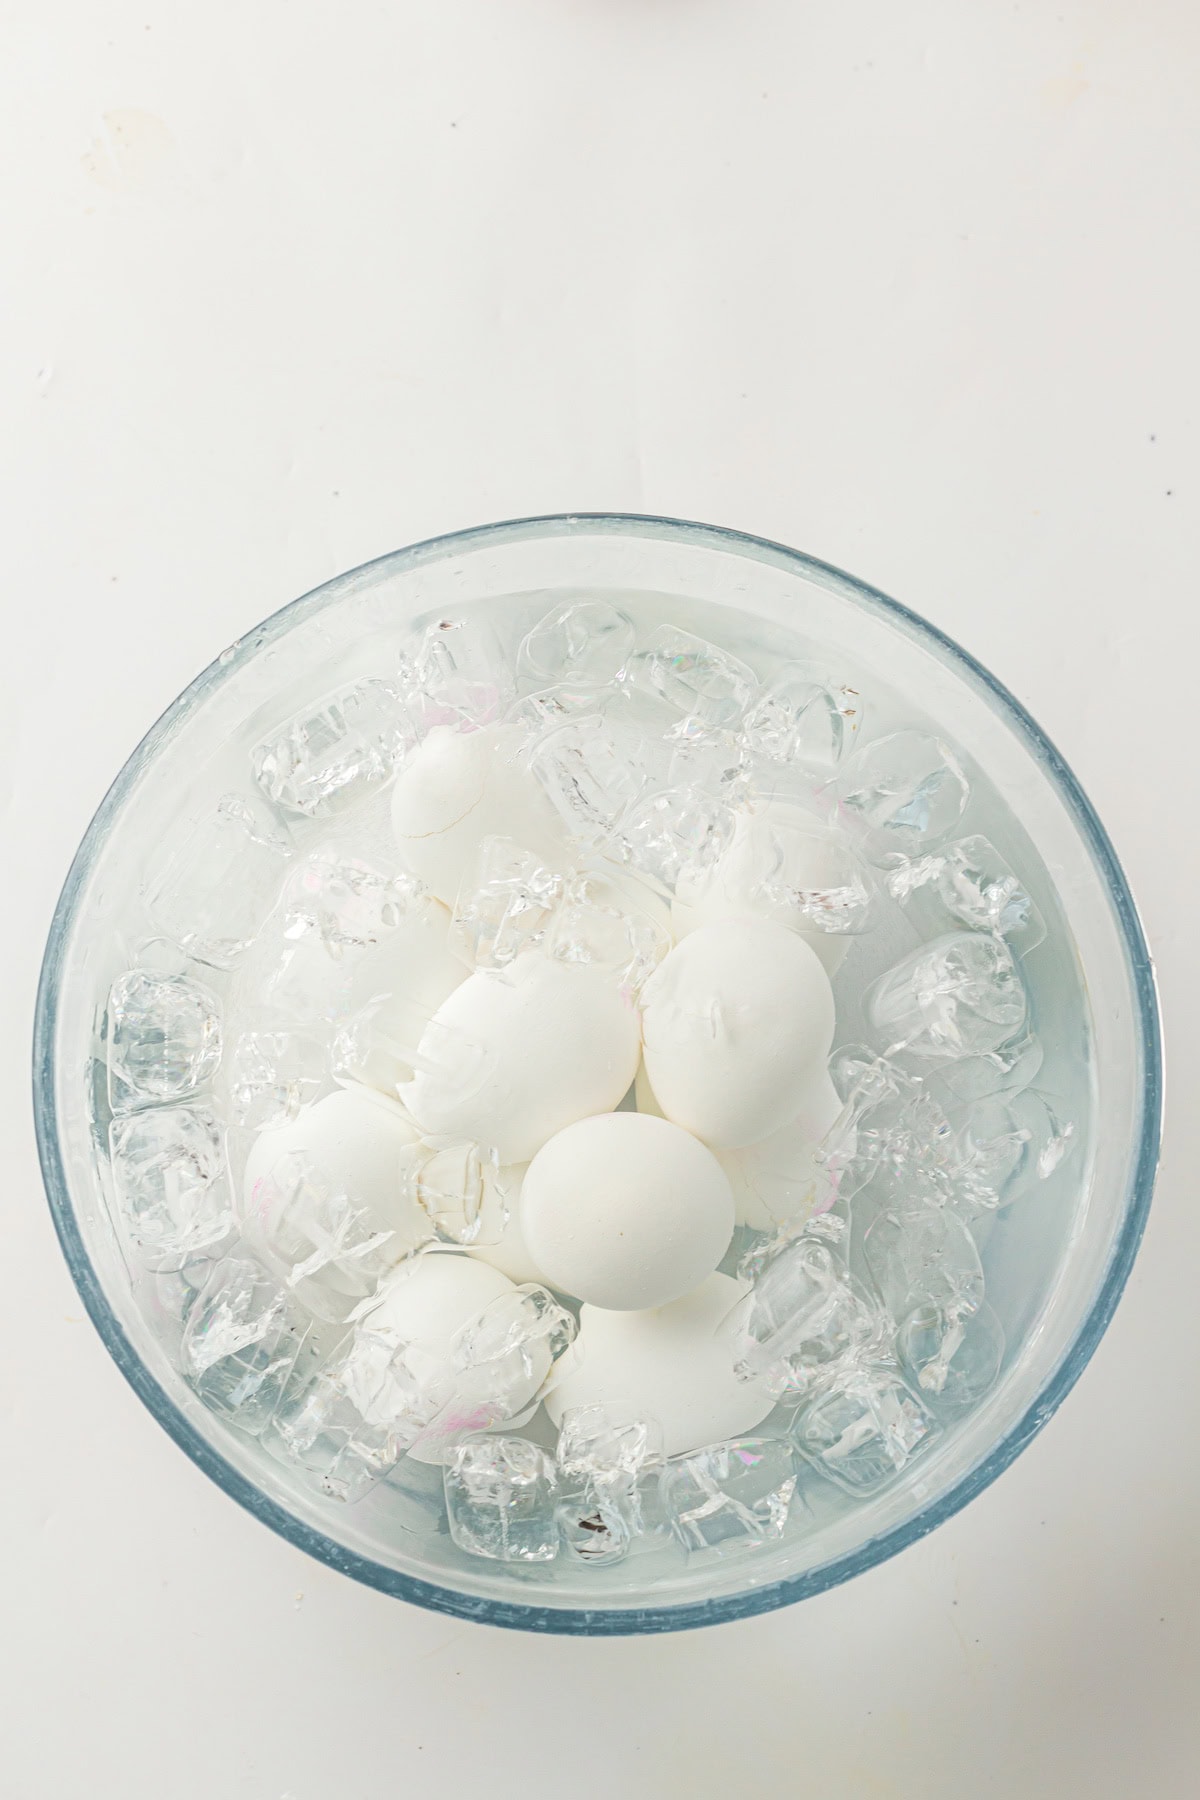
- Remove the eggs from the Instant Pot and place into an ice bath for 5 minutes.
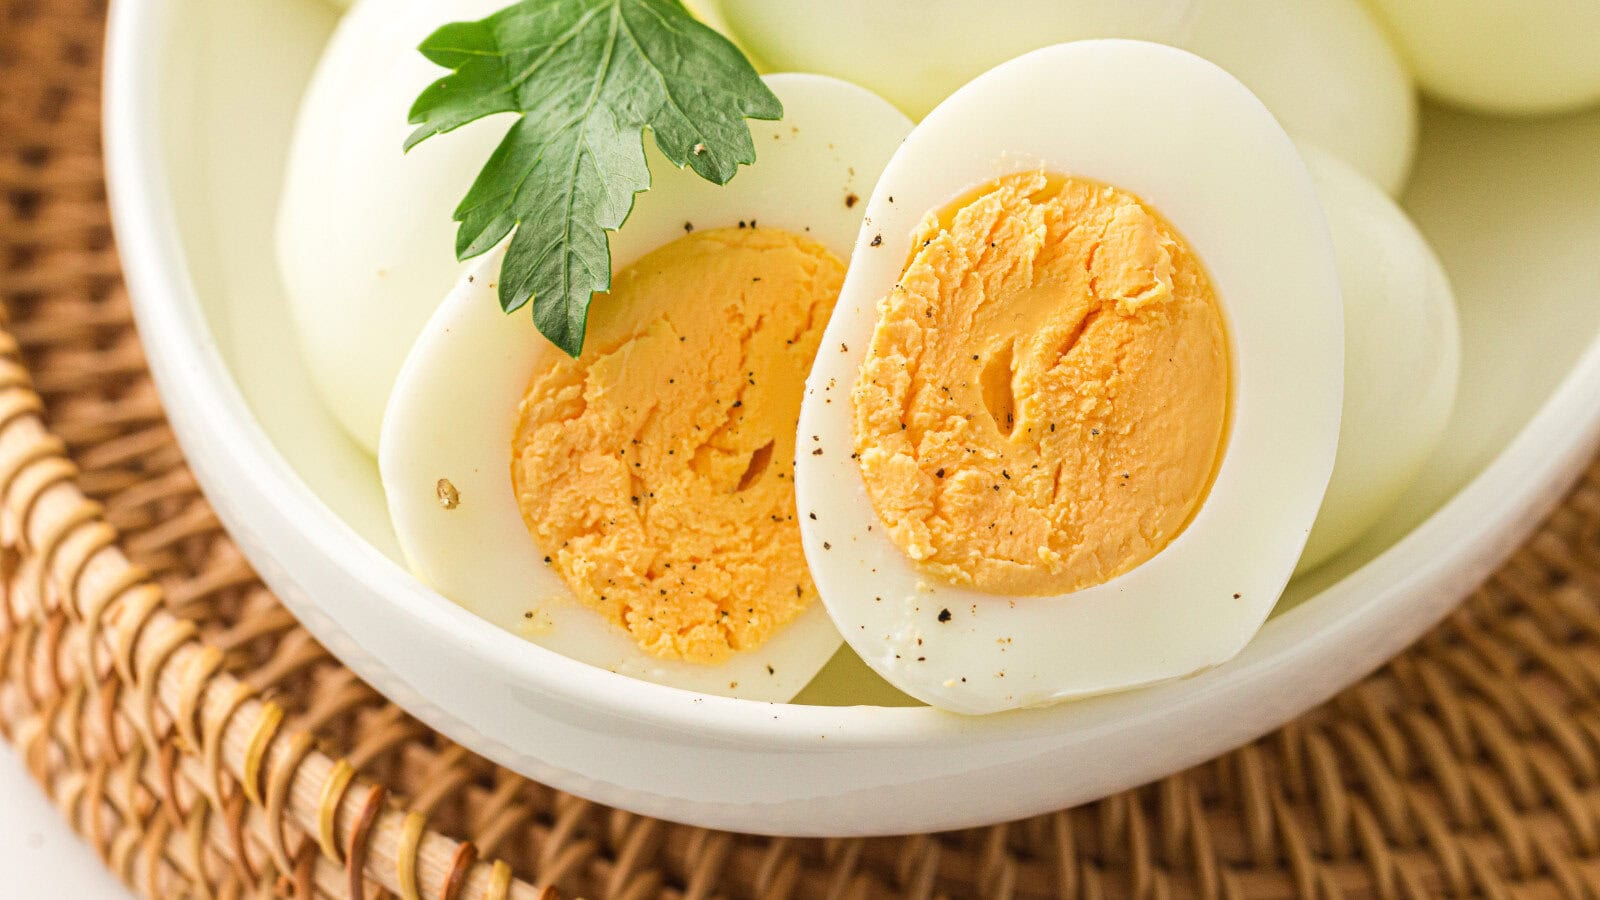
- Peel and eat, or store unpeeled in the refrigerator for up to 1 week.
Instant Pot hard cooked eggs come out perfectly every single time, and they are always easy to peel. We used to use the stovetop method linked here, but since we got an Instant Pot, we only use it. It's so easy and the eggs come out so well that we'll never go back to the stovetop again!
I recently perfected air fryer hard boiled eggs which are also very quick and easy. I'm not sure which I prefer.
What can I do with all those hard boiled eggs?
I have some wonderful recipes for you! Try one or more of these:
- Bacon Cheddar Deviled Eggs
- The Best Classic Deviled Eggs
- Instant Pot Potato Salad
- Egg & Olive Salad - my favorite!
- Turkey Salad
- Rotisserie Chicken and Egg Salad
- Canned Chicken Salad
- Egg & Asparagus Salad with Mimosa Dressing - another of my favorites!
- Cowboy Caviar
- No Crunch Macaroni Salad
Recipe

How to Cook Perfect Easy Peel Hard Boiled Eggs in the Instant Pot
Equipment
Ingredients
- 12 large eggs
- 1 cup water
Instructions
- Add the eggs and 1 cup of water to the pot. Cook the eggs on high pressure for 5 minutes.
- Allow the pressure to release naturally for 5 minutes.
- Remove the eggs from the Instant Pot and place into an ice bath for 5 minutes.
- Peel and eat, or store unpeeled in the refrigerator for up to 1 week.


rydermakes3 says
I've been cooking them wrong all along! I had no idea 🙂 Fun post! I love Easter, too.
Krista says
Wow! I'd been letting mine boil for about 10 minutes before taking them off the heat. Can't wait to try it this way - thanks for teaching us Tara 🙂
Krista says
Oh my gosh! That's exactly how I've always done it too - we must have had the same teacher 😉
FeelsLikeHomeBlog says
I know! Not only have I always boiled for 10 minutes, but I always left them in the water until it cooled. Probably an hour, maybe even more!
FeelsLikeHomeBlog says
Probably. Whoever that was, they were wrong! 🙂
Jenny in Ca says
I have to admit I didn't know this! I usually start with cold water, put the eggs in and then cook for 20 minutes. I do cool them under cold water right away to make the shells come off easier. I will have to try this method and see how I like it.
thanks!
Blessedwithgrace says
Great and informative post! I read a similar explanation for how to boil an egg once before. They said the same thing! Take it off the heat and sit covered. Your instructions are even more informative. My problem - I start the eggs and then forget to take them off the burner when they start boiling. UGH! Too much going on and not paying attention.
Happy Easter, my friend! I am thankful for your friendship.
Amy @ Finer Things says
Very interesting! I turn the burner off as soon as it starts boiling (if I remember!) but I leave them on the hot burner. Will try moving to another burner next time.
Rick Thomas says
There are other foods that can be cooked that way for example rice, an inch of cold water over the top and bring to a full boil put on saucepan lid and take off the heat and leave for 15 to 20 minutes it may need warming up a bit. Stews much the same in a heavy pot bring to full boil put on lid and allow it to slow cook, you also save a lot on your energy bill.
Alicia says
You're right! The 5-5-5 rule works every time!
Ashley says
I don't have an Instant Pot, but this method worked perfectly.