Grace, my 10-year-old, is obsessed with slime. So much so that she received a gallon of Elmer's glue (it's very economical) and a large box of Borax for her birthday on June 2, and she is about ¾ of the way through the glue already. She makes slime every single day.
We are year-round homeschoolers, and I was planning for July and August last weekend. Grace saw me going over lessons and coming up with activities, and she asked if we could study slime.
Why have I never thought of that before? Grace is a very reluctant learner. She hates anything I label as school, before I even open my mouth to explain the activity.
But learning with slime might hook her! It might work!
I finished the unit I was planning on Ancient Egypt (thanks to Layers of Learning which I am totally in love with right now), and I set out to find some learning activities on Pinterest related to slime.
Except there weren't any.
There were lots of instructions for making slime, lots of variations of ways to make slime colored and glittered and smelly and ten other changes, but absolutely nothing on how to make slime educational outside of a couple of mentions of polymers.
Being the former high school science teacher, I decided to write up some stuff on my own. I couldn't pass up the opportunity to teach Grace some stuff using something that she loves.
The Science of Slime
Basic Slime Recipe with Elmer's Glue and Borax
To make Grace's basic slime recipe, you will need these ingredients:
- 1 tablespoon Borax
- 2 cups water, divided
- 8 oz Elmer's glue - white glue works (and is cheapest) or you can use glitter glue (which makes amazing slime!) or clear glue for different results
- Decorations - food coloring, sequins, glitter, styrofoam balls, or others as you see fit
Slime Instructions:
- Microwave 1 cup of water for a minute or so, until it is hot but not boiling. Dissolve the Borax in the hot water.
- Pour Elmer's Glue into a bowl. Fill the bottle with water, shake it around to dislodge any leftover glue, and pour it into the glue in the bowl. Mix the glue and water together until it is smooth.
- Add any decorations at this point including food color and/or glitter or styrofoam balls.
- Pour the Borax water a little at a time into the glue mixture and stir. The slime will begin to form almost instantly and continue to form as you add the Borax solution and mix it up.
- Once you have a nice-sized glob of slime, pull it out of the liquids and knead it until it is no longer sticky.
- Store is an air-tight container or zippered bag.
You can find other recipes online that use liquid starch or even contact lens solution instead of borax. If you have a reaction to borax or are concerned about its being poisonous, you could search for one of those instead. I have only used borax, so I can't really help you with either of those.
Polymers
No discussion of slime science would be complete without mentioning polymers, so that's where I'll start.
Slime is made from glue which contains polyvinyl acetate or PVA. (You can buy plain PVA which can be either polyvinyl acetate or polyvinyl alcohol, both of which work the same. PVA is rather expensive, so we haven't tried it.) PVA is made of very large, very long molecules called polymers that can bend easily and slide past each other, allowing them to act like a liquid, pour, and take the shape of their container.
Borax is a solid called sodium tetraborate. When you dissolve it in water, the solution contains lots of borate ions (that means charged particles which are not complete molecules).
When you mix the glue and borax solutions, the borate ions hook those huge polymer chains together in a process called cross-linking. The chains get all tangled up, and they start to act more like a solid which you can stretch and squeeze. Depending on how much borax you've added, the slime may still flow a little or it may be as solid as a bouncy ball. More on that below.
Scientific Method
The scientific method is the backbone of all science. It's the general set of steps that all scientists and researchers follow in order to learn new stuff about the world, although it is fluid and flexible and sometimes done in a different order. But essentially, here's what happens:
- Observe a situation.
- Identify a problem or question. What do you want to learn or answer?
- Research the problem or question, possible causes and factors that could affect it. What do you already know or can you learn from others' work?
- Write a hypothesis or educated guess based on the information you have. What do you predict will happen?
- Create an experiment to test the hypothesis.
- Observe and analyze the results. What happened?
- Draw conclusions. What did you learn? Was your hypothesis proved or disproved?
- Report your results.
Then you start over, tweaking your hypothesis given the new information that you have. You might repeat this process four or five times or even more depending on your experiment and variables.
Slime is great for teaching the scientific method because you can complete a whole cycle in a few minutes and start over. Perhaps your hypothesis will be that less borax makes a more liquid slime, so you would create two recipes, make them, and test the liquidiness of both. Or you could hypothesize that if you put enough borax in the slime, you could make it into a rubber ball, so you make up a new recipe with a lot of borax and test again.
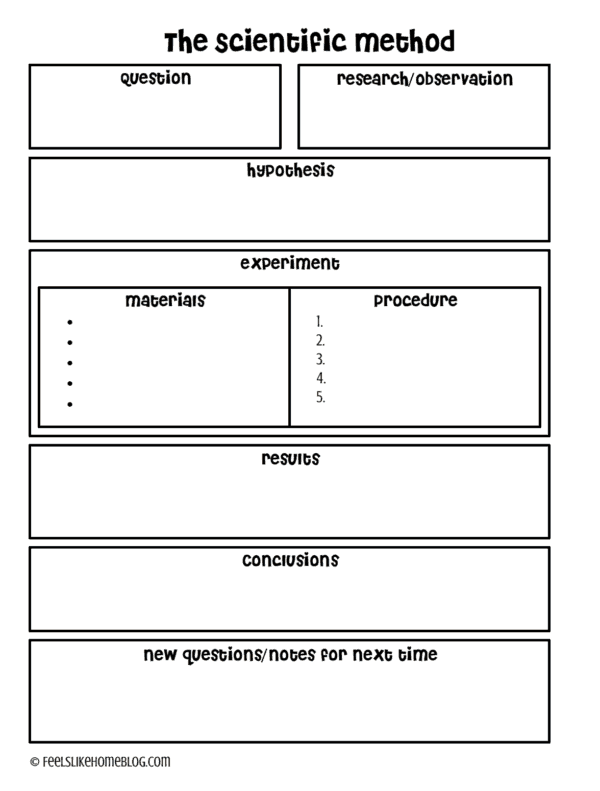
I created this free scientific method printable that you can grab and fill out with your kids.

Hint: a great way to write the question in the beginning is to follow this format:
What effect will ___________ have on___________?
Variables
Variables are things that change during an experiment. Part of designing an effective experiment is identifying and manipulating the variables. Independent variables are variables that you can control, such as the amount of glue or the amount of water. Dependent variables are variables that change as the independent variables change, such as the stickiness of the slime you create. Finally, controlled variables (or "controls") are the variables that never change, such as the combination of ingredients used (you would change the amounts of the ingredients, but each batch of slime would use the same list of ingredients.).
In a well-designed and simple experiment, you would only have one independent variable. You might want to test the effect of water on the slime, so you try several different recipes using different amounts of water, but you don't vary the amount of glue or borax at all. Or perhaps you want to test the effect of borax on the slime, so you do several different recipes, each with a different amount of borax, while keeping the amount of glue and the amount of water constant.
Limiting Factor
This is another experiment where you vary the amounts of the Borax and glue. Use way more Borax than you need (you may need to adjust the amount of hot water to get it to dissolve) and see what happens to the slime. Then use way more glue than you need and see what happens to the slime.
The idea of a limiting factor is that the chemical reaction can only continue until one of the ingredients has been all used up. Once it's been all used up, the reaction stops and the other ingredient is left over.
Elasticity
Elasticity is the amount of stretchiness in a substance. You could use elasticity to determine the results of your variable changes above, but you have to be careful about how you measure it. If you pull the slime in two directions, how will you know that it is being pulled with the same force? A better plan is to put the slime on the edge of a table and see how far down it stretches in a certain amount of time since gravity always pulls with the same amount of force. The time constraint is important because if you let the slime stretch for 5 minutes for one batch and 3 minutes for the other batch, of course the results will be different.
Viscosity
Viscosity is the resistance to flow. A high viscosity means that a liquid is very thick and doesn't pour well, like corn syrup. A low viscosity means that the liquid is thin and pours easily, like water. You could do many different experiments to test viscosity, such as using glue with a high viscosity (remember, thick and sticky) and comparing that to a glue with low viscosity or making 3-5 different recipes with different amounts of borax.
Non-Newtonian Fluids
This is a concept for much older kids although even littles can explore the properties of the fluid. According to Sir Isaac Newton, the viscosity of a liquid is dependent only on temperature. A Newtonian fluid is a fluid that continues to flow, regardless of the forces acting on it, temperature. However, the viscosity of a non-Newtonian fluid, such as slime, can be altered in other ways such as agitation or changing the pressure.
The technical explanation is that slime is a fluid that changes its ability to resist deformation according to shear stress. Shear stress sounds fancy and scientific, but it just means the pressure that's applied to a substance by squeezing or stirring.
What this means is, when you pour slime or let it ooze through your fingers, it has a low viscosity and flows like a thick liquid. When you squeeze non-Newtonian slime or pound it with your fist, it feels hard, like a wet solid. This is because applying stress squeezes the particles in the slime together, making it hard for them to slide against each other.
Some non-Newtonian fluids get thicker when pressure is applied, like slime does, and some get thinner, like ketchup or mayonnaise. Think about a squeeze bottle of either one. You could hold that squeeze bottle upside down, and nothing would come out. The ketchup or mayo is acting like a solid at that point. But when you squeeze the bottle, the stuff inside shoots out like a liquid. That's a non-Newtonian fluid for you.
There are myriad Non-Newtonian fluids including slime, oobleck (which is what you get when you mix cornstarch and water - very fun), blood, yogurt, Silly Putty, tree sap, ketchup, and vanilla extract.
To test the properties of this Non-Newtonian fluid, try stretching it slowly, stretching it quickly, bouncing it, forming it into a ball and laying it on a table, and dropping it into a wide funnel. Describe how it behaves in each situation.
Also, this would be a great time to study Isaac Newton, who is one of the greatest thinkers and scientists ever to have lived. He had a very interesting life, beginning with his birth on Christmas Day 1642 as a tiny premature infant. He lived much of his life with his grandmother because he didn't like his step father. I could go on, but I think it would be fun for you to look into his life yourself.
Creep
Creep is a highly scientific term that refers to the ability of Borax to ooze around when placed on a table or other hard, flat surface. It is interesting to note that the same process is what causes the plates of the earth to shift around on the mostly solid but somewhat oozy mantle. While slime can ooze at a rate of a few centimeters per minute, the plates move a few centimeters per year in some spots and even less in others. The movement of the plates is called plate tectonics if you're interested in learning more about it. That's one of my favorite geology topics.
Evaporation
Feel the slime in your hand and notice the temperature.
Slime always feels cool when you touch it. This is because it is 96% water, and all that water evaporates readily. Evaporation, or water changing form from liquid to gas, takes in energy (heat) which then cools the surface. It's doesn't just feel cool - it is cool.
This is the same principle that explains why sweating cools you down. As the water evaporates, it removes heat from your body.
Because slime contains so much water, it can easily dry out and become brittle. It might be fun to leave some out and check its properties every couple of hours for a day or so, until it is completely dry.
Borax
Borax is caustic, which means that it is capable of burning the skin. Some people are allergic and have reactions to it. Use caution if you think you may have a reaction. Grace has used her Borax over and over with never an issue, but if you think you might have a problem, it would be best to use rubber gloves.
Borax is poisonous if swallowed, and you should take care not to breathe in the fine dust. Always wash your hands after handling Borax or slime.
Borax has been used as a water softener, a mild antiseptic, and occasionally as cleaner, though today, these applications are generally performed by other products. Borax is not widely used anymore, and that's why you may have trouble finding it in a traditional store.
In Conclusion
I think slime is really cool, and so do my kids. I think I have given you lots of things to work on to make slime a very rich learning experience, but if you can think of anything else to do with it, please leave your suggestions in the comments. I'd also love to hear and see what you do with it in your homeschool (or afterschool or summer projects), so leave those in the comments or on Facebook.
Happy sliming!


Anna says
Thank you so much for this treasure!! I'm getting ready for a slime STEM program at the library and encountered the same problem you did when I started the prep: lots of slime recipes, but barely any scientific info. This is so helpful and will add substance to my program! Thank you!