
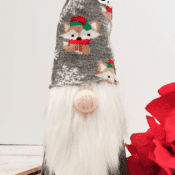
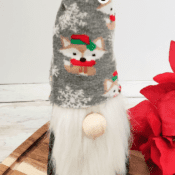
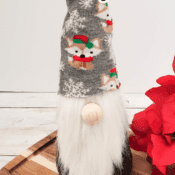
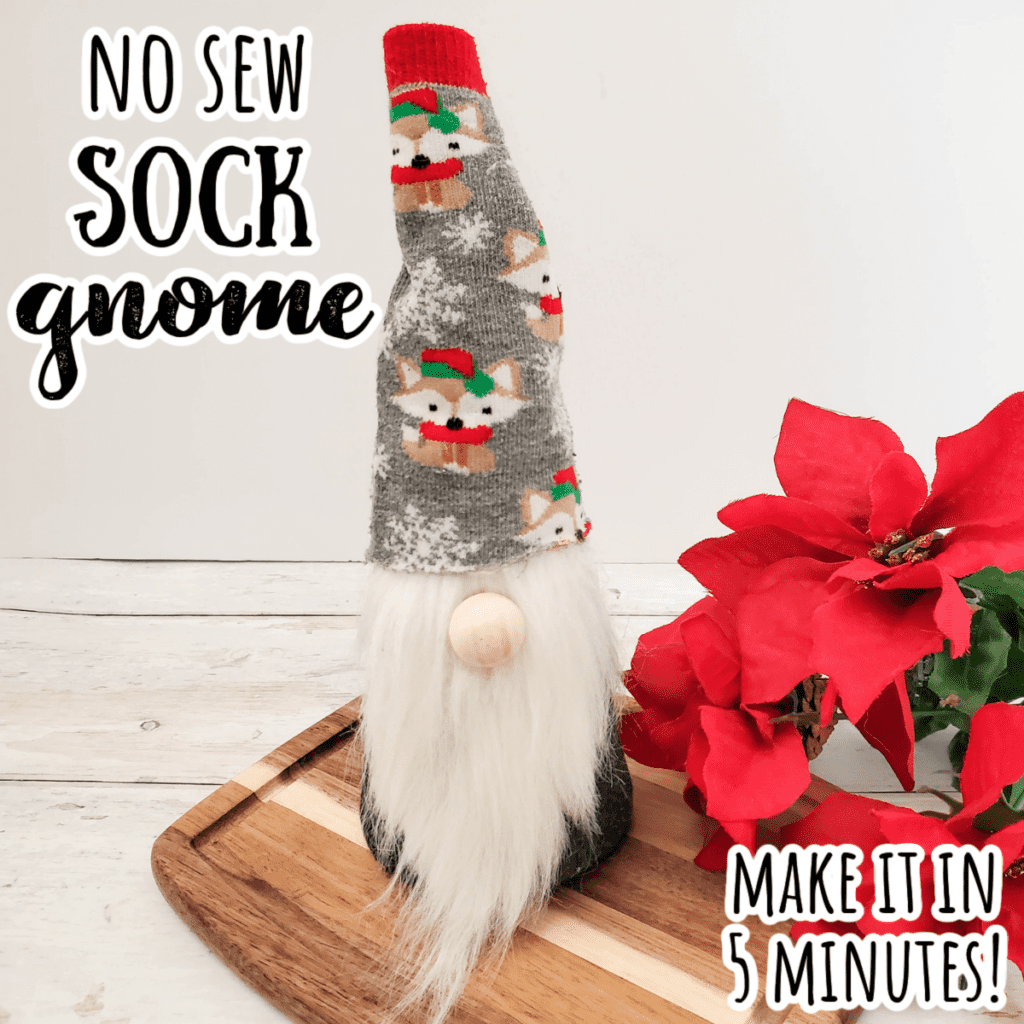
Learn how to make an easy no sew gnome from a sock using this tutorial made and just 5 minutes! This is the best quick and easy tutorial to learn how to make a DIY sock gnome. It's a great way to use a lonely sock!
Allie and I have a thing for Scandinavian gnomes. In fact, we have such a thing for them that we have gnomes for every holiday season: Christmas gnomes and Valentine gnomes and Easter gnomes and even a gnome that looks like Fleur Delacour from Harry Potter.
Gnomes are the perfect decorations and also the perfect gifts. They're cute and don't take up a lot of space. Best of all, you won't believe how easy they are to make!
Some of our gnomes have been purchased, but we've made the majority of them. Once we figured out how easy it was, we became gnome making fools.
The reason that we make our gnomes is that they're so easy! All you need is a couple of socks, a hot glue gun, and a gnome tutorial.
Why do we use socks to make DIY gnomes?
First of all, socks are perfect for this craft because they're just the right shape. But more than that, what household does not have a bunch of lonely socks? I used to grudgingly throw them out, but now we save them for gnomies and Barbie clothes. No more waste!
My upcycling has worked a little too well I think because one of my kids occasionally loses socks on purpose so that she can reuse the lonely mate.
Why do we hot glue our gnomes?
In a word, because it's easy!
Some people pin their gnome hats and gnome bodies together and sew them with a needle and thread. I made a couple like that early on.
I don't think the sewn gnomes look any better than the glued ones, so we started gluing them and never looked back.
How do you make the gnome body?
We've experimented with a bunch of different materials for inside the gnome's body. For a while, we were making all the gnomes by filling the bottom sock with rice and using a rubber band to hold the sock shut at the top. The problem with rice is that it leaks out if the bottom sock doesn't have a super tight weave (and a lot of fancy socks don't). Plus, a rice-filled gnome is pretty heavy. Later, we next tried dried beans because they wouldn't come out through the holes in the weave of the sock, but they make the gnome lumpy.
We eventually moved on to styrofoam cones, and we found that these work pretty well. They're more expensive than rice, but they are light and hold the shape best, and we don't have to worry about rice stuffing falling out of the gnome.
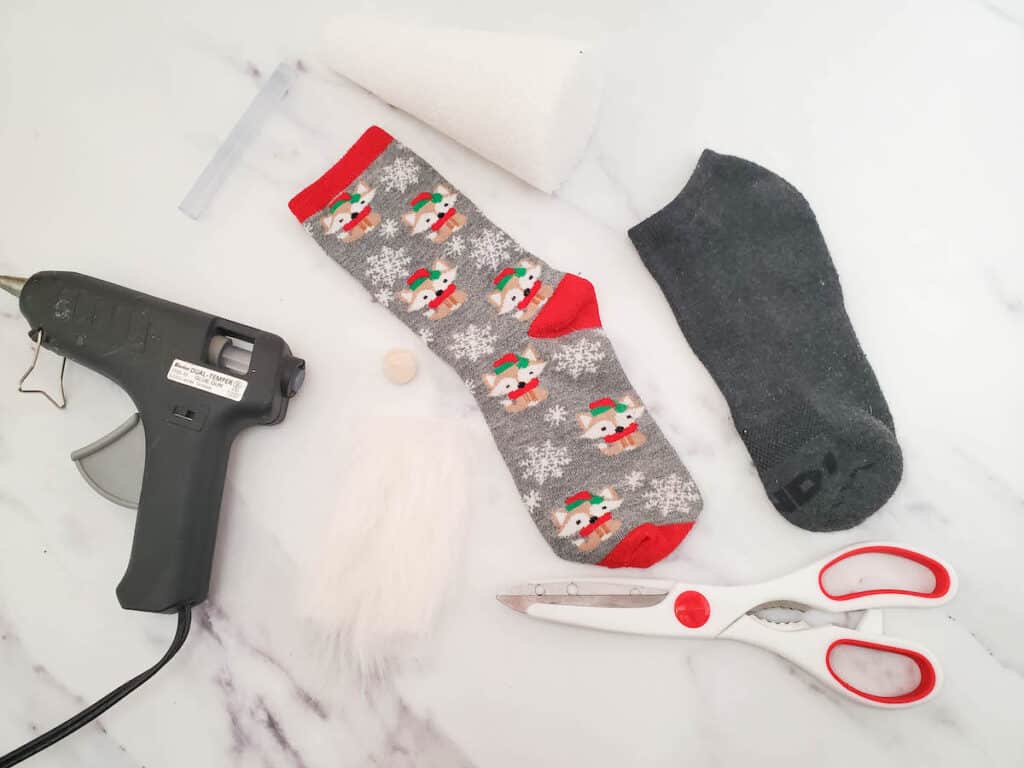
What you need to make a no sew sock gnome
You'll need the following to make this cute little gnome:
- A styrofoam cone that's 2.75" by 6" - Amazon has these pretty cheap. The cone will become the gnome's body.
- Adult size Christmas sock - This patterned sock is going to be the gnome hat. A taller sock is better than a shorter one because you'll use the part above the heel. This is a great way to use up lonely socks without having to throw them away. If you don't have any lonely socks, you can always get a cute pair at the Dollar Tree.
- Adult size dark gray sock - An ankle sock is fine for this; you'll only use the bottom below the heel.
- Small wooden ball - You can get a bag of 300 of wooden beads from Amazon, but since you need exactly 1 bead per gnome nose, you might want to find a local craft store like Michael's. Make sure your wood beads don't have holes through the middle. Alternately, you can use small pom poms.
- Faux fur - This can be hard to find. I got mine from Amazon. It was reasonably priced, and I got enough to make several gnome beards. If you want a really fancy gnome with a longer beard, you can invest in this Mongolian faux fur. It's more than twice the cost of the fur I got, but it is really impressive.
- Sharp scissors - I have a pair of scissors that are for fabric only, and everyone in my family knows never to touch them under threat of bodily harm. Dull scissors will make a mess of the socks and the faux fur.
- Hot glue gun
- Hot glue sticks
How long does it take to make a no sew sock gnome?
This is such an easy craft, it will take about 5 minutes, maybe less. It will take you longer to read these instructions than it will to actually make your gnome.
How to make a no sew DIY sock gnome
Basically, you're going to cut the socks, fit them over the styrofoam cone, cut the fur into a beard, and glue it all together, attaching the nose at the end. It's pretty simple.
Here's the step by step instructions:
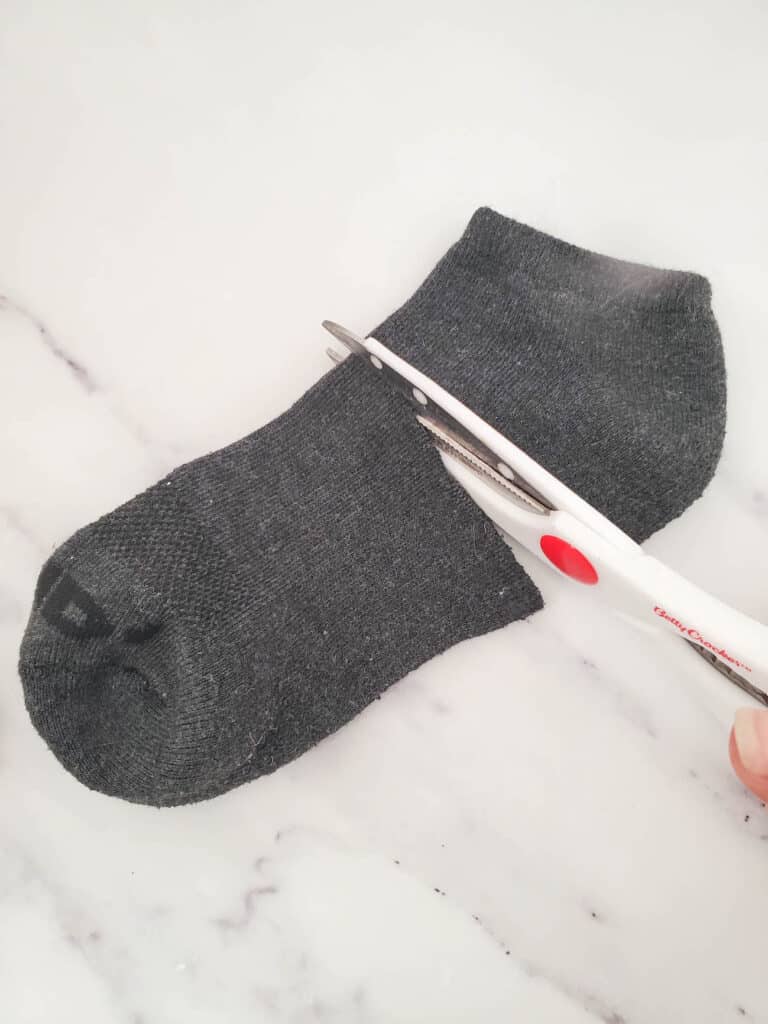
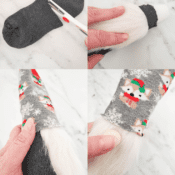
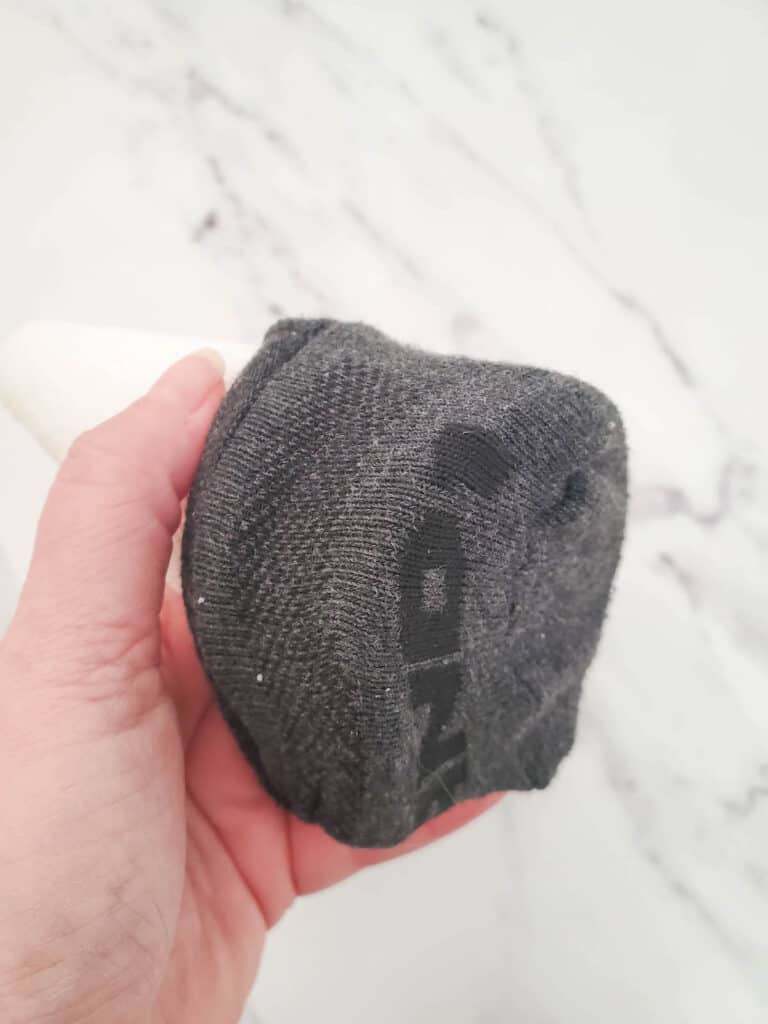
- Cut the gray sock just below the heel. You can discard the ankle part.
2. Fit the toe part of the sock over the bottom fatter end of the styrofoam cone, centering the toe line in the center of the bottom of the cone. Pull the rest of the sock up over the cone. It should fit a little more than halfway up.

3. Glue the top cut edge of the sock to the cone.
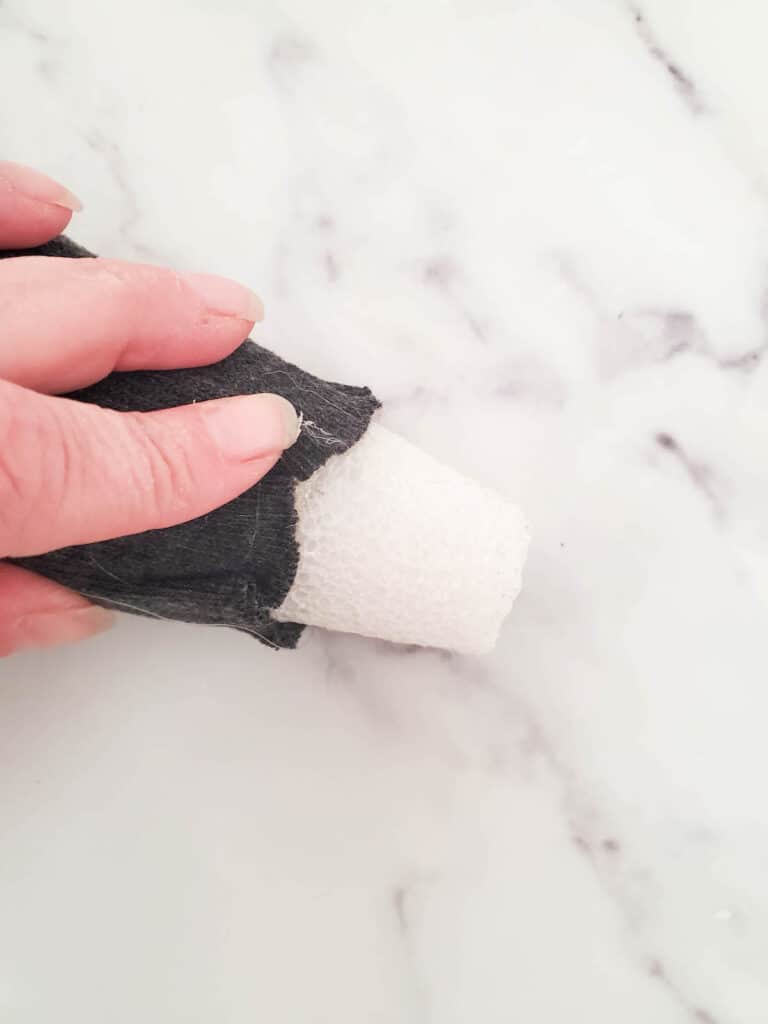
4. Hold the sock in place until the glue sets.
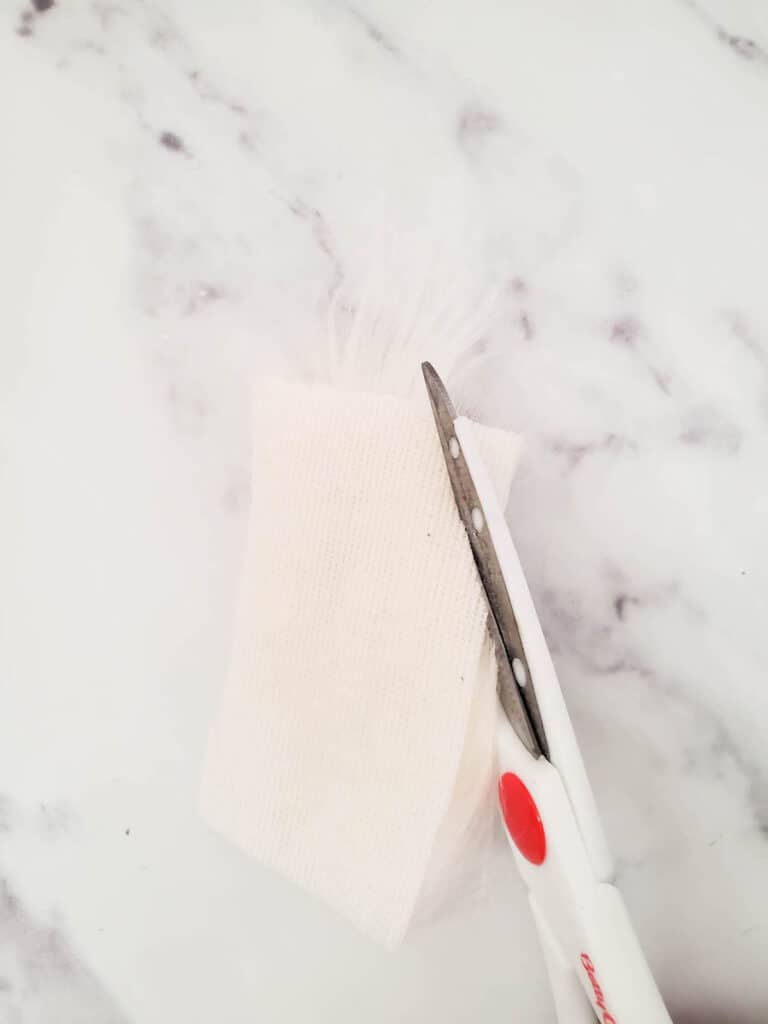
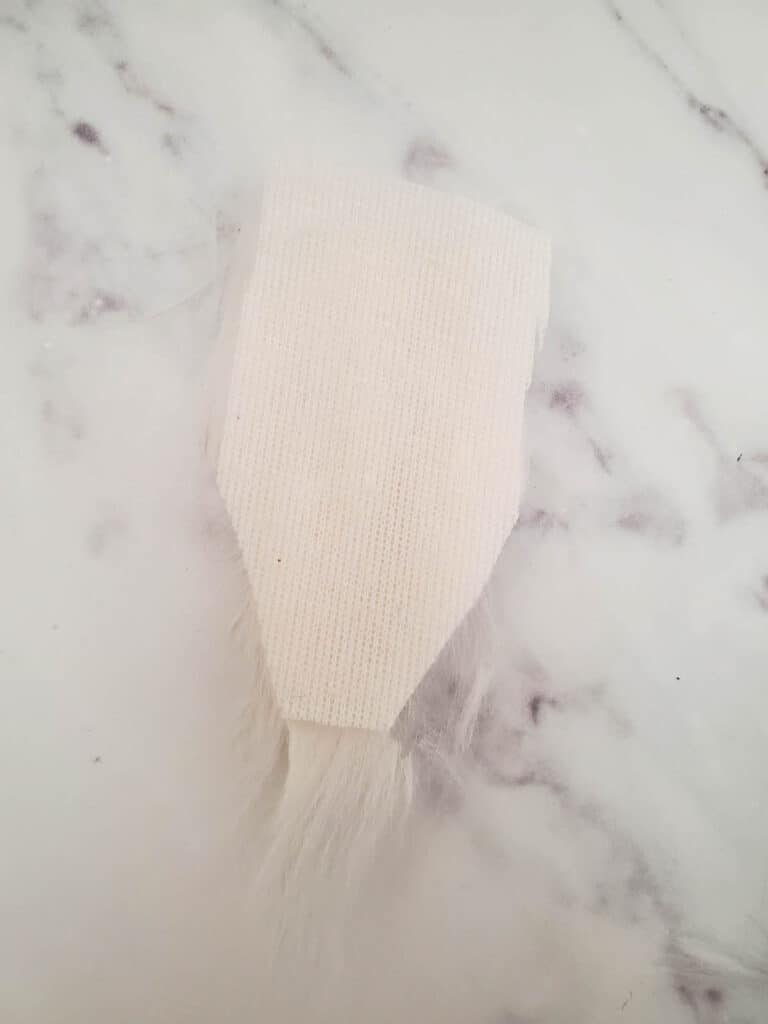
5. Taking care not to cut off too much of the fur, cut a 5 inch by 2.5 inch strip of the craft fur with your very sharp scissors. Cut the bottom corners off, leaving a 1 inch wide bottom and a full 2.5 inch top. It should look like the photo below.
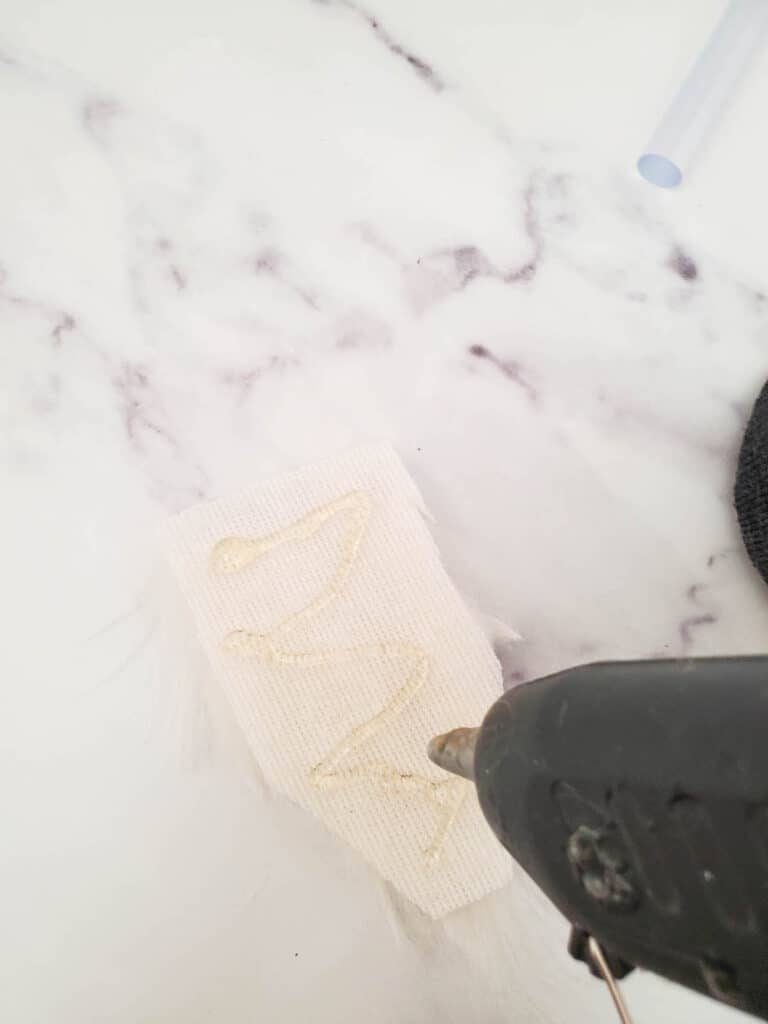
6. Apply hot glue to the backside of the faux fur.
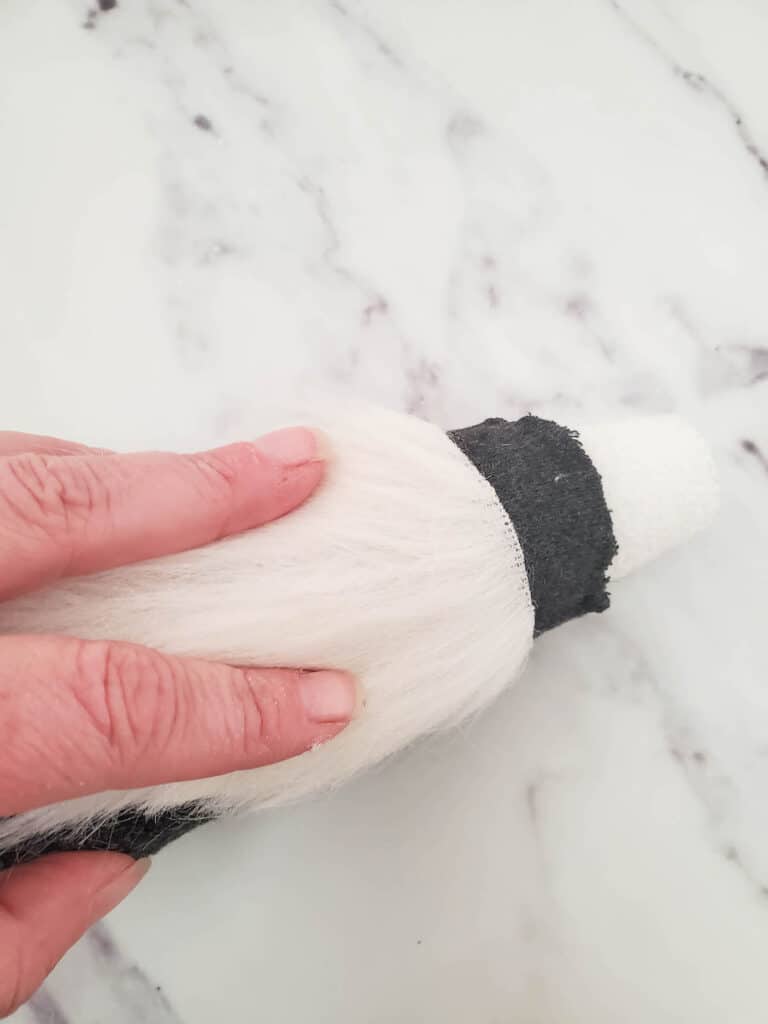
7. Press the beard onto the gray sock so that the bottom of the beard is right around the bottom of the cone. Hold in place until the glue sets.
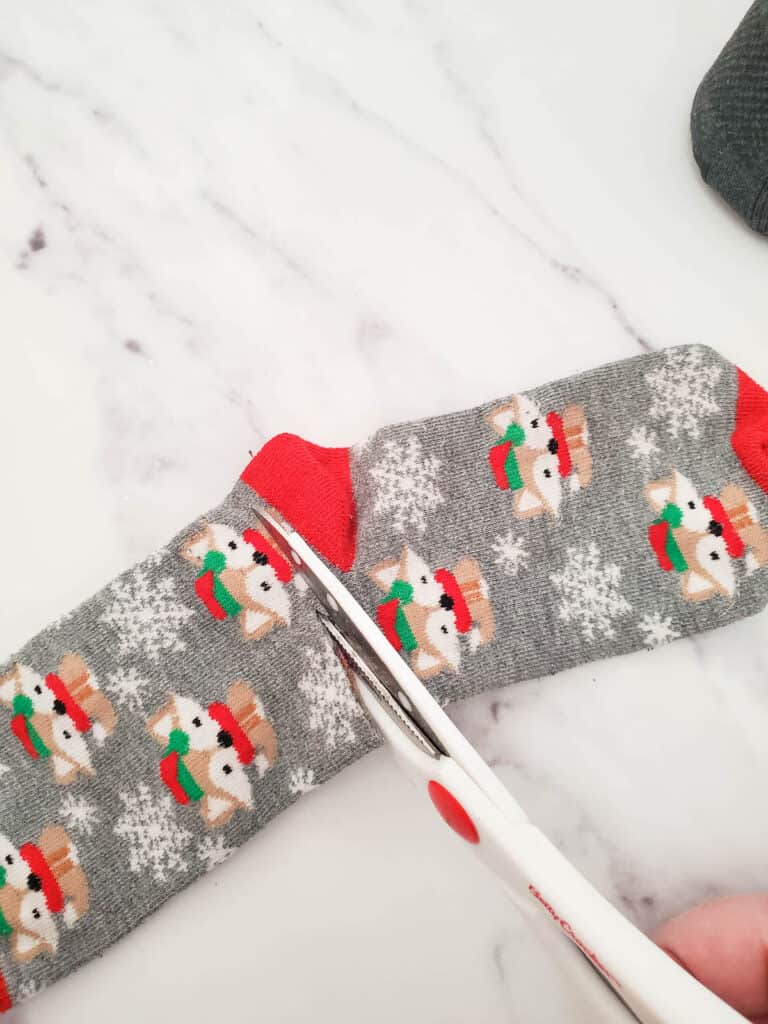
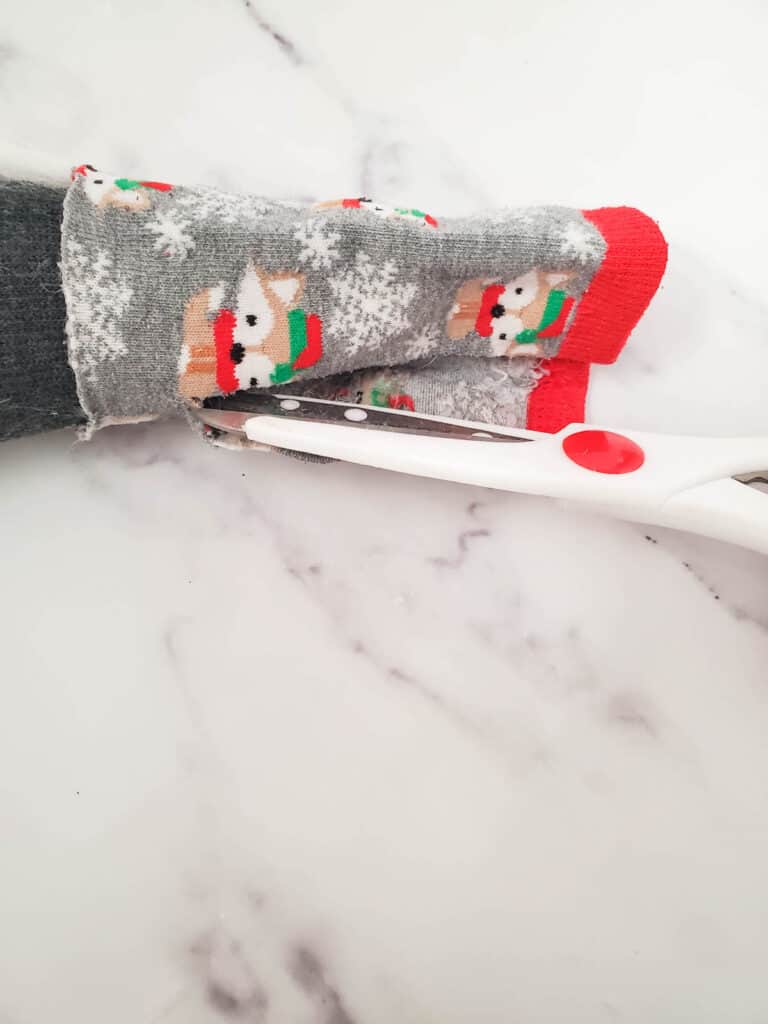
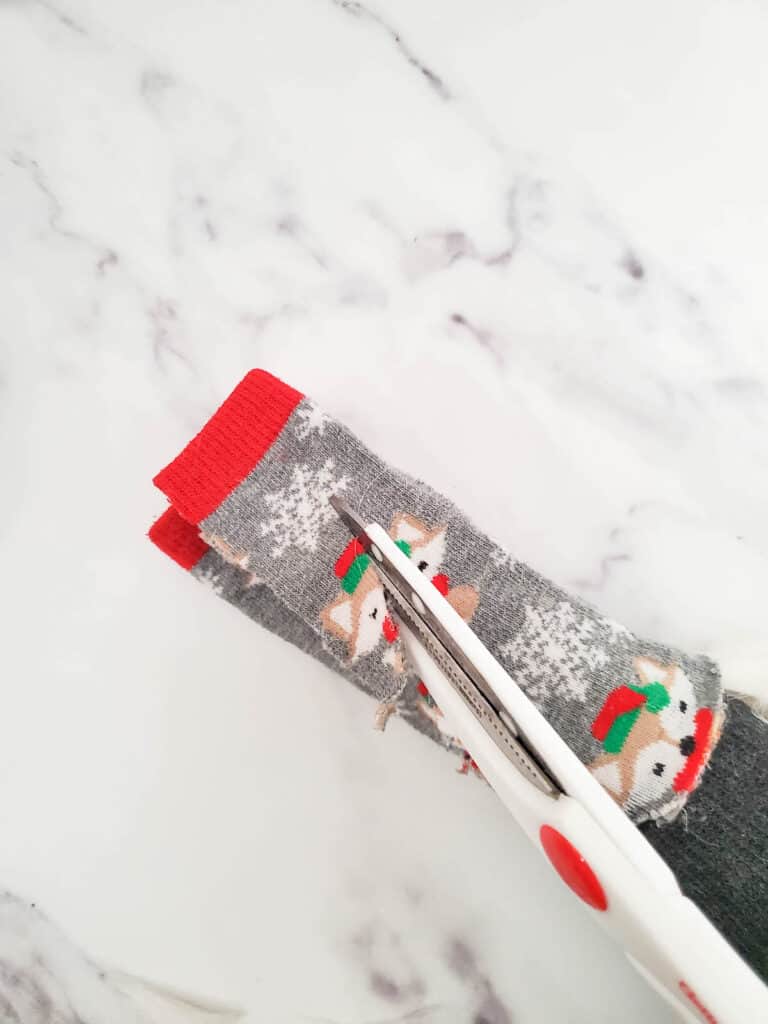
8. Cut the Christmas sock on the ankle, just above the heel. Discard the toe part.
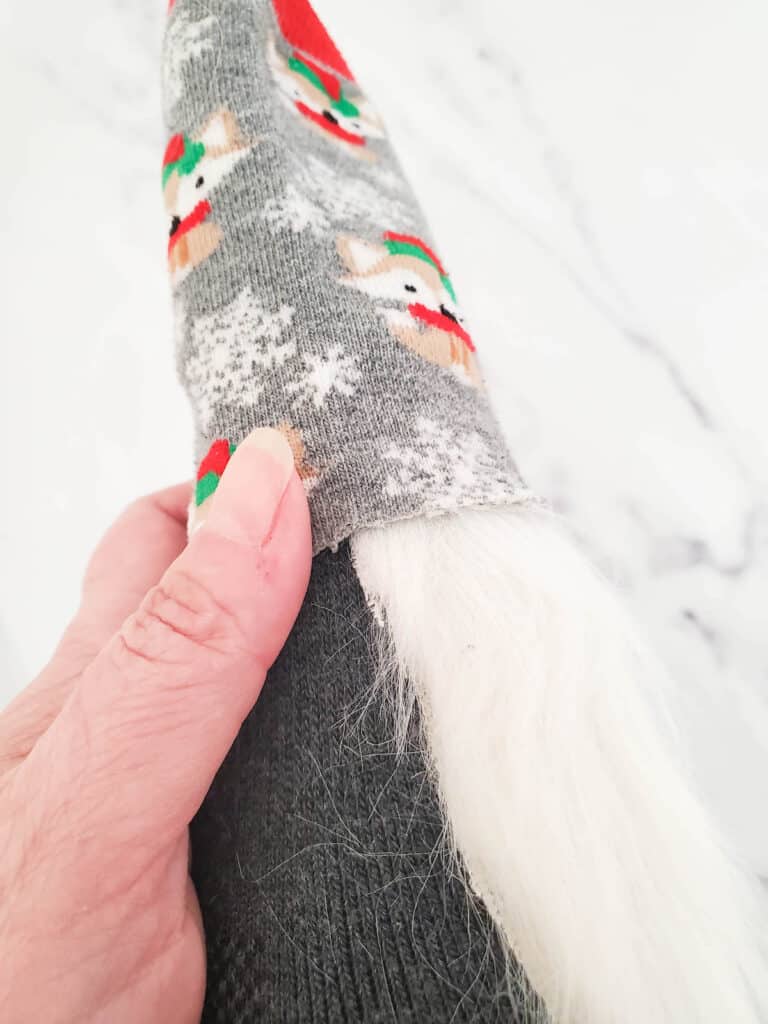
9. Fit the Christmas sock over the top of the cone and down over the beard and gray sock, overlapping them a little.
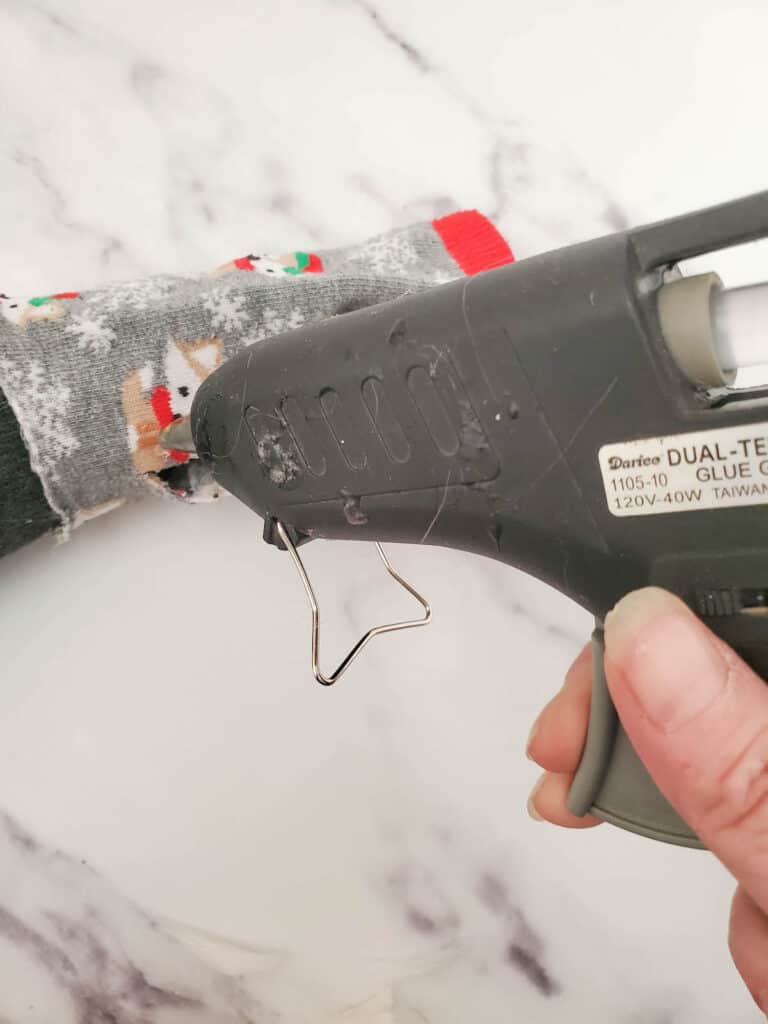
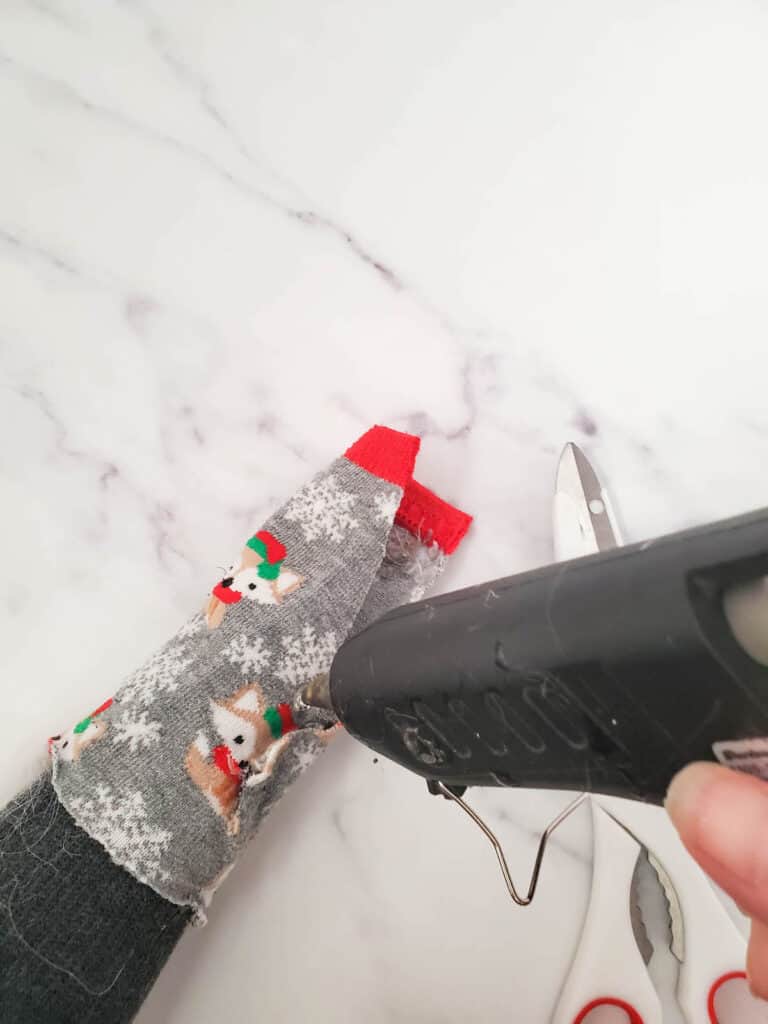
10. Apply hot glue to the bottom edge of the Christmas sock, carefully gluing over the faux fur and the gray sock. Hold in place until the glue sets.
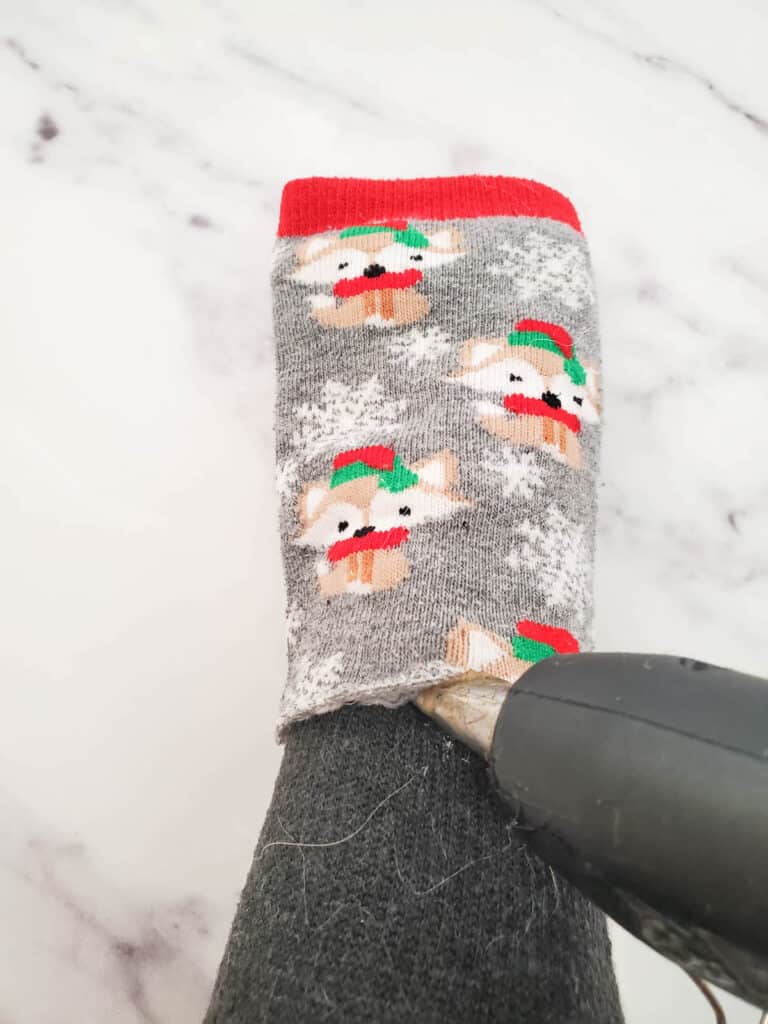
11. Flip the gnome over to the back and cut a slit down the back of the Christmas sock. This is where you'll pull it together to make a pointed hat.
12. Cut the edges of the slit diagonally from the bottom of the slit to the top of the sock, taking care not to cut off too much. You just want to make small cuts so that the rectangular sock will form a pointy cone.
13. Starting at the bottom of the hat, hot glue the cut edges together to make the pointy hat. Glue a bit, then hold it shut until the glue sets.
14. Glue the hat shut all the way up, doing a bit at a time and holding it together until the glue sets.
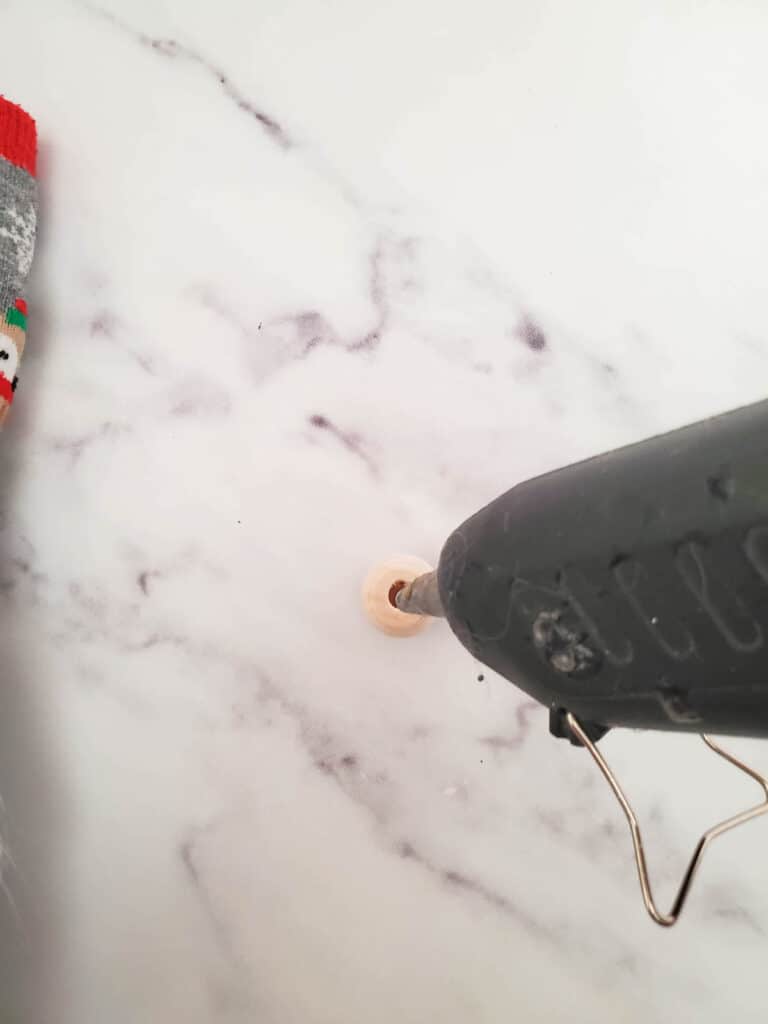
15. Apply hot glue to the back of the nose.
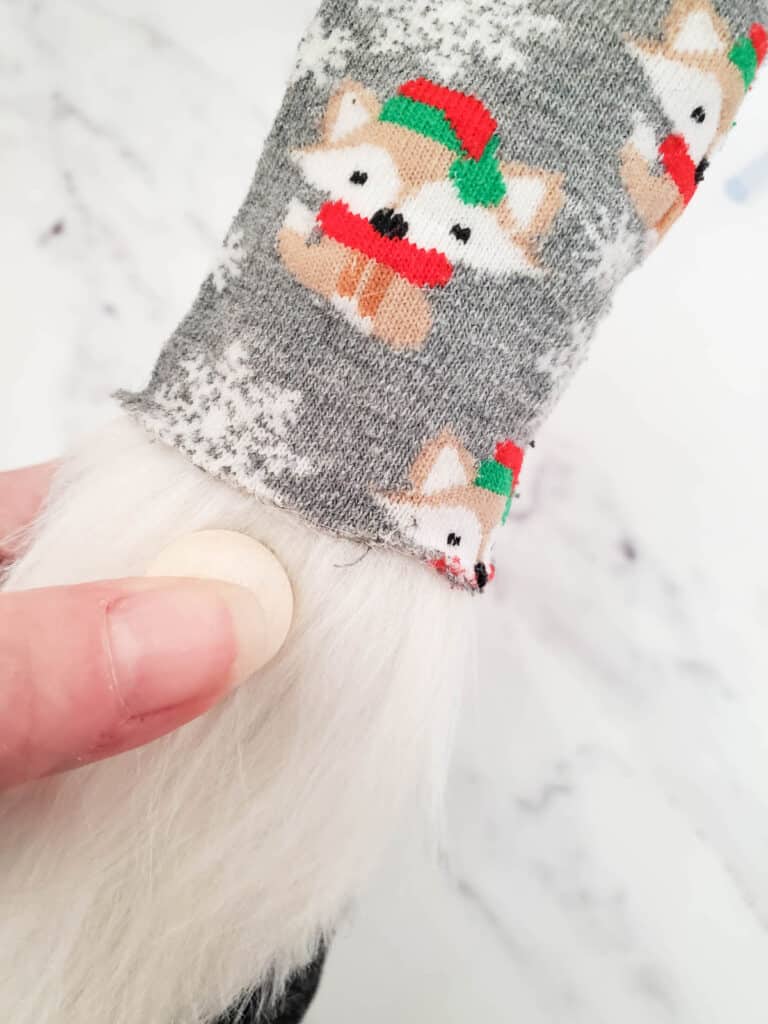
16. Press the nose onto the middle of the beard, about ¼ inch below the Christmas sock. Hold it firmly until the glue sets.
That's it! You're ready to make your own little guy! I made my gnome for Christmas, but you could get all kinds of cute patterned socks at the dollar store and make your own gnomes for all the holidays!
How do you make a gnome with fuzzy socks?
You can definitely use fuzzy socks to make sock gnomes. In fact, those cute fuzzy socks are the exact reason we stopped using rice to make our gnomes. I don't know why, but fuzzy socks tend to have a larger weave (bigger holes between the stitches of the sock), and the rice falls out.
So anyway, you make a gnome with a fuzzy sock in exactly the same way that you make one with a smooth sock. Just follow the tutorial above.
How to you make a gnome with felt?
I don't think I would use felt for the bottom of the gnome, since you'd have to wrap it around the bottom of the cone, and I think that would get both bulky and messy. But you could definitely use the felt for the gnome hat. Just cut a big wedge shape with a rounded bottom, and then wrap that wedge into a cone.
How do you make a Santa gnome?
It's easy to make your gnome into Santa. Just use 2 plain red socks and white or off white faux fur. You can wrap a rectangular strip of the fur around the bottom of the hat to make it look more like Santa's hat.

How to Make a No Sew Gnome
Materials
- 1 2.76"x6" styrofoam cone
- 1 adult size Christmas sock
- 1 adult size dark gray sock
- 1 small wooden ball
- 1 square faux fur
Instructions
- Cut the gray sock just below the heel. You can discard the ankle part.
- Fit the toe part of the sock over the bottom fatter end of the styrofoam cone, centering the toe line in the center of the bottom of the cone. Pull the rest of the sock up over the cone. It should fit a little more than halfway up.
- Glue the top cut edge of the sock to the cone. Hold the sock in place until the glue sets.
- Taking care not to cut off too much of the fur, cut a 5 inch by 2.5 inch strip of the craft fur with your very sharp scissors. Cut the bottom corners off, leaving a 1 inch wide bottom and a full 2.5 inch top.
- Apply hot glue to the back of the faux fur. Press the beard onto the gray sock so that the bottom of the beard is right around the bottom of the cone. Hold in place until the glue sets.
- Cut the Christmas sock on the ankle, just above the heel. Discard the toe part.
- Fit the Christmas sock over the top of the cone and down over the beard and gray sock, overlapping them a little. Apply hot glue to the bottom edge of the Christmas sock, carefully gluing over the faux fur and the gray sock. Hold in place until the glue sets.
- Flip the gnome over to the back and cut a slit down the back of the Christmas sock. This is where you'll pull it together to make a pointed hat.
- Cut the edges of the slit diagonally from the bottom of the slit to the top of the sock, taking care not to cut off too much. You just want to make small cuts so that the rectangular sock will form a pointy cone.
- Starting at the bottom of the hat, hot glue the cut edges together to make the pointy hat. Glue a bit, then hold it shut until the glue sets. Glue the hat shut all the way up, doing a bit at a time and holding it together until the glue sets.
- Apply hot glue to the back of the nose. Press it onto the middle of the beard, about ¼ inch below the Christmas sock. Hold it firmly until the glue sets.


Comments
No Comments