
About a week ago, a man from my church told me that he needed to talk to me.
My pastor said, "Run, Tara. Run!"
I wasn't sure if it was a joke, and I was supposed to stay or if he was serious, and I was supposed to run away from what was sure to be a forced volunteering.
I stayed. (The pastor told me later, "The next time I tell you to run, run!" So now I know.)
Anyway, the man in charge of our annual church banquet asked me to be in charge of decorations for the event.
I am not the decorating type, if you haven't noticed from the photos of my insanely cluttered and dirty home.
{Just saying.}
I didn't even decorate the Christmas tree this year. I made Joe and the girls do it (sadness was involved; my mom bought the tree when I was a little girl). And then, two days later, I took 95% of the ornaments off the tree after Allie broke two of Grace's special Hallmark ornaments.
It takes some amazing effort to break unbreakable resin ornaments, by the way.
I was so angry that I swept everything off the tree except the cheapest of the cheap plastic balls and the Dora stars and squares. It was like the time I was so angry about the two of them fighting that I stood up from the toilet, grabbed a screwdriver, and removed the doorknob from the bathroom door. (I never put it back on either.)
I very rarely act in anger, but when I do, watch out!
Anyway, this is not about my church or decorating or anger at all. I got off to a bad start there.
When the man in charge of the banquet was talking to me about decorating, I said, "Well, decorating really isn't my strong point. I thought you were going to ask me to do something with the kids."
"Well, actually, I don't have anybody to do that, either, so how about you do both." He didn't ask. The other woman standing with me said she'd have to talk to her husband, but I knew I wouldn't be able to decline and would just end up doing it (with her help, as it turns out).
So I had to come up with crafts to keep the children busy during the banquet and with centerpieces for the tables.
Crafts I can do.
Christmas crafts for kids? So totally me.
I began researching, and six hours later, I had thirteen options. You know how it goes.
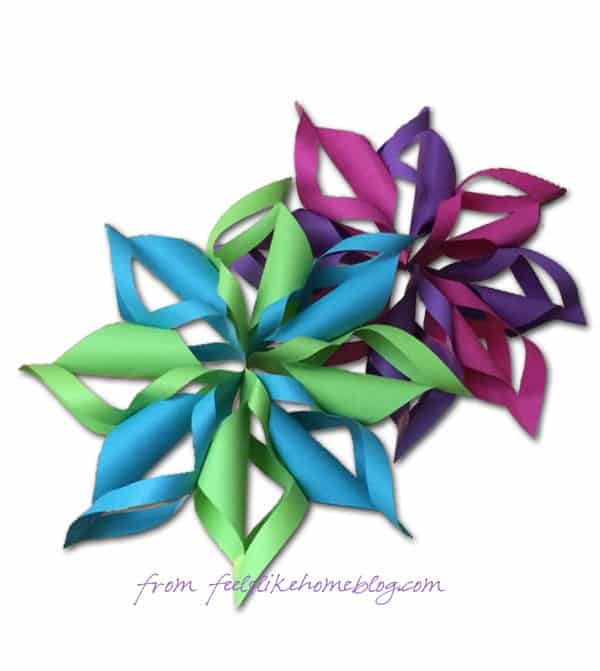
One of the options came from Spoonful.com, which is the reincarnation of the Family Fun magazine website. It was a beautiful gold and white 3D star thing. This one, in fact:
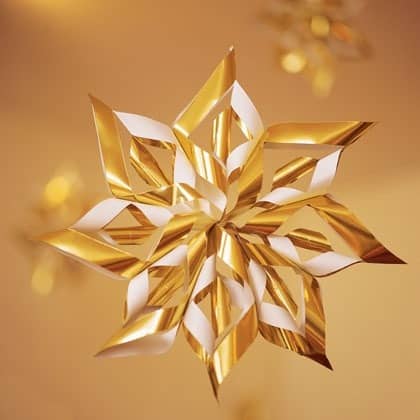
Image from Family Fun magazine
I thought it was just lovely, but it stressed my craft budget past its limits. I cut it. Now that I've made a bunch of them, I think I'm glad I cut it because I don't think kids under 6 would be able to do it at all, and it's probably best suited for kids 8 and up.
And also pretty fun for grown ups.
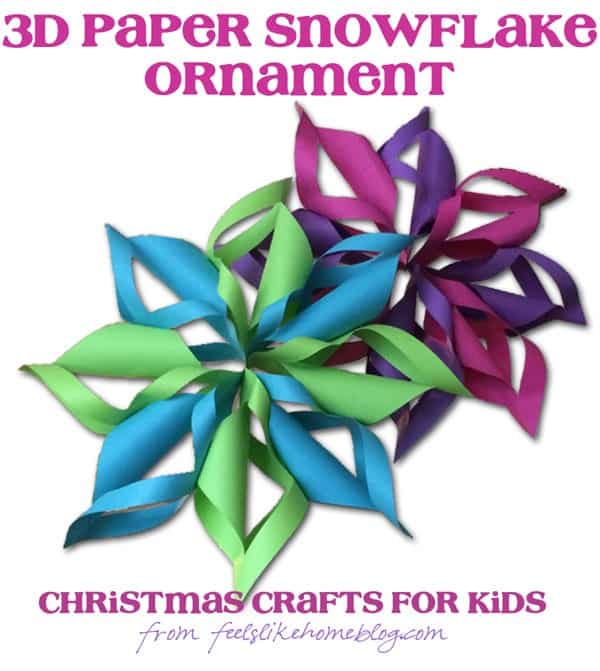
How to Make 3D Paper Snowflakes
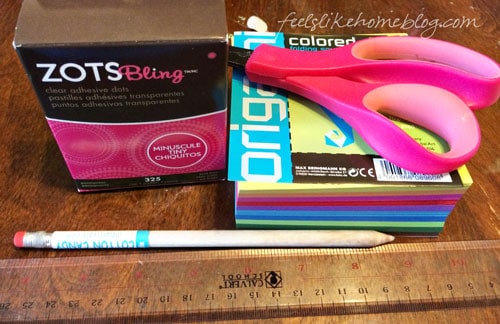
Materials:
- Paper squares (The original lousy tutorial suggests 5" squares, but I used 4" squares. I think 6" would also work.) - I got Folia's Origami School Pack because it was very inexpensive. The only downside is that each sheet is the same color on the front and back. If you're willing to spend a little more, this textured iridescent origami paper is gorgeous, and this foil origami paper is just like the picture - foiled on one side and white on the other. On the other hand, if you felt like measuring and cutting squares of paper, you could buy a roll of metallic wrapping paper and cut. I didn't want to do that because the squares have to be kind of perfect or the finished snowflake won't look quite right.
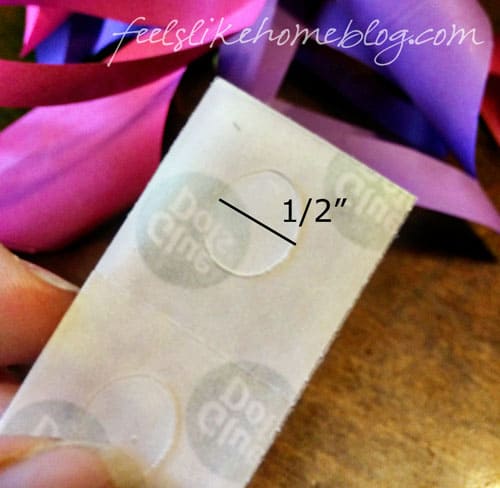
- Glue dots or double-sided tape - I only have tiny ones in the photo, but you will also need large ones, ½" or so.
- Scissors
- A ruler
- A pencil (Smencil not required.)
Making the 3D paper snowflake
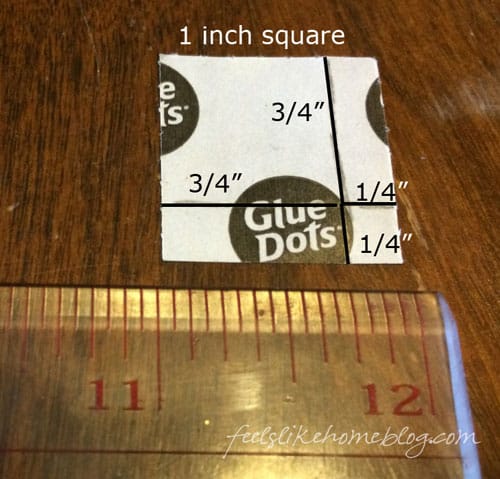
1. This first step is not required, but will make your life considerably easier for the next hour. Cut a 1" square (or use the paper square from the big glue dots which happens to be exactly 1" square), and make a line straight across ¾" from one side, and then do it again so that the square looks like this.
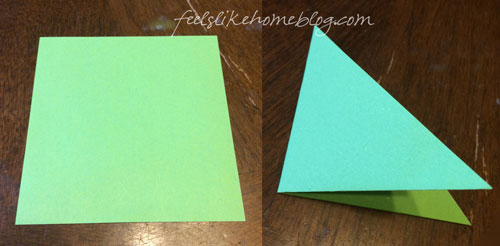
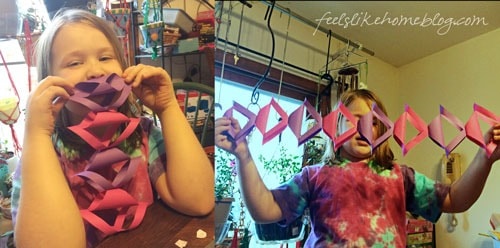
2. Get 8 squares of paper. Grace and I chose 4 each of 2 different colors. Fold each square in half to form two identical triangles, then fold the triangle in half again to make a smaller triangle.
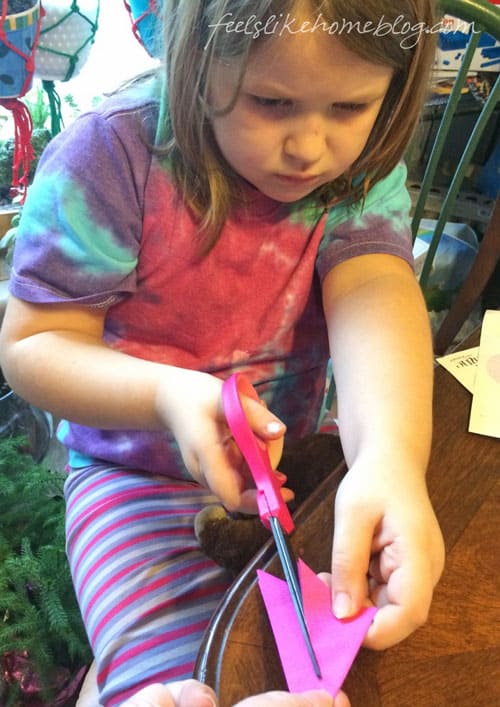
3. If you are doing this craft with a smaller kid, keep in mind that their fine motor skills may require assistance on the folding. I helped Grace to match up the corners and hold the paper still while she folded. She wanted it to be absolutely perfect, so we spent a lot of time matching corners.
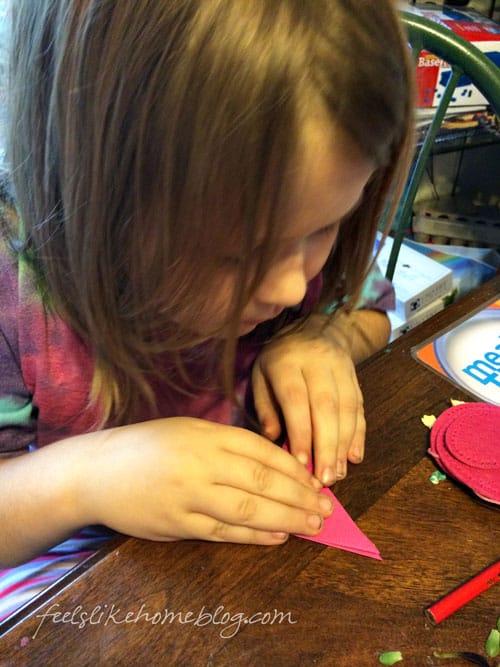
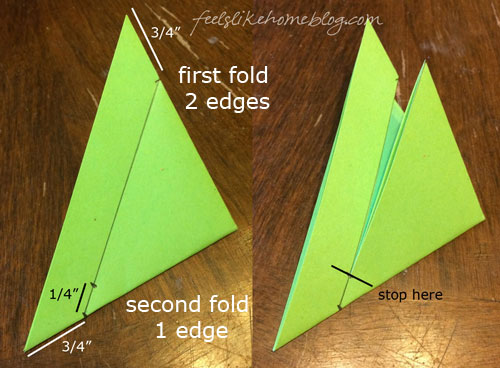
4. Sorry that I keep switching back and forth between my green papers and Grace's pink ones. I wanted to show that kids can do this as well as adults. Once you have small triangles, make a mark ¾" from the bottom on both of the short sides, as I show below.
Then draw a line between the marks.
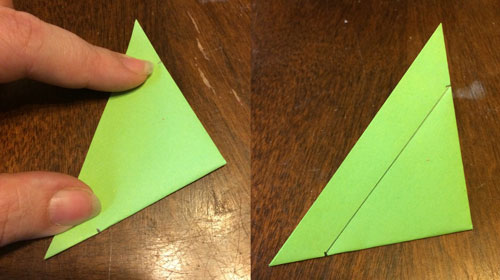
5. This next part is very important. Find the second fold - the one where there's only one edge. Make a mark along the line between ¼" and ½" up. I started doing ¼", but I think ½" worked a little better.
Cut from the first fold (where there are 2 edges, the side that can open) to the mark you just made, as I illustrated below.
In the Family Fun/Spoonful version, they made a second cut ¾" from the first cut, but I knew that would be too complicated for kids. If you want to see that, go over to their site and see how they did it.
6. Even though Grace's cutting isn't perfect, she was really into cutting all by herself. I held the triangles so that she wouldn't cut too far.
Because if you cut too far, you will have yourself a square and a square ring, but not a piece of a snowflake.
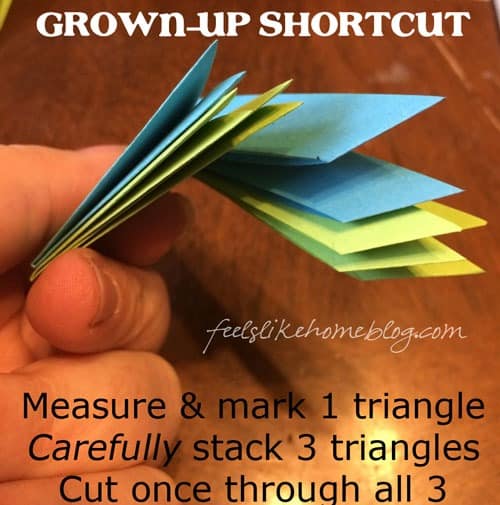
7. When Grace had left, I stacked my triangles up and cut three of them at once. Then I only had to measure three times.
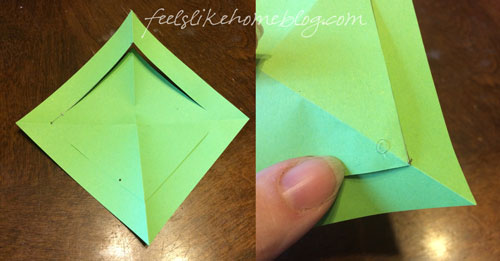
8. Here's what your squares should look like when you unfold them. Put a tiny glue dot on one side of the smaller square.
Then roll the other side up and attach them together. Then roll the bigger squares toward the outside and do the same thing.
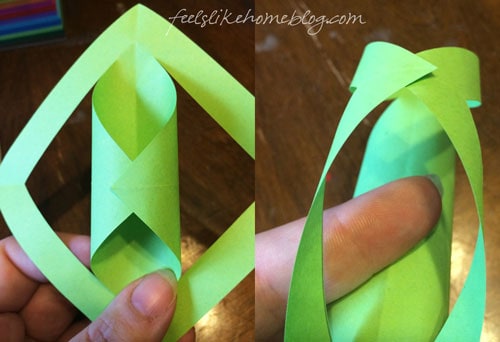
So now you should have 8 shapes with the inside rolled toward one side and the outside rolled toward the other side.
9. You're ready to glue the pieces of the 3D snowflake together. For this part, you will need big glue dots or double-sided tape.
Somehow, I managed not to take any pictures of this part, but I'm sure you can figure it out. Glue the inside part of one piece to the outside part of the next one. See Grace's example below.
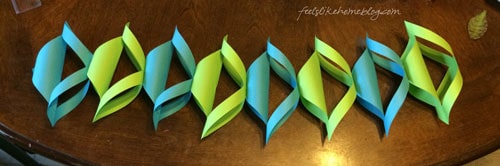
I think this would make a very pretty garland, too. I might work on that.
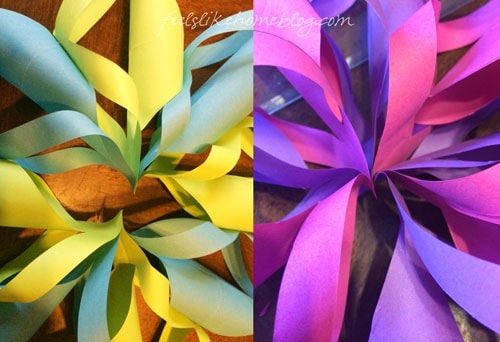
10. The last step is the connect the centers. With Grace's (on the right), I piled all the centers together in the same direction. You can see how they're flat all together, and then they sort of fan out.
With mine, on the left, I attached four of the pieces together in the same direction and attached the other four together in the same direction.
Then I attached the two big chunks together.
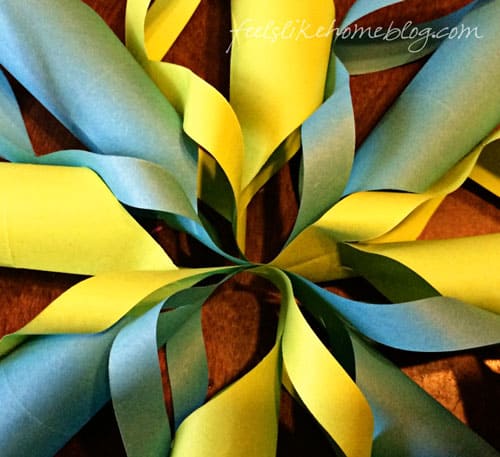
I think both ways look nice, so you can do whatever you prefer.
11. I pulled a piece of regular old sewing thread through one of the holes and hung our snowflakes from the ceiling fan in our dining room. They are quite big - far too big to hang on our Christmas tree (and of course, I removed all the ornaments, so that wouldn't make sense anyway). I didn't measure, but I would guess these 3D snowflakes are more than 11" across.
(I guessed that because of the Pythagorean theorem and, while I enjoy the opportunity to teach you about things, I'm going to leave that one out right now. Anyway, the long side of each piece is 5.6" long, so it's about 11.2" across.)
I'd love to see your 3D paper snowflakes. Share them on my Facebook page!


Crystal @ Crystal's Tiny Treasures says
I haven't seen these in colour before, i adore them! I'll be pinning and sharing today!
Tara Ziegmont says
Thank you! 🙂 The origami paper I ordered was all colored, so - we made them in color. I want to make one in a solid color and see how that looks.
Natalie F says
This is really beautiful. My husband made some out of plain paper last year, but yours look really gorgeous. And I am amazed that you didn't say "no" to a pushy banquet organizer 🙂
Tara Ziegmont says
Are you secretly my best friend, Sommer? She said EXACTLY the same thing to me last week.