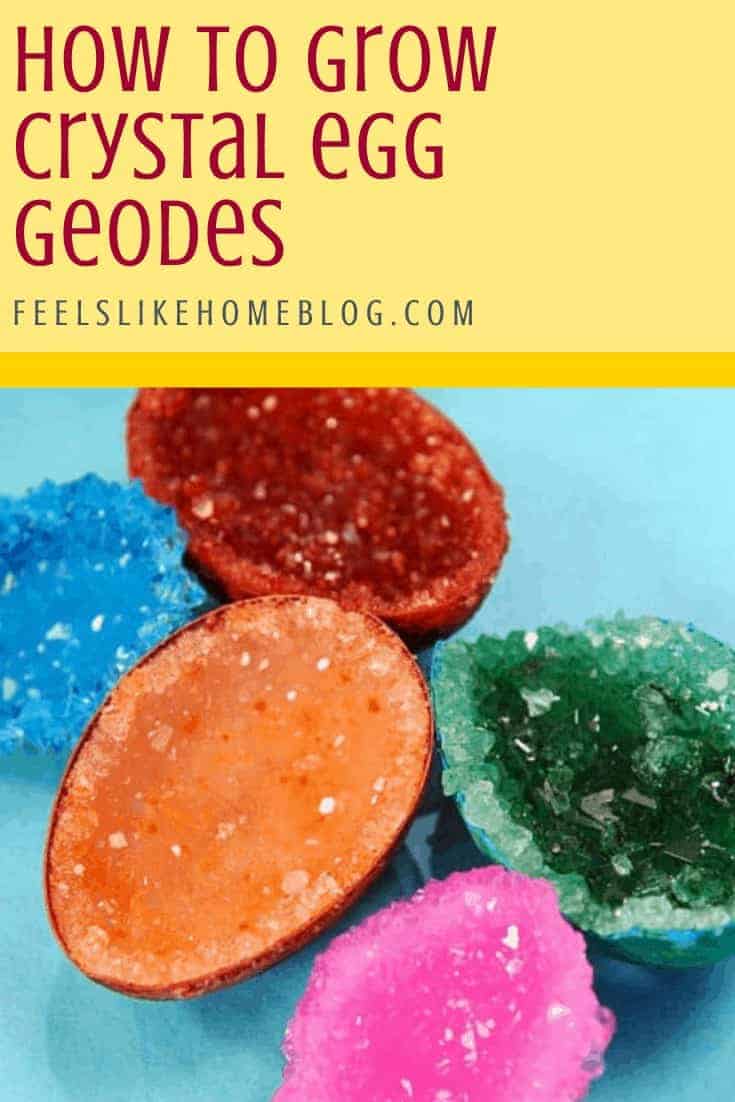
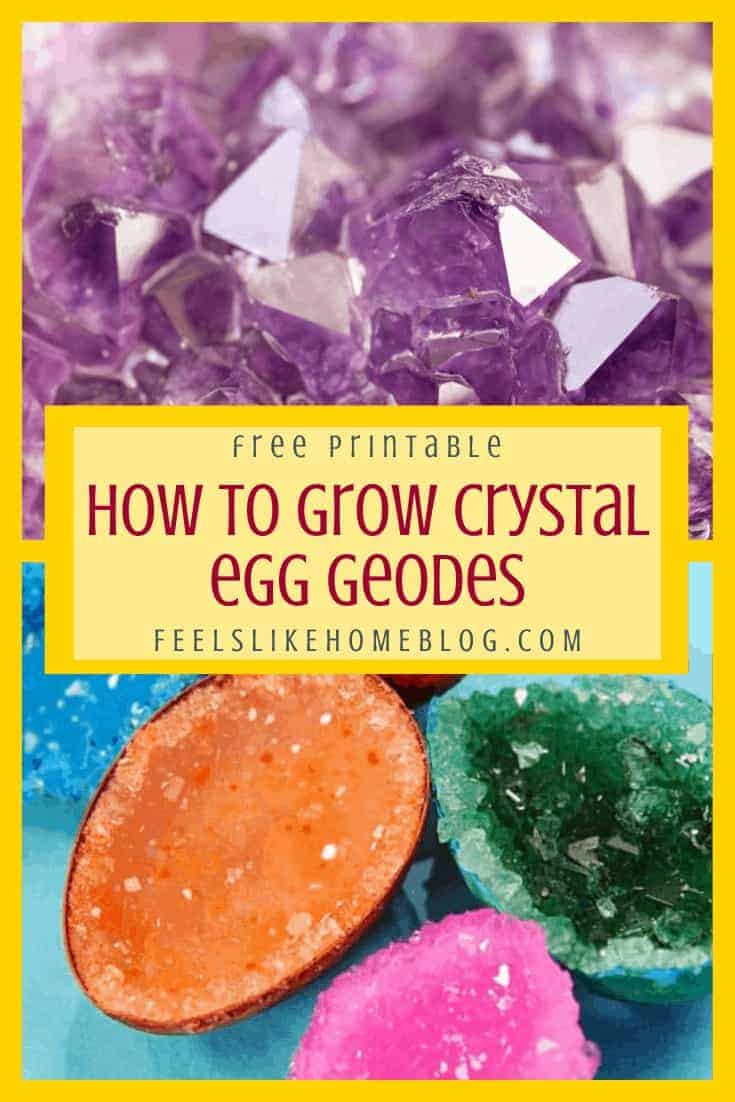
How to Make and Grow Your Own Crystal Geodes - Cool Science Experiment for Kids - These super easy and simple instructions are based on Martha Stewart's but much better with more science background. Use natural or plastic eggshells to make beautiful, fun crystals for Easter, science fair, or any time!
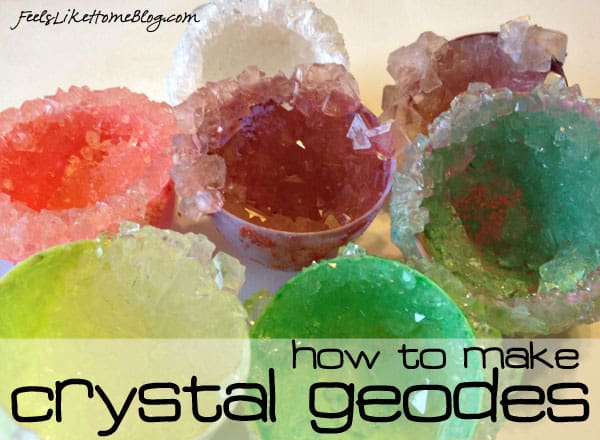
Growing crystals is a simple process, ripe with science concepts, but it is not a quick process. I questioned whether Grace was ready for a process requiring so much patience.
Then I saw this pinned on Pinterest:
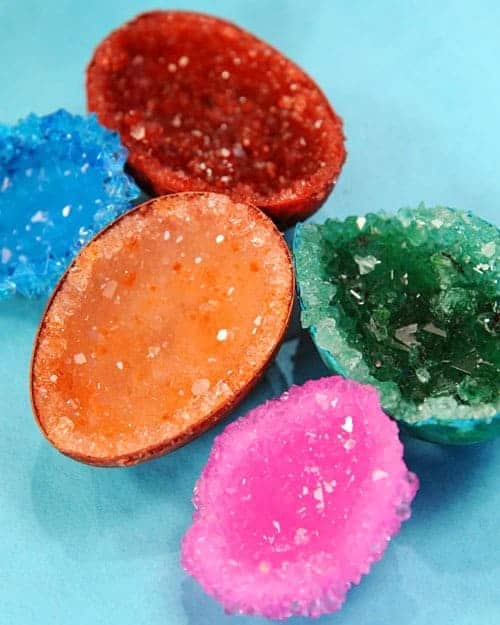
Come on now. If you knew how to make those, would you be able to resist them? The same day I saw the picture, I ordered the necessary supplies and got to work with my girls.
These are from Martha Stewart. Mine aren't as pretty as Martha's, but I think they're cooler because our crystals are much nicer.
Growing Crystal Geodes - A Cool Science Experiment for Kids
I'm not sure about calling this an experiment. It's more like a recipe. Anyway, read on.
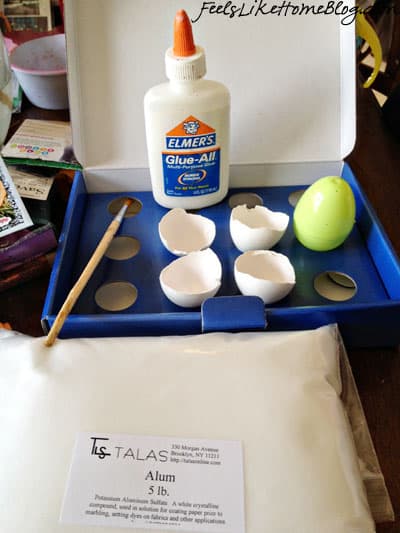
Materials
- Alum powder
- You have to make sure you get the right kind of alum powder, potassium aluminum sulfate. Some commercial alum contains potassium, and some doesn't. If you get the kind without potassium, your crystals will not grow. I got mine from Talas, the company recommended on the original website. Theirs will for sure work.
- You also don't need 5 pounds. I've made a dozen crystal eggs, and I've only used 2 pounds or so.
- Eggshells or plastic eggs
- We used a combination of real eggshells, broken in half, and plastic Easter eggs. You can scrutinize our finished eggs in the slideshow below, but I don't think there was a difference between the crystals grown in the plastic and real eggs. They all came out really well.
- The geodes would look better if you cut the egg lengthwise, but have you ever tried to break an egg lengthwise? It's pretty close to impossible. Joe did blow out an egg and cut it in half lengthwise with his Dremel thing, but that's a lot of work. I guess if you want to make perfect geodes or if you're doing this for a science project, you might want to go to those great lengths, but we were just doing this for fun (and to share with you).
- Glue
- I'm pretty sure that any old glue will work. We used cow glue (that's what Grace calls Elmer's).
- You're going to coat the inside of every eggshell or plastic egg with glue, so you'll need a lot of it.
- Paintbrush
- You only need this to paint on the glue.
- Don't forget to wash the glue off before it dries. If you forget, you might as well throw the paintbrush away. Ask me how I know.
- A box or something else to put your eggs in to dry
- Wet alum crystals are very delicate. In fact, you may knock some crystals off when you pick the wet geode up out of the solution. You will want some kind of container that will allow each geode to dry without being jostled.
- The box we used was sent to us by International Delight, the creamer company. I don't know if you can buy these boxes in the store or not. It was really handy both for drying and for storing our geodes.
- If you're having trouble coming up with something, you could cut rings off of a toilet paper roll, and set the wet eggs in the rings. The rings would be about the right size and shape, and they would hold the geodes up off of the table or countertop.
- A 4-cup bowl (not pictured) - This is to mix the solution in.
- A spoon or whisk (not pictured) - For mixing the solution
- A measuring cup (not pictured) - You will need to measure ¾ of a cup of alum powder.
Sorry that I only put the consumables in the picture. I didn't think about the bowls and stuff, but they are obviously necessary.
Before You Can Grow Crystals
This is like Step 0.
The day before you want to grow crystals, you have to prepare your eggs. You have to do it the day before to allow the glue to dry. I suppose you could just wait a few hours, but the glue really needs to be dry and hardened before you put it in the alum solution.
First, paint the eggshells with a thin layer of glue. If you want crystals to grow around the edge (for a less authentic, but cooler-looking geode), make sure to paint a little glue on the outside of the rim of the eggshell.
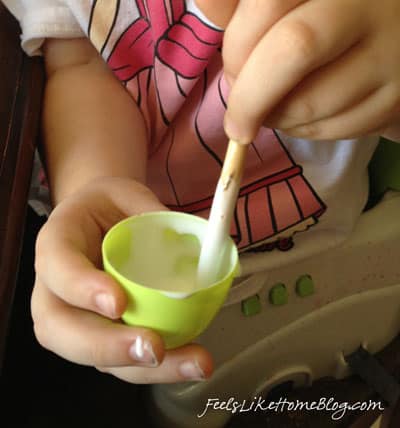
A thinner coat is better, but as you can see, it's not a make or break issue.
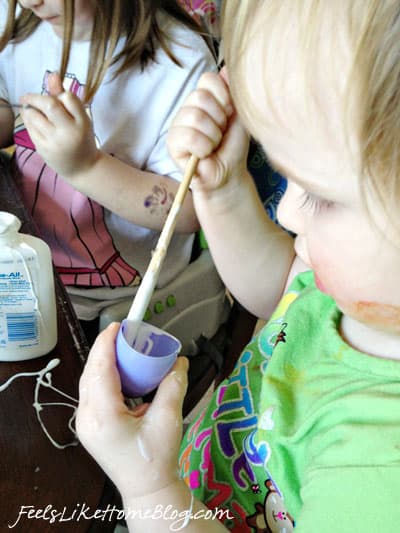
Both of my kids were thrilled to paint eggshells with glue, so I let them go at it. I did have to remove ⅔ of the glue afterward to avoid deep puddles in the bottom of each egg. Puddles won't do.
While the glue is still wet, sprinkle the egg with alum powder.
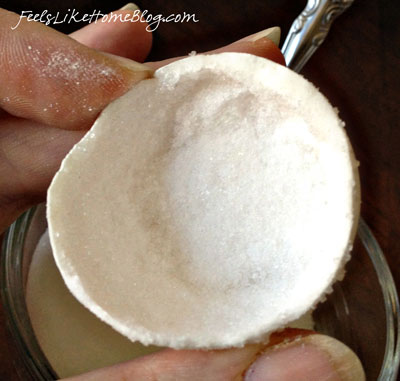
Alternately, you can fill the eggshell up with alum powder, roll it around, and dump the powder back out. I don't recommend this method, but it's what we did for most of our eggs. My kids are too little to understand "sprinkle;" they're dumpers.
Don't neglect the glue on the outside of the egg. You can turn the egg over into a small bowl of alum powder to get this part.
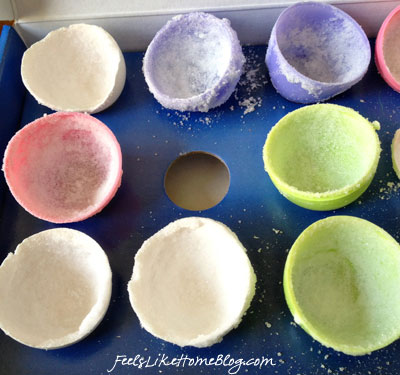
Do this for a whole bunch of eggshells at once. It's a little messy, and you don't want to go back and do it every day or two, one eggshell at a time. That would be a serious pain in the neck.
Now We Can Grow Crystal Geodes
Okay, so you've let those eggs dry overnight. Now you're ready to make your alum solution.
If you want to use dye, stir it into 2 cups of water. We used Easter egg dye once and food coloring a couple of times. Neither of them worked particularly well. Martha Stewart recommends an expensive powdered egg dye that is supposed to get better results, but I wasn't willing to shell out the dough for it.
I liked the clear crystals best anyway.
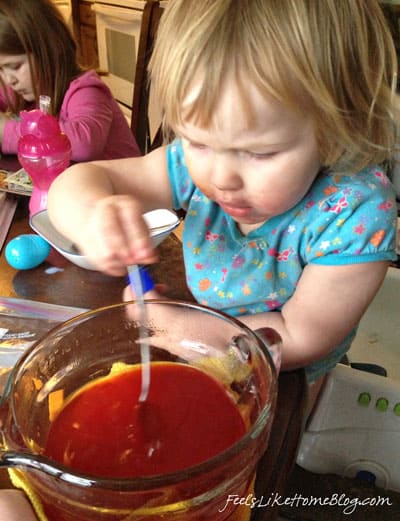
Heat the water to almost boiling. I put mine in the microwave for 5 minutes. It think it boils during that time, but as soon as I open the microwave door, it quits. Works for me.
Pour ¾ cup of alum powder into the water and stir it for longer than you think is necessary. If there are any crystals in the bottom, you need to either stir longer or reheat the solution or both. I usually put mine back in the microwave for 2 minutes, and all the extra crystals dissolved.
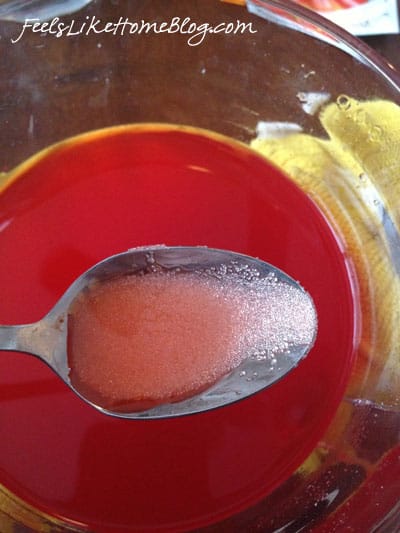
The idea here is that you want a saturated solution. In other words, you want the water to be holding as much alum powder as it can possibly hold.
There's a fine line between saturated and crystals sitting around in the bottom of the bowl. If there are crystals in the bottom of the bowl, they will draw the alum away from your geodes, and the crystals in your geode won't get as big.
If there's anything else in the bowl - dust, bits of glue, unidentified floaters - strain the solution with a strainer. It's important that there aren't extraneous bits floating around in there. (I had to strain ours a couple of times.)
On the other hand, if your solution isn't saturated, when you put your alum powder-coated egg in the water, the alum powder will dissolve and your egg will be bare. That happened to one or two of our eggs. They still got crystals inside, but they didn't cover the whole egg, just the bottom where they settled out.
The good thing about this project is that it's pretty forgiving. As the solution cools, crystals are going to form on the bottom of the bowl. As long as your egg is in the bottom of the bowl, it's going to collect some crystals, even if you've messed up practically everything.
When you're satisfied that the mixture is sufficiently saturated, drop an eggshell or two into the mixture. We did all of ours two at a time.
Now, you wait.
Leave it alone until tomorrow. Pick up the eggshells tomorrow, and see how you like them. If you want the crystals to grow bigger, carefully (!!) put the eggshells back in the solution, and wait until the next day. If you're happy with the size of the crystals, take them out and start over with a couple of new eggshells.
The giant one in the bottom right, below, soaked for three or four days.
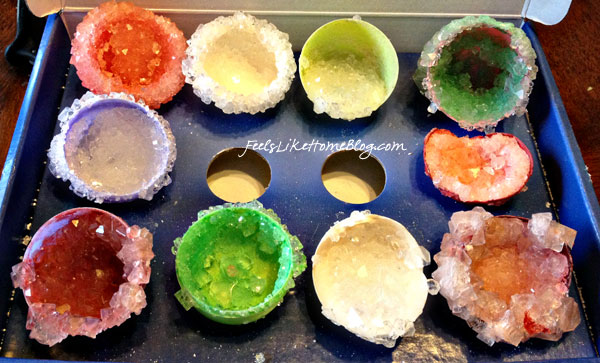
You can keep reheating and re-saturating this alum solution until you're sick of it. When that happens, pour it down the drain, wash your bowl, and be done. Alum is an edible pickling spice, so it's completely safe.
But don't go eating a bunch of it or anything. Safe and healthy are two different things.
The slideshow below has up-close pictures of most of our crystal geodes. Allie attacked them before I'd gotten to take pictures of all of them, and I forgot to go back and finish.
On that note, they all survived Allie's attack, so the crystals are fairly durable once they've dried.
Alum Crystal Science
I didn't tell Grace most of what's below. I share it now because I assume you're not 5, and you have a longer attention span that she does.
Alum crystals are awesome to grow because many different factors affect their crystal growth.
- You can experiment with cooling rate - let the solution cool normally, cool it faster with a few pieces of ice, cool it really fast with a lot of ice (be careful if you're using a glass bowl - freezing a glass bowl full of hot liquid is a recipe for a broken bowl and giant mess), cool it super slow by keeping the solution in a pan on the stove at a very low temperature. One of the above will result in a few huge crystals and one in scads of tiny crystals.
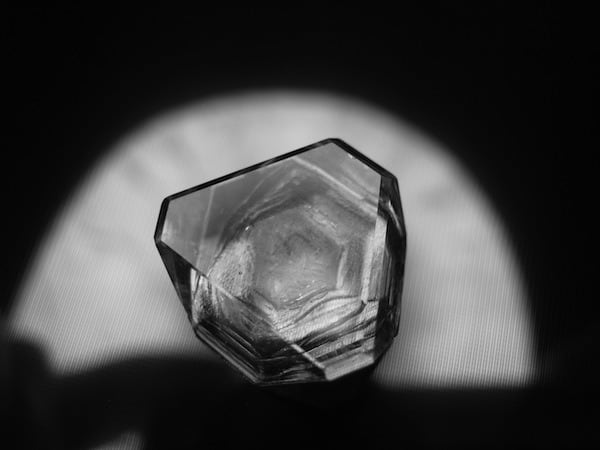
- All substances have a preferred crystal shape, depending on the alignment of the atoms or molecules that make it up. Potassium aluminum sulfate's crystal shape is isometric. In other words, this alum likes to make octahedrons. (Think two pyramids fused at their bases.) If you look at my slideshow, you will see very few octahedrons.
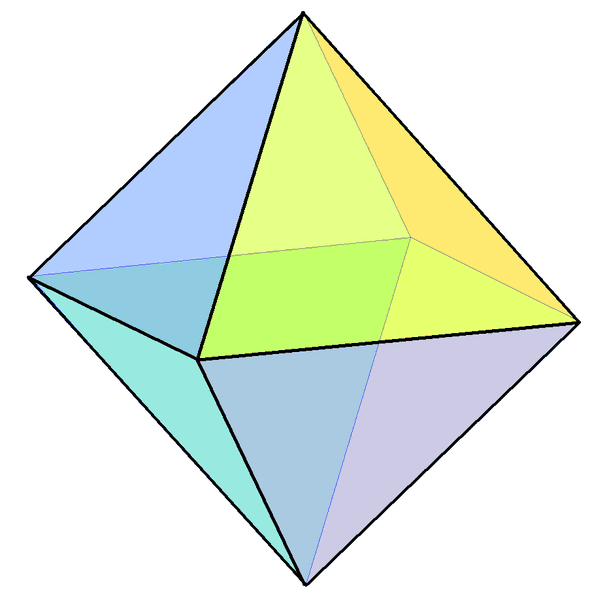
The catch is that crystals can only grow in their preferred crystal shape if they aren't squished. If they're crowded (as yours will most likely be), they grow into whatever space is available. It's not unusual to see almost-trapezoidal crystals like the one below where the octahedrons have interfered with one another. You'll see all sorts of other shapes, too.




Julia says
SUPER COOL! We tried to make these once with Epsom salt, but you are inspiring me to try again. I love the colors!
Tara Ziegmont says
I've never tried epsom salts. I think I have a gallon of them. How do they turn out?
Haylee Rohn says
I don't know
Michael says
I use Borax (Sodium Tetraborate) and they turn out very nice!
Judy says
What ingredients did you used and what amts. Thank you. I have been having trouble find the right alum.
Jackie Higgins says
These look great and I loved the slideshow that allowed me to see the crystals close up. Now I want to make these! My dad is a retired science teacher and loves doing this kind of stuff with all the grandkids so maybe I'll just send him over to read your article 😉
Julia says
They are supposed to crystallize like yours did, but we didn't get any crystals to form. Probably our solution wasn't concentrated enough. We might try it again.
Gina says
As a Homeschooler with 3 science nuts in the house this is just fabulous. We will be doing this project soon. Thanks for the tutorial.
Tara Ziegmont says
Fun! Depending on their ages, you might consider letting each of your science nuts prepare her own eggs and solution. Every single batch of these crystals turn out differently, so it would be fun to see how each kid's eggs look. It would be a great time to talk about variables in an experiment - the ones you can control (amount of alum, amount of water, length of time you let the crystals grow) and the ones you can't (imperfections in the different bowls, invisible differences in the arrangement of the alum crystals {when they dust the wet glue}, visible differences in the amount of glue used, and so on), as well as the constants across all of the bowls (temperature variations in the room, amount of light exposure, type of egg used).
Beth says
This is SO cool! What a fun clever idea!
I am featuring this on TGIF this week here: http://www.123homeschool4me.com/2013/03/tgif-linky-party-69.html - Feel free to grab an I was featured button if you like. Thanks again for linking up and sharing your creativity with the rest of us.
I hope to see you linked up again soon! Have a WONDERFUL Easter,
Beth =)
Ticia says
I love how yours turned out, what a great job. I saw that pin too, and I want to do this.
Thanks for linking up to Science Sunday!
Tracy says
These look fabulous, and AAAAARRRRGGGGGHHH!!! we just had our Science Fair last night, and these would have been FANTASTIC! And so much fun and so cute. I've totally bookmarked this page for next year. Thanks for the great, explicit details. Adorable AND educational!
Mom to 2 Posh Lil Divas says
So cool! The finished geodes look amazing - so colorful. Thanks for sharing these on the Sunday Showcase. I have wanted to make some for years and never get around to it. You have inspired me. Featured this on this week's Sunday Showcase.
Tara Ziegmont says
Thank you!
Hannah says
Impressive! I pinned this for summer break when our playscool willhave school aged children!
boopila says
This is so cool. My mom's birthday is coming up and I've been racking my brain for some personalized gift ideas that my kids will actually enjoy. Because G-ma is a decor-holic, and macaroni posters are the opposite of tasteful or chic (cute as they may be), I've decided this would be the perfect project. Not to mention we'll be able to use eggs from her own hens. Yay science! Props to Auntie Gomo who sent us this link.
Jeffery says
I simply wished to take a couple of moments and let
you know that I enjoyed reading the post. I
truthfully don't think many people know exactly how much effort that goes into putting together a good web page. I know that this is sort of random however it bothers me occasionally. Anyhow excellent post.
Mike says
Wow this is awesome , I tried this before but it didn't turn out this good. I might give it another go sometime. 🙂
Antoinette says
This is great! I can't wait until my kids are old enough to appreciate this.
Haley says
I tried this project with my little ones and the crystals did not form so we tried it agian and it still would not work I do not recommend this😞
Tara Ziegmont says
I'm sorry that you weren't happy with your results. Where did you get your alum powder? As I said in the post, if you don't get a very specific type of alum powder, the crystals will not form. You might try Epson salts. They will also form crystals and may be less temperamental. I haven't tried them yet.
Kari says
I did this in elementary school with sugar and salt in plastic cups.
tina says
I pinned this & shared on FB. Im on my phone - hopefully it worked....
Thanks!
ken says
My kids love these crystal experiments! They recently made their own video on Alum crystals: https://www.youtube.com/watch?v=pfy9mjNs7yk&list=TLsEBie84rHA0Jhdrj5dmhmFT9H74qlRE6
Robin Romack says
I am sooo not good at science though i like it. I talked my high school daughter into this for her science fair after she did something else last year. The plan to compare the crystals of 4 solutions. sugar, alum, vinegar/salt, and borax BUT i am sadly somewhere between 5 and 50 on the understanding scale. we tried heating and stirring and first just poured them in the eggshells, reread and then reheated solution and poured it around the the whole shell. It is the second day and growth looks pretty minimal--she switched projects at the last minute to this and claims every suggestion of mine gets her a horrid grade. (In 4th grade we had to do a building from our town and being a Landscape Arch I insisted on this old hotel which we made to scale with lights and researching history etc--she got a check minus sooo alot rides on this) Anyway. Do you take them out of the water to grow, take them out of bowl and leave solution in egg, take the solution out of bowl and reheat/refill, set the whole darn thing on the heater, leave all in bowls and put on heater??? I feel like an idiot and failure right now as she pointed out it's one third of her grade and somewhere (none I saw) someone called this project hard.
Tara Ziegmont says
My first guess is that your solutions weren't super saturated. Did you heat it and stir in as much of the solid as would dissolve (leaving some in the bottom of the pan or bowl)? Then you just strain out the excess solid and have a super saturated solution.
Where did you get the alum? It's possible that you used the wrong kind of alum, but the sugar and borax should definitely have worked if you had the solution super saturated.
You put the eggshell right into the bowl of saturated solution and leave it there for a few days until the solution has cooled and the crystals have formed. The solution has to cool or else the crystals won't form. If you keep it hot, you'll never get crystals. Also, the faster the solution cools (like if it's in a cold draft or something), the smaller the crystals will be. So keep it in a warmish spot - but not a hot spot like on a heater or on the stovetop.
Robin Romack says
Thanks for the quick reply!
Tara Ziegmont says
oh, and! Don't forget to glue some of the undissolved crystals into the eggshell. Those are the seeds on which the crystals will form. Crystals can form without them, but they speed up the process.
Emily Sorensen says
I make Christmas ornaments by making a saturated borax solution and hanging shaped pipe cleaner on a sting in it overnight or so. The cooling borax adheres to the pipe cleaner and beings to form crystals much like sugar would when making rock candy.
DO NOT ATTEMPT TO EAT.
Jamie says
Great step by step. I homeschool my 2 boys, and we just started a new unit in science about rocks,and rock formation. Next weeks lesson is all about crystals! How fun for us to have this awesome project to go along with it!!
Alwyn Lefae says
Such a cool little experiment! I will deffinitley have to try this in dorm this weekend when I go to town!!! My only question is: Does it absolutely have to be alum? Because I'm not sure I can get alum in town (you'd think so, but it's a small town, and who uses alum anymore?!). I will deffinitley look, but if someone else used some other crystal-making solution that would be easier for a student to get on a tight budget, that would be amazing~
Tara Ziegmont says
You can make crystals with epsom salts or sugar pretty easily.
FRUSTRATED says
We have so many different ways to get these crystals to grow in the last couple weeks & all we ever get is SLUDGE in the bottom of the cup. We have THOUGHOUGLY MEMORIZED these directions & still no crystal geodes! Just eggs with crystals glued to them sitting in sludge! We are using the correct POTASSIUM ALUMINUM SULFATE...WE DROVE TO A LABORATORY SUPPLY STORE & BOUGHT 16 oz of "LABORATORY GRADE" FOR OVER $20!! . Ridiculous, but the only thing we found in stores didn't contain the potassium like some commenters had warned was necessary. It was in irregular, small crystals vs "powdered" form but that should not make a difference once dissolved. You'd also think the crystal form would also be a good base for the crystals to adhere to in more of a geode appearance. Our experiment involved testing how/if environmental temp (fridge, room & warm) differences affected the crystal formation...problem is ABSOLUTELY NO NEW CRYSTALS FORMED! The glued on ones remained in place but the dissolved, saturated, filtered through coffee filters alum...we tried so many things over the course of the past couple weeks... just precipitates out to the bottom in a fine grained sludge. We tried forming "true seed crystals" to glue to egg shells...we can't even get THOSE, again just powder residue. We used distilled water so we had no contamination from our well water. You use metal spoons so our thought that ions from the steel somehow got introduced during the stirring of the heated solution and changed our chemical isn't probable... We're done pouring any more time or $ into further trips to the laboratory store. This supposedly fool-proof project DID NOT work for us. So much for trying to do a project with "common household things"... Back to the drawing board. The science fair is a week away & we will be switching to rock salt (which we can obtain more easily in larger supply) & trying other methods described out there. 6th grade son are EXTREMELY FRUSTRATED & parents are too because we have to keep trying to coach him to try again & change what might have gone wrong... to heck with scientific process when it doesn't ever do what it's suppose so the kid runs out of time & QUITS!!! We should have never wasted our time with this project!
Tara Ziegmont says
I'm really sorry this happened to you. I don't have experience with any alum except that sold from Talas, and it has worked every time I've ever tried the experiment. You might want to try epsom salts or sugar. They usually give good results, too.
Peter says
I saw a workshop recently with 20 primary school children where this worked fine for all of them. They had it done within an hour, put it in a fridge and had crystals a couple of hours later. Sometimes it's best not to be too careful. For instance, using distilled water might be your problem - just use tap water, it should work fine. (As an aside, when brewing beer, tap water is needed because it contains minerals that the yeast enzymes need, distilled water is no good.)
Also, just add borax (or epsom salts) till no more dissolves - that is, some settles on the bottom and won't dissolve - then just pour off the solution at the top (it will be saturated). Just get your experiment to work and then decide if you want to try again to get better results.
You can see from Tara's description that she has done the experiment multiple times in order to optimise the results, but when you first try it it's best to start out "quick and dirty" then optimise.
Peter says
Oops, I meant to include alum as one of the possible chemicals to use for crystal growth. Also, I always find videos often make procedures "crytsal clear" (excuse the pun). Emmymade has a good crystal growing video, plus lots of other ideas, https://www.youtube.com/channel/UCQjEdAaQ0zzbrsD-biel8eg
Tiffany LeClair says
I have done this every year for the past four years with my fourth grade and it has worked perfectly every time. I order my alum from Carolina biological, and have never had a problem. When we had tried grocery store or spice quality alum it didn't work, just as you have already pointed out.
Sharon Abel says
Tara I have a 5 year old grandson that we are always doing things together...when he spends the night we always work on 'Projects'...lol..this is one we'll be trying soon...Am sorry for all the negitive responses from some of the people. I won't comment on the ones that got me a little ticked, this is suppose to be a fun thing to do with the kids...am thinking up ways to incorporate this into other fun projects with the little ones! Keep up the fun ideas!
Natali says
Importantly, all very easy to do with children. Will definitely try.
SherriSue says
I have a couple questions;
Can you remove the crystals from the shells after they have completely dried?
Can you use different small plastic containers instead of egg shapes?
Tara Ziegmont says
I've never tried to remove the crystals. You'd have to try it and see. They may break when you try.
You could use any shape plastic container. For that matter, you could use almost any surface to grow the crystals on. The important thing is starting with the seed crystals, and the big ones will grow from there.
billiejo says
I've tried this over and over and verified the correct alum. We can't seem to get any crystals. I am trying with the borax this week. I'm wanting this to be successful because this will be an activity at our Harry Potter Hogwarts on the Bayou camp. The students are make g the sorcerer stone. How do you get your plastic eggs from not floating to the top of the solution?
Tara Ziegmont says
I didn't have to do anything. They just sunk. They weren't whole, of course, just halves.
Nancy says
My first attempt failed. I now have the correct alum and am ready to try again. Are you suppose to submerge the eggs while the solution is still hot/warm? I let mine cool the first time and that may have been one of the issues.
Tara Ziegmont says
Yes, submerge the eggs while the solution is still warm. That way the crystals can form as it cools down.
Mercy says
million dollar question
You mentioned they're quite sturdy once dry. Sturdy enough to drill a tiny hole in it? Or would it crack, explode, shatter, die.... You get the gist 🙂
Tara Ziegmont says
I think it depends on how tiny the hole is. They might stand up to a really tiny drill bit.
Dianah Rutledge says
I want to try this. I have a question. How long do the crystals last?
Tara Ziegmont says
They will last pretty much forever. We got tired of ours and threw them out, but they really are hard and durable.