
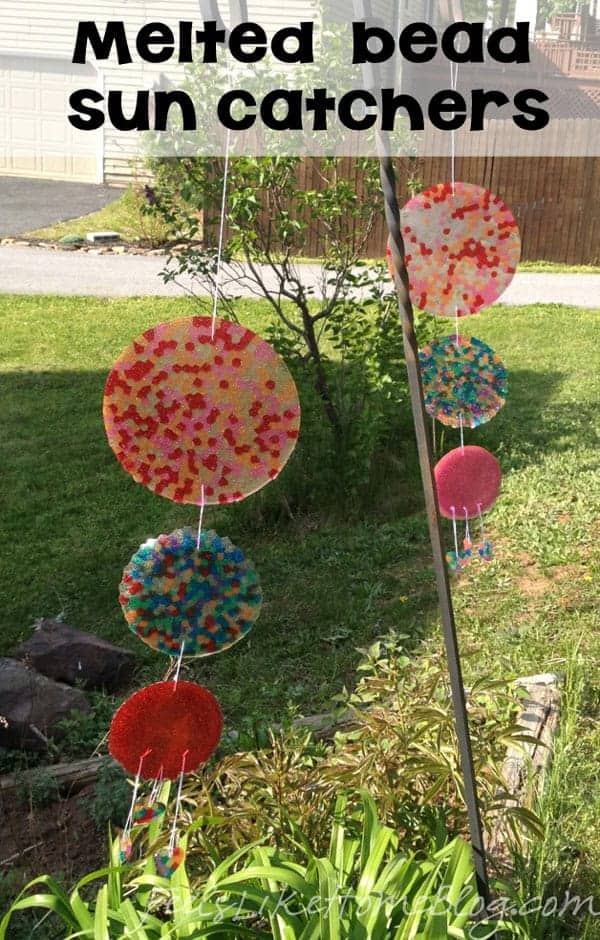
How to make melted bead suncatchers in the oven or gas grill - Fun, easy activity ideas for DIY gifts made by kids or adults. We used these beautiful projects as Mother's Day gifts but they would also make nice baby mobiles or wind chimes or even Christmas ornaments. Can be made any shape depending on what kind of cake pan or muffin tin you use. Perfect summer craft!
This is an awesome homemade Mother's Day gift that you can make in an afternoon. If you are my mother, mother-in-law, or older sister, you should stop reading now.
Or keep reading and ruin your surprise. It's up to you.
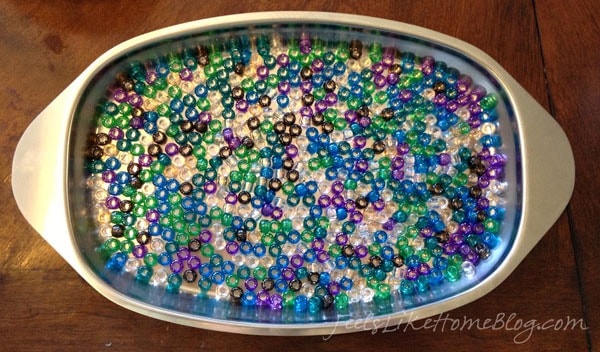
A few weeks ago, my little sister sent me these two photos on Facebook.
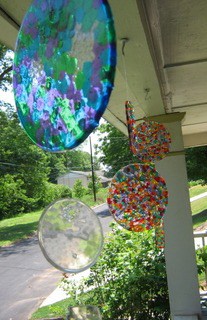
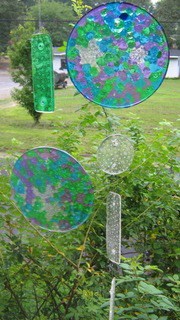
I thought they were really neat, but the link with them was spammy. I scoured the internet to find instructions to make them, trying all kinds of different searches on Swagbucks, Google, and Tineye.
Finally, I found the original crafter's information on Craftster.org (a message board for crafters).
After reading over fifty pages of explanations, warnings, and tips, I decided we could make these melted bead suncatchers.
Melted Bead Suncatchers Materials
Unfortunately, I didn't take a picture of our materials. Sorry.
Here's what you'll need:
- Glitter Pony Beads - I bought these same ones at the craft store. Any plastic pony beads will work. If you use opaque pony beads, the light won't go through your suncatchers (there is one opaque bead in one of my pieces below). Plain transparent pony beads are a little cheaper than ones with glitter, but we really liked the glitter look and spent the extra money.
- Metal pans - Any metal pans should work, but I wasn't sure I wanted to eat out of a pan that I'd melted plastic beads in. The plastic does leave a ring around the edge that I couldn't get out. We gave ourselves a budget of $15 and hit the Salvation Army Store. We got all shapes and sizes of dishes, including a really neat heart-shaped mini muffin pan. Most of the dishes were 99 cents.
- Normal cooking stuff - hot pads, timer, big metal tongs (for turning the pans)
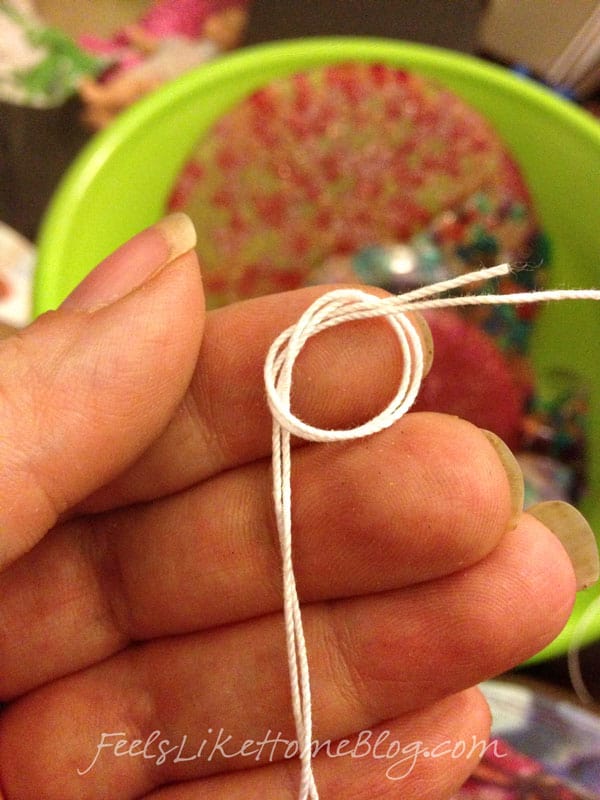
- String - You could use fishing line, but I can never get it to tie a nice knot, so I got Classic Crochet Thread in Size 10. It is thin enough to almost disappear in the sunshine, but it's sturdy enough not to fall apart.
How to Make Melted Bead Suncatchers
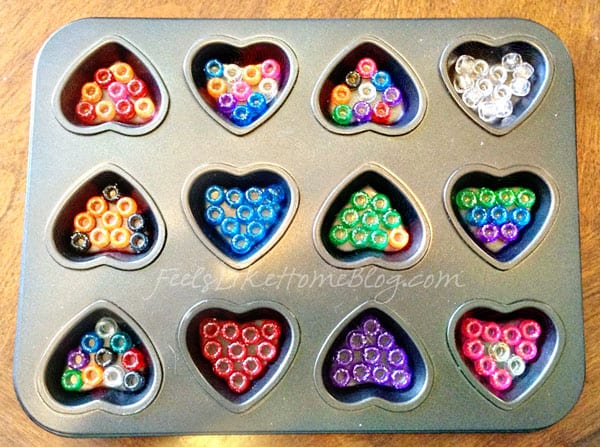
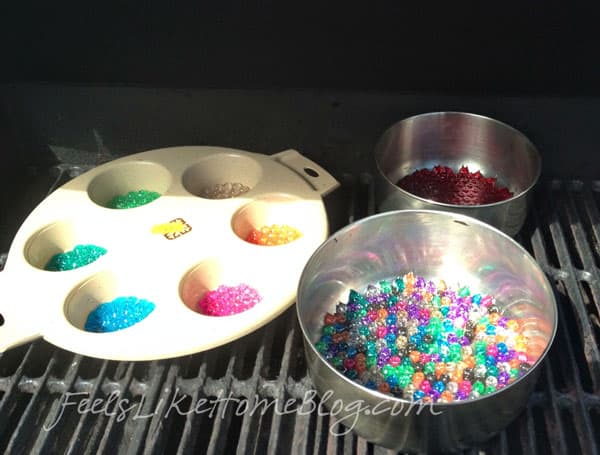
1. Fill the container with a single layer of beads.
Get as many beads as possible into the container without allowing any to jump up into a second layer.
Grace was really into this part for about five minutes, long enough to fill up the heart tray below.
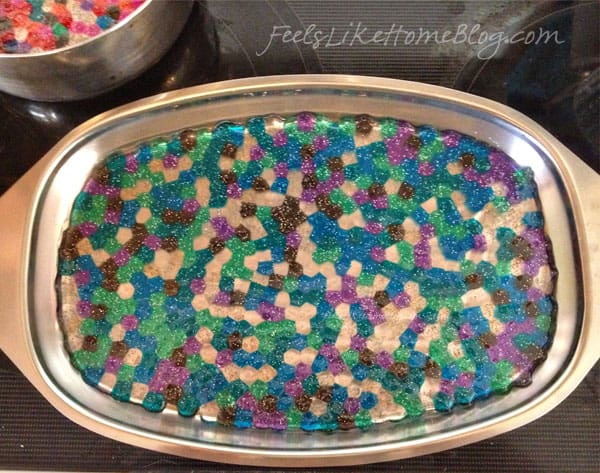
The hearts below worked pretty well, except for the ones that needed an extra bead. It took a lot of heating to get the two on the right side of the middle row to look like hearts. They didn't have enough beads.
Another thing to note is that the beads that are flat (with the hole facing you) will melt into a sort of hexagonal shape. The beads that are up on their side will melt into a square or rectangle. A combination of both makes for an interesting pattern.
2. Melt the beads.
After all my craftster.org reading, I decided to melt these in the oven. Preheat to 400, melt for 20-30 minutes, check for adequate melting, heat longer if necessary, remove and cool.
Simple, right?
I also read that the melting plastic produces copious noxious fumes, including possibly cyanide gas (no idea if that's true or not, just retelling what I read on craftster.org). I did this on a beautiful day, opening all the windows in the house, and turning on the ceiling fans. I gathered my three house cats and tossed them outside, and for the first time in ten years, plucked my turtle from his tank and moved him to a semi-enclosed part of the yard under Grace's watchful eye.
Then we waited. I came back into the house to check on the beads after 20 minutes, and they weren't done.
The fumes, however, were nauseating.
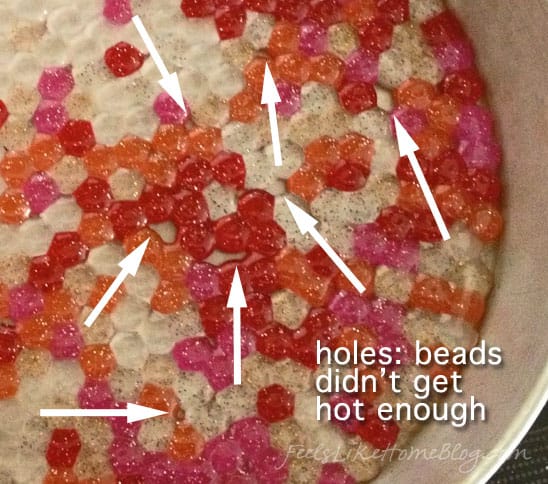
After 30 minutes, they still weren't completely done, but I didn't know enough to realize it. The arrows in the photo below show all the holes in my first suncatcher (partly due to not enough beads, but also due to not getting melted enough).
This one was in the oven at the same time. It melted perfectly, and is still one of my favorites even though I've now made almost twenty of these things.
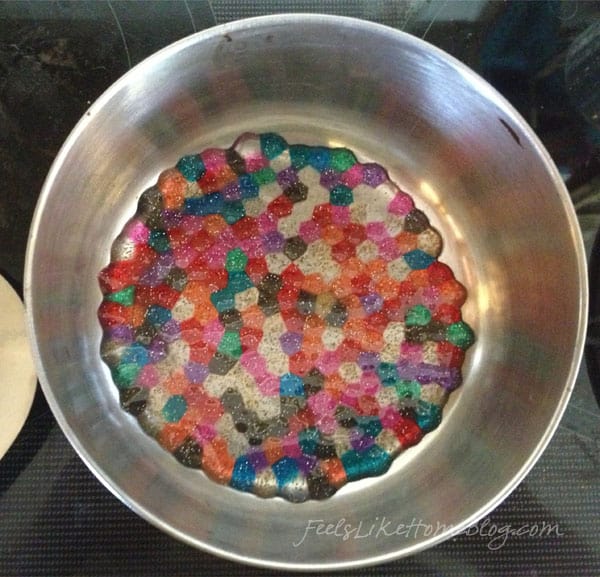
This one is my most favorite. I just love the colors and the pattern they made. This one took almost a whole bag of beads; it's really big.
During this outside siesta, the cats ran around, thrilled to have grass under their feet. The turtle was less thrilled.
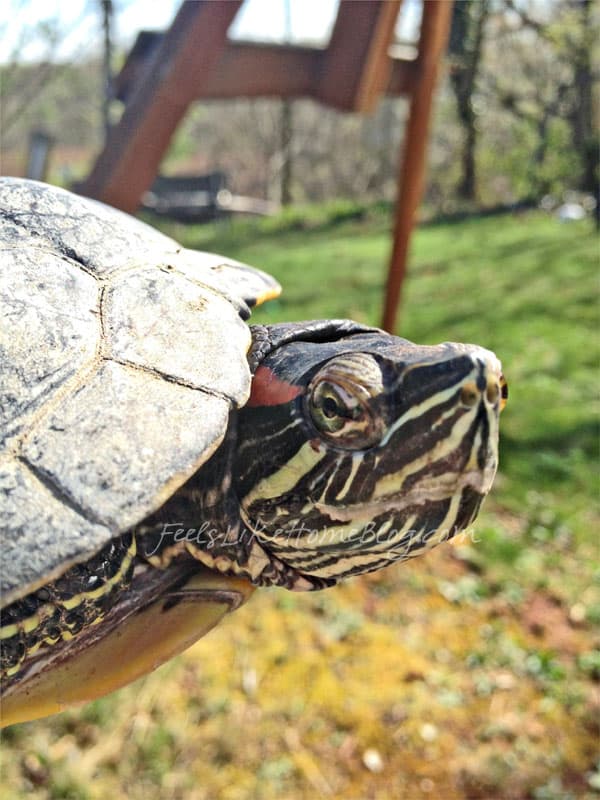
Obviously.
It took a good three hours from start to finish before our home was re-inhabitable, and I was hesitant to go through all that again. The turtle alone was a lot of work.
Joe suggested that I try melting the beads in our grill outside. It seemed like a good enough idea - temperature controlled, well-ventilated, and required no evacuations.
For the next set of beads, I sorted out colors (making an all-red one, all-pink, all-purple, and all-turquoise, as well as some different color patterns), preheated the grill to 400-ish, and got started.
The grill worked so much better. I highly recommend using a grill if you have one. There were hot spots in the grill that required a little bit of moving and turning, but it was so much easier to deal with the fumes on a small scale (just within the hood of the grill) than throughout my whole house.
A note on that plastic pan - This plastic pan from the Salvation Army said it was oven safe up to 400 degrees. I may have overheated it. Or maybe the melting beads simply fused to it? I don't know. The melted beads wouldn't come out. I ended up breaking the whole dish in half trying to get the pretty melted bead disks out of the pan. Stick with metal pans.
I also found I was better able to control the melting of the beads in the grill, probably because I wasn't trying to hold my breath to avoid breathing in poisonous fumes.
In the grill, the beads took a little less than 20 minutes to melt, and they took less than 5 minutes to cool outside. It was a sunny but very breezy day. I've since melted beads twice more using the grill, and the timing was about the same. My results have been consistently good with the grill.
3. Drill little holes in the plastic.
I knew I wanted to have a large piece, then a medium piece, then a small piece, then 3 hearts on the suncatchers for my mom and mother-in-law, and smaller ones for my sister and Old Grandma. I used a Sharpie to make a dot where each hole should go, and then Joe did the drilling for me using a very small drill bit.
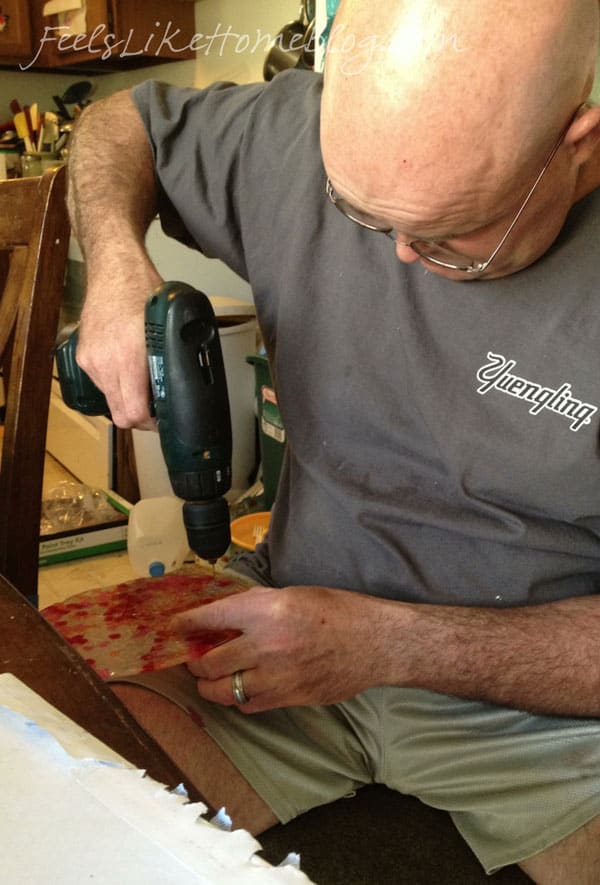
I do not recommend Joe's drilling method.
In fact, I only took this picture to show the Emergency Room doctor how Joe drilled a hole in his leg. Fortunately, I didn't need it, but that does not mean this is a safe way to drill the holes.. Put the suncatcher on a workbench or something.
Also, don't drill on the kitchen table, counter top, deck, or any other surface you want to remain nice. You have to put something underneath it for the drill to sink into.
4. String the pieces together.
I used the crochet thread (which was exactly the right size to string through the holes Joe made) to connect the pieces together. I played around with spacing, deciding on shorter strings between the bigger pieces and longer strings for the hearts at the bottom.
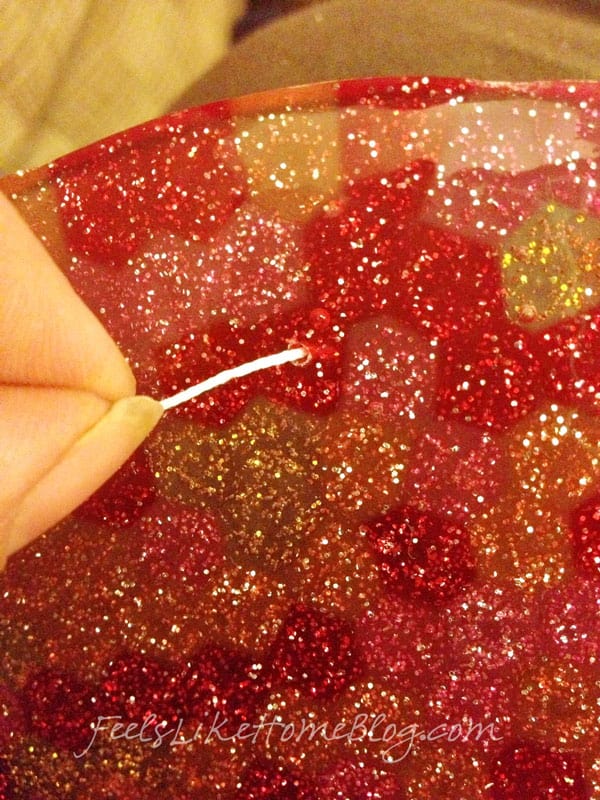
I just strung the string through all the pieces and tied a plain old knot in the two ends of the string, pulling it tightly and trimming the ends.
That's all there is to it! I know it seems like a lot of steps, but it goes really quick once you do it, and once you've made a couple of suncatchers, you'll be melting beads all the time. Watch out!


Alisha says
May want to clairfy that you don't recommend drilling over your leg like shown here. It's not safe, and all it takes is one nincompoop that isn't thinking clearly!
Tara Ziegmont says
You must have missed the 3 paragraphs under the photo. They're about why you shouldn't drill like that and how I expected to have to take him to the ER.
Deborah Jackson says
Joe has a spot on his shorts that looks suspiciously like BLOOD - ha!! His drilling method looks painfully similar to mine. Going to try this over the weekend - highs in the 50's here so good time to turn on the grill! Thank you.
Luann says
I use cooking bags to cook mine in the house so you don't have the smell. When you use the cooking bags you cook them in a 375 degree oven instead and they take alittle longer to cook. When they are done and you take them out of the oven leave them to cool in the cooking bags for 5 minutes. When you open the bag there will be some plastic smell come from the bag but not as bad as your whole house smelling. It is hard to tell how many minutes it will take for them to be done it all depends on size of container they are cooking in but start with 25-30 minutes.
Tara Ziegmont says
Very interesting! Thanks for the tip!
Rebecca says
Thanks for the insight! I did mine today with my daughter using turkey oven bags and could only smell something when I opened the oven.
Tara Ziegmont says
That's good to know. Thanks for the tip!
Liz says
thank you for this, my husband is not a fan of me cooking beads in the oven and he didn't want me to use all the propane for the grill
Liz says
when using the oven bags, do you have to do the normal add flour to coat the bag? or just cover the baking dish and secure it closed?
Tara Ziegmont says
Sorry, but I've never used an oven bag.
Liz says
okay thank you tara! trial and error i guess!! i will go to the dollar store to purchase them and try it tonight if it starts smelling then it wont work lol.
im making a 2 tier platter like: (a cupcake stand, fruit stand, jewelry holder) for christmas gifts...one size is a round cake pan the other size is a mini pie pan. i have 4 to make all at once and the oven would be the best bet, just dont want the icky smell, already did one and can't take the smell. i will let you know how the bag turns out!!!
judy says
I am trying this one more time today. I have done it two times. First time did not use the right kind of beads. The ones I used last night I had it too thick and adding two layers to make coasters. I can tell it did not get hot enough. Today I am trying it again with a single layer with the holes up I am hoping it melts the bead together instead of them just sticking together. Cannot catch much sun with holes in it. If you have other suggestions, please let me know.
Tara Ziegmont says
Definitely one single layer. 400 or 425 degrees. If they don't look like they're melted enough, keep them in longer. It might take 30-40 minutes or even more if your oven isn't really hot. Even in a single layer, they will be plenty thick enough for coasters. The plastic is slippery, though; I'm not sure how well the glass would sit on them.
judy says
We don't usually have much in glasses here. It would be water bottles or canned soda. So thinking it will work. I finally did one as a suncatcher and it did fine. Now just have to get a pan to make them bigger. I had hoped I could do multiple layers so I could make stepping stones but not sure that will work. I got some plastic beads that you use a a filler for pillows and it melts great. Thinking I can do that then put small round colored beads in first and they will stick to the white plastic as it melts. Going to try that next weekend. Thanks.
Tara Ziegmont says
Very interesting! Share some pictures on my Facebook page! I'd love to see what you come up with. http://Facebook.com/FeelsLikeHome
Kelly says
I made these last summer. I was afraid of the fumes in the house and grill. So we bought a toaster oven at Salvation Army! It's now our crafting toaster oven! We just put it outside and it worked great. We used a metal star mold from the dollar tree. Instead of drilling a hole, I just used a toothpick to make a hole, while the plastic was still soft. I guess the only negative is that you can't make large suncatchers in the toaster oven. Yours look really nice!
Chris says
Wondering if anyone has tried melting those colored stones used to put in flower vases. If so, could the same method be used? I don't have a kiln. I have looked at a few blogs, but they all used kilns. (and that was for marbles. I'm thnking these stones might have the same consistancy as marbles) please let me know if you have tried this. I am anxious to try some ideas I've been playing with in my head:)
Tara Ziegmont says
These beads are just plastic. The marbles you're talking about are glass, as far as I know. Neither a home oven nor a backyard grill get hot enough to melt glass.
Diana says
can i use the foil pans?
Tara Ziegmont says
I think foil pans would work.
Diana says
Thank you for getting back to me. I will let you know how the foil pans work.
Anita says
Thanks so much for posting all your hints! Our small crafting club will be making these tomorrow and you have saved us a lot of problems with your experience. I'll let you know how it goes! Thanks again!
Tara Ziegmont says
Finding all the problems is my special gift. 😉 I'd love to see pictures when you're finished. You can always post them to my Facebook page.
Lisa says
I so enjoyed reading about your suncatchers. I was looking on Google for ideas to make them and came across your page. I was quite engrossed until I came to the pic of Joe drilling the holes and your comment about the emergency room.....it was then i realised exactly how engrossed I was....lol. Thank you for that.
Tara Ziegmont says
hahaha! Glad you liked it. 🙂
Denise says
have you ever used the beads with letters or words on them? I've been wondering how they would melt.
Tara Ziegmont says
I haven't tried them, only because I like my finished suncatchers to be transparent and the ones with stuff on them are usually opaque. I suspect that the letters would morph into unreadable blobs, but the only way to know for sure is to try it. If you do, share a picture on my Facebook page so we can all see!
donna says
WOW! YOU COULD NOT HAVE MADE THIS PROCESS ANY EASIER. Thank you for all your helpful information. Looking forward to giving this a try when the cooler weather is upon us.
Cheryl says
Help!! Tried making coasters. I cannot get them out
of my muffin tins? Any ideas? What did I do wrong?
Tara Ziegmont says
Sadly, I have no answer. The same thing happened when I used a muffin tin, though my muffin tin was a sort of oven-safe plastic. Maybe to make that size, it would be best to line them with aluminum foil?
Linda says
oil your container your using. I threw away tw0 previos attempts until spouse segested oiling the container your using. WORKS GREAT.
Denise says
Mine stuck too. I had to like bend and pull on the tin to get them to loosen. they eventually did release.
Jackie says
I used a commercial pan for large cupcakes and it is stuck and the pan is too heavy to bend or twist. Any other options for me to try to get the sun catcher out? It is so pretty it just makes me sad:(
Tara Ziegmont says
Unfortunately not. I lost a couple because I couldn't get them out of the pans. I actually broke one of the pans in half trying to get the suncatcher out.
Jackie says
My husband solved the problem! He put the pan with the stuck sun catcher into the freezer for about 4 hours. He then ran hot water on the bottom of the pan, then gave a gentle rap against the sink and a perfect sun catcher came out. So proud of him and so happy to get the sun catcher out of the pan so I can use it
Tara Ziegmont says
Yay! I'm so happy that you saved it! I didn't think of putting it in the freezer. What a resourceful husband!
Donna Golliday says
How do I get the edges from being so rough?
Tara Ziegmont says
I just left mine rough. If you sand it, there would be scratch marks and stuff.
Lisa Byron says
I used the wrong kind of beads Mardi Grau beads
Tara Ziegmont says
Yeah, those definitely won't work.
Ira von Hombracht says
Thanks for all the good ideas. Started on mine yesterday. cooked them outside on the grill soooo easy. used small metal bracelet/earring beads for hole to eliminate drilling on the larger pieces. drilled holes on the smaller rounds but the metal piece makes them look very "professional".
one thing though, bought old pans from the thrift store and if there is any black or rust on them it will transfer to the shape...not so pretty! 🙁
has anyone tried silicone molds? i just looking for more variety in the shapes.
Melissa says
Any tips for the drilling? maybe my drill bits are too big idk but they heat up while drilling and then spin the disc, with sharp edges i might add so i have acquired some nice gashes on my fingers. My brother suggested making the discs cold so I have my remaining ones in the freezer. I love the way these look and can not wait to finish this project 🙂
Tara Ziegmont says
I think you're right. The drill bits are too big. Ours were tiny and went through very easily.
Wendy says
I put metal beads inside the design. The plastic stuck to the metal bead, and then I had a hole to hang things. Then you do not have to use a drill.
Joy says
First time yesterday. Used. Glass dish covered with tin foil and some using saved aluminum tart containers. I don't have a drill but it was suggested to put a toothpick in while still warm but I like the idea of using a metal round jewelery thingy or even a small washer would make it look more professional. I'm wondering if you can also melt those containers that fruit comes in (cut into shapes) and integrated with the beds?
Tara Ziegmont says
They are much thinner, so I think they would melt at a lower temperature and probably boil. If you try it, let me know how it turns out!
Marge says
I used small thin washers, they worked perfect. I found some that have little beady spikes around the hole and they look great...
Shelly says
Im making mine now, have been in oven for almost an hour at 400 degrees. I am using poni beads and they are somewhat melted, but is the top of the beads suppose to melted so its smoothe? Leaving them in longer to see if they melt all the way down. I've been wanting to do this for monthsm
Tara Ziegmont says
If you leave them in longer, they do get smooth. It depends on what look you want whether you take them out while they're still bumpy or if you leave them in to become smooth.
Kristine says
Hello, My daughter made some of the sun catchers with pony beads for a 4H project. We are looking for copyright permission to use this project. Thank you!
Tara Ziegmont says
Of course! Make all the sun catchers you want. 🙂 You can even sell them if that's your thing.
felicity woodruffe says
Please please do not use silicone we did it melted everywhere and every time we light the oven the kitchen morphs into a smoke ho u se
Sunny says
I just finished one.. It worked great on the BBQ,,,it only took about 15 min.,,,I did it in an old metal pie pan..when it didn't want to come out,I put it in the freezer for 20 min,,after I tapped it on the edge of the counter and it popped right out...Thanks so much for all the tips,,,I'll make lots more..
sherie mcclelland says
i wonder of u can stick a head pin in where you want a hole while heating or before it drys for jewlery purposes
Tara Ziegmont says
If you put the pin in and intended to leave it there, yes. If you wanted to remove the pin, I'm not sure.
angela says
Love the melted bead idea but worried about toxic fume issue . Does cooking in Turkey bags help
Tara Ziegmont says
I've never tried it, but I don't think it would matter much.
angela says
Well, I am shopping for a cheap used toaster oven, lol! I don't think I will try this indoors based on the fumes review. I am wondering if a combo of clear and solid beads would work or does it have to be all clear?
Tara Ziegmont says
Oh yes, that will work. It will give you an interesting pattern, too.
Janene says
do you spray the pan with Pam before you put beans in and then in oven or BBQ pit?
Tara Ziegmont says
I did not spray the pan with anything. I just put the beads right in.
Shannon S says
Hello! I am excited to do this project with my 3 year olds and will be using my grill. Did you close the lid when you did on the grill or leave it open?
Thanks!
Tara Ziegmont says
Keep the lid shut as much as you can to keep the temperature constant and hot enough to melt the beads.
Tracy says
Wanting to make some suncatchers of Luther Roses for our church's celebration of the 500 anniversary of Luther in the reformation. Couldn't fine any but think I can use this idea with heart shapes. How would you suggest gluing them together?
Tara Ziegmont says
I would think any heavy duty glue like E6000 would glue them together. Maybe even a hot glue gun would work.
Pip says
Hi
We used a bbq and the beads have discoloured and I can't get them out! I think it may have been too hot as the plastic seemed to be boiling... Our gas bbq has a flat hot plate on one side and an open grill on the other - which do you use?
Tara Ziegmont says
If the beads discolored, I would agree that they were too hot. You definitely don't want the beads to boil. I have an old, non-fancy grill, and I just put the pans in on the grates over the fire, but I didn't put it on too high.
I did have one pan where the melted beads wouldn't come out. I ended up breaking the pan (!!!) and the beads trying to get them out.
BECKI says
Enjoyed reading this and learning more ideas for craft projects. As I read I couldn't help but to realize some were having issues with them not coming out. Just a thought, as I have not tried this yet, but would applying parchment paper work for easy removal? Just a thought. Also, to the one questioning about the glass beads...i have been taking my glass marbles and baking them and then soo. As they come out putting them in an ice bath. They rack so pretty and can be used for many different craft ideas. However they have to be glass beads 100% to work. Some of the filled in white marbles are not all glass and didn't work.
Have fun crafting people and keep ideas flowing for us all.
Dee says
HI! I'm not sure you are still available for comment, given the date of these posts. I wanted to know if using clear glue would affect anything. I wanted to do this with my students but would need them to glue beads down to the pan so they wouldn't move. I suspect it would take two classes for them to complete it. I would also need to take them home to melt them.
Tara Ziegmont says
Hi Dee, I do still read and respond to comments, and I still post new stuff regularly as well. 🙂 I have never tried to heat glue, so I'm not sure how it would work. I would be concerned that the glue might turn brown and also concerned that the beads might not come out of the pan once the glue cools. What I do know is that if you put the beads in the pan in a single layer, you can pack them in pretty tight so that there would be no need for glue. Then you could stack the pans one inside the next to keep them safe for transport. Good luck!
Tammy says
My two grandsons are making their Momma sun catchers for Mother’s Day tomorrow. I hope they turn out! Lots of good tips in the comments.
Cindy says
I am hoping you get this. I made some of these tonight for the first time. My husband put them in his gas grill and I’m worried he may have gotten them too hot. They do not look burned at all and turned out very pretty but…. I cannot get them out of the pan to save my life. I used a metal muffin pan, one layer. 400° for 20 minutes. Any suggestions?
Tara Gerner says
That happened to me twice, and I wasn’t sure why either time. Unfortunately, I couldn’t get them out and ended up having to throw the whole thing away. 🙁 I’m sorry.