
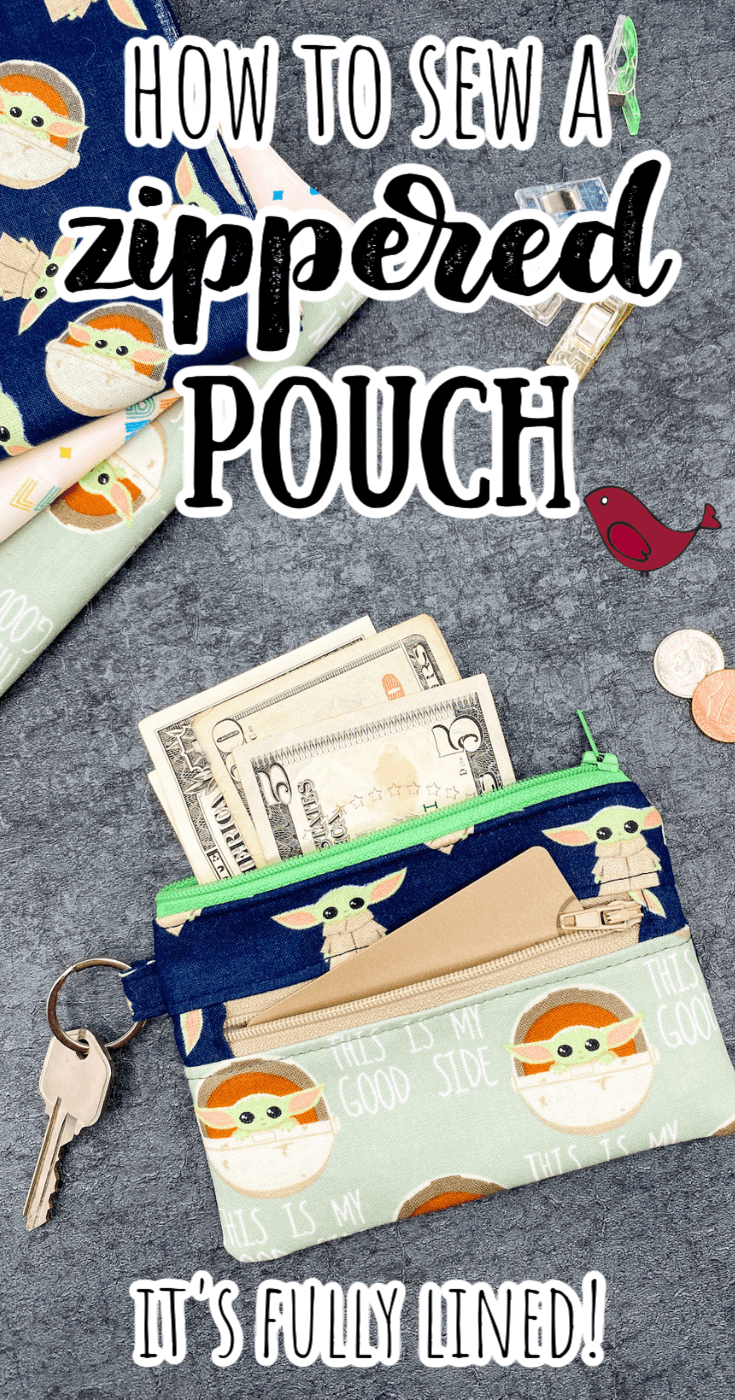
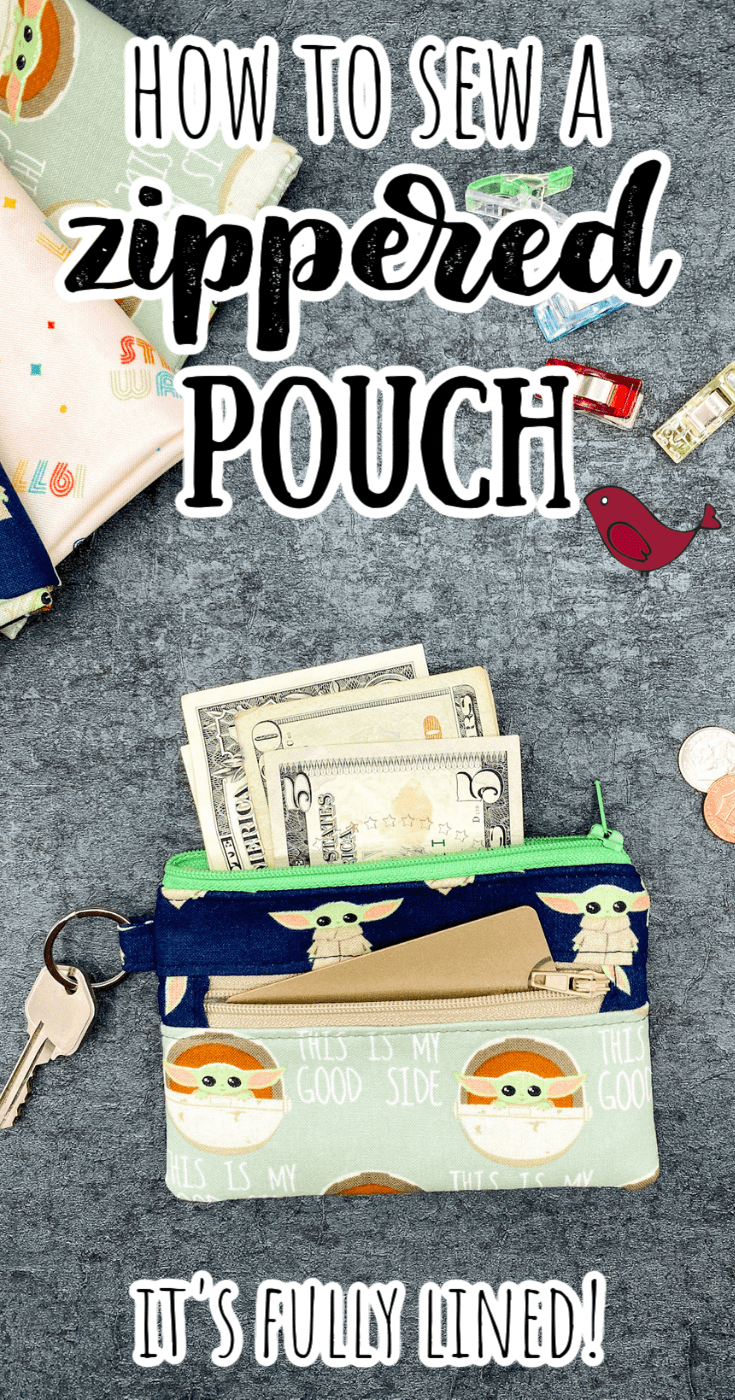
If you want to create a zippered coin purse or pouch but have been hesitant because you haven't sewn a zipper before, then this is the tutorial for you. This is a super easy zippered pouch and once you have created one, more will be simple & easy. You can make these zippered pouches from your fabric stash, and they make great gifts.
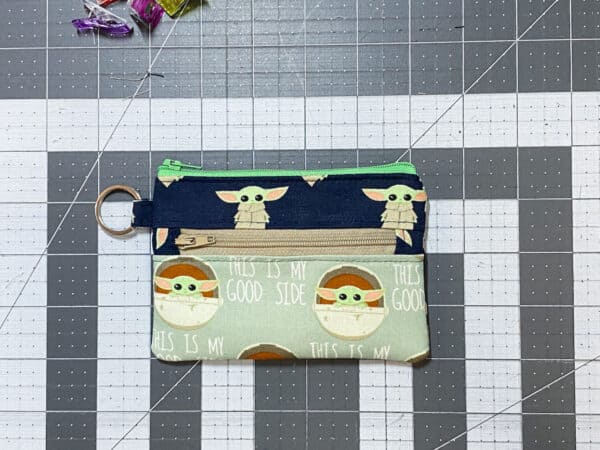
My teen is totally enamored by Grogu (known as Baby Yoda to the rest of us).
Her dad got her hooked on The Mandalorian, entirely because of Baby Yoda, and she has watched every episode with him.
I sewed her a hoodie with Baby Yoda wearing a mask and little germs all around him, and I gave her a Build-A-Bear Workshop Grogu as well as some other Grogu dolls and stuffies.
She's a fanatic.
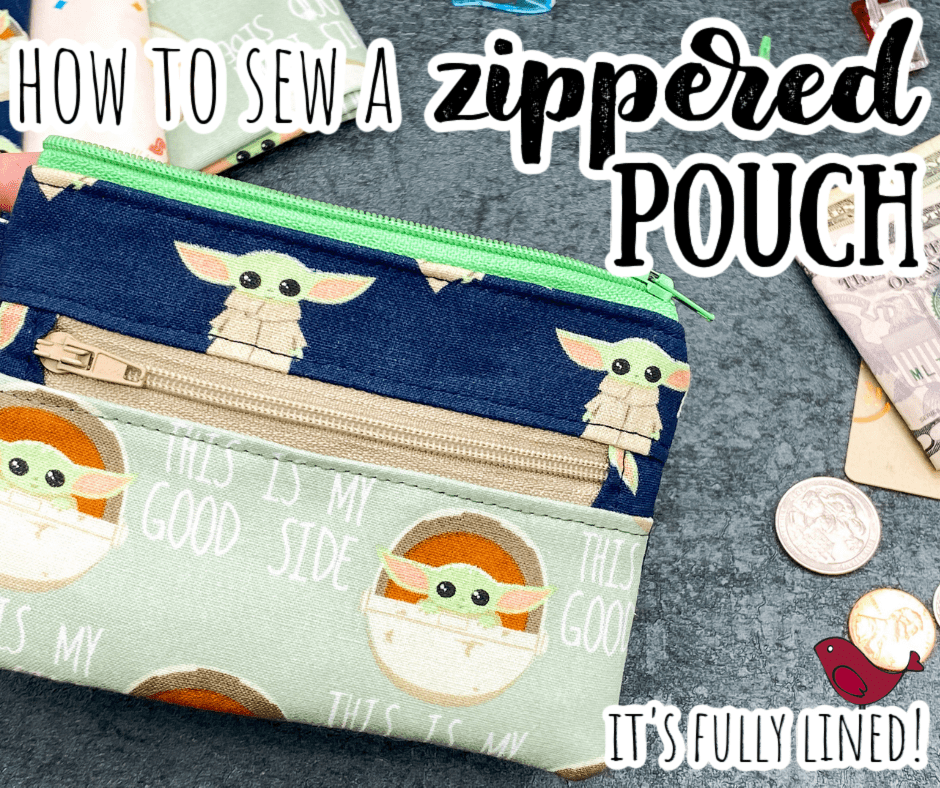
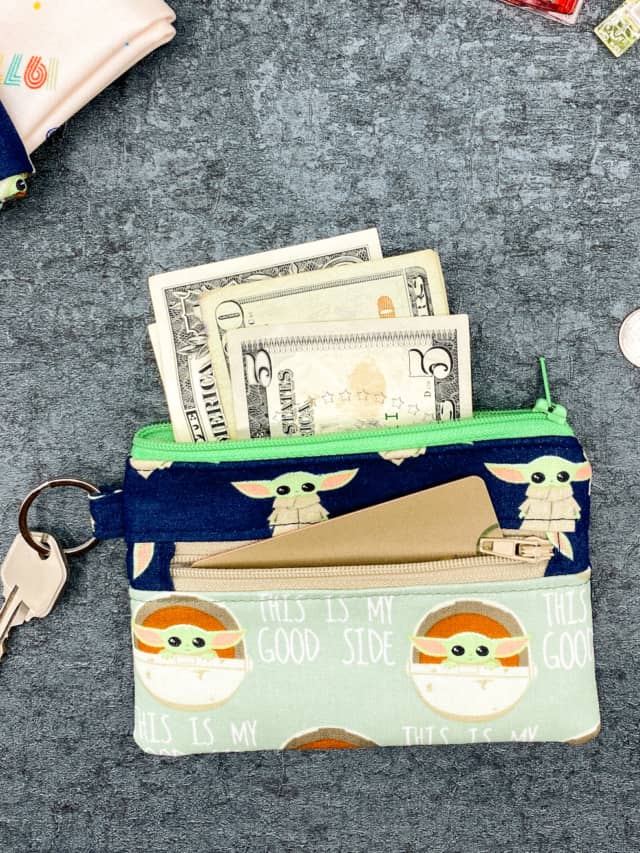
So, when I saw this adorable Baby Yoda fabric on Etsy, I knew I had to use it to make her something. I settled on a little zippered bag that she could keep either her money in. She loves it!
How hard is this zippered pouch to make?
I have been sewing for most of my life, but I have never done enough of it to advance past an advanced beginner skill level. I have made a very simple quilt with squares and straight lines, and I have sewn a few garments, but that's about it.
All that to say that if you have basic sewing skills and can put in a zipper, you can make this little pouch. It's pretty easy.
Why make a lining for the pouch?
You may be thinking that a lining just makes extra work, and that is true, I guess, but having a lined bag is much nicer and more finished looking than an unlined one.
For some projects, you make the lining and the bag separately and then piece them together at the end. That is NOT the case with this zippered pouch. The lining is actually part of the construction of the bag, so you can't make the pouch without including the lining.
Do I have to use Baby Yoda fabric?
Of course not! The beauty of sewing is that you can use any fabric you want. This project works best with a lightweight woven cotton fabric, such as a quilting cotton or even a very light flannel. The fabric should not stretch in any direction.
What materials do I need to sew the zippered pouch?
In addition to basic machine sewing supplies (a sewing machine, straight pins or sewing clips, and sharp fabric scissors), you will need 3 different fabrics, fusible interfacing, 2 zippers, a split ring, and matching thread.
Here's what I used:
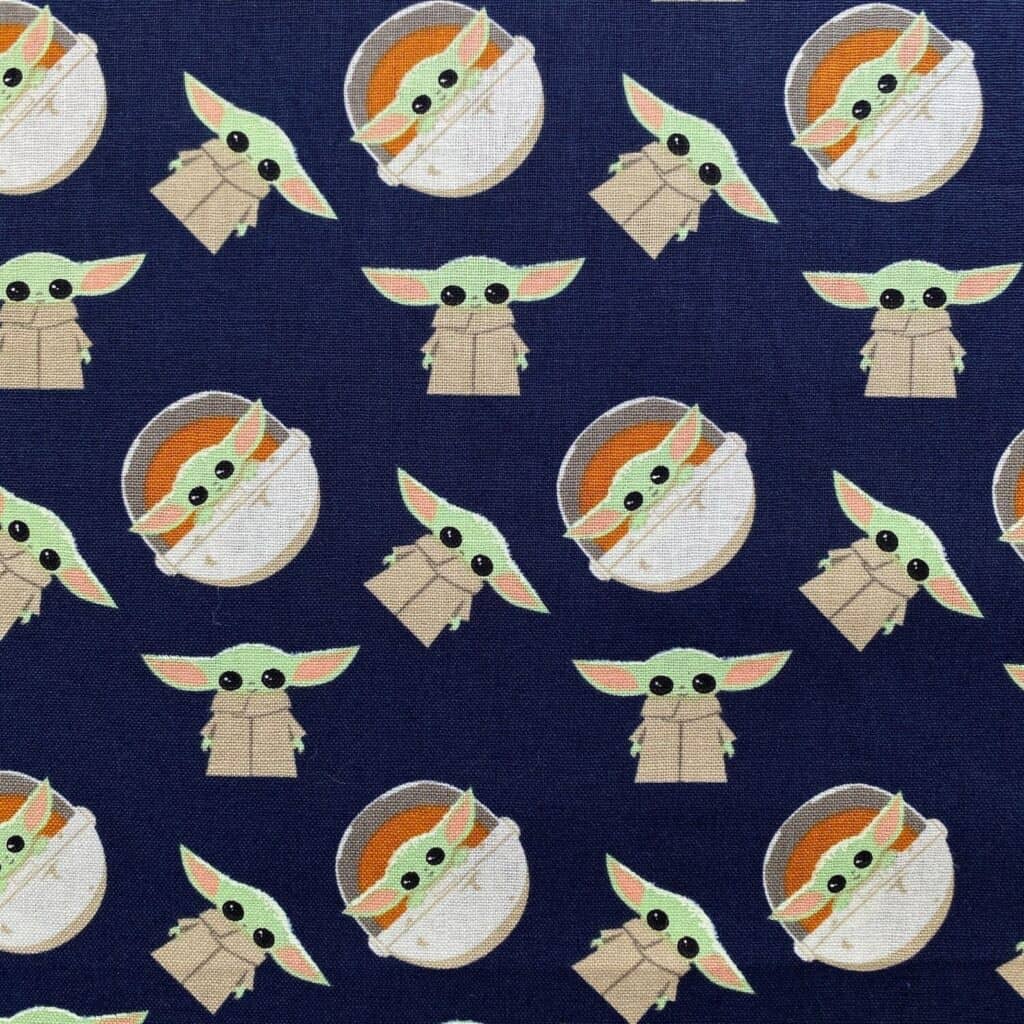
Main fabric (100% cotton blue Baby Yoda fabric):
- one 6 ¼” wide x 1 ¾" tall for front pocket panel top (apply interfacing to this piece - more on that in the instructions)
- one 6” wide x 4 ¼” tall for back panel (apply interfacing to this piece - more on that in the instructions)
- one 2” x 2” for ring tab
- two 2 ½” wide x 2” tall front zip tabs
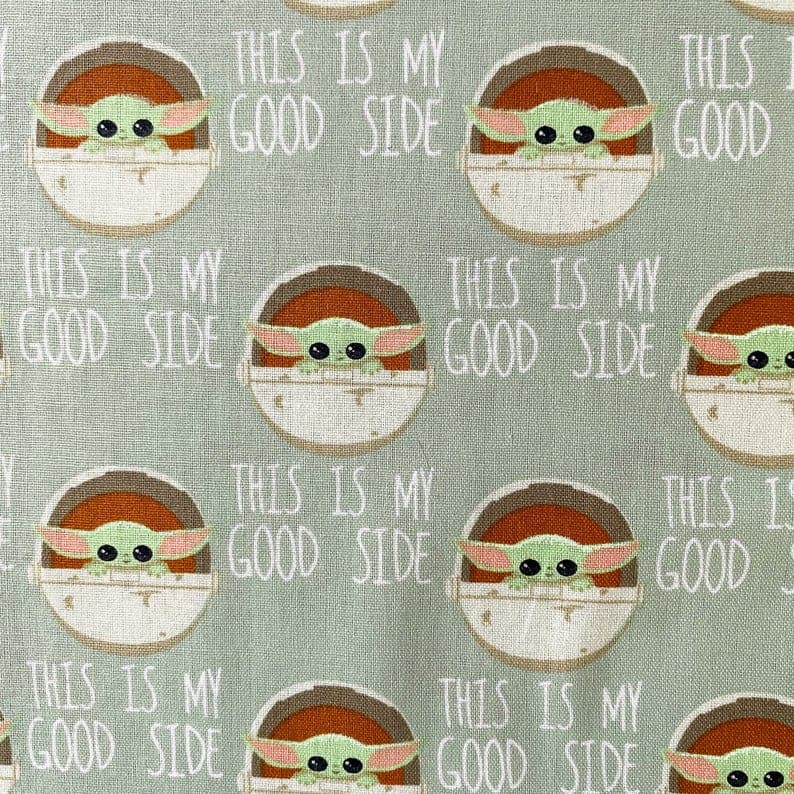
Accent fabric (100% cotton green Baby Yoda fabric):
- one 6 ¼” W x 2 ¾” T for front pocket panel bottom (apply interfacing to this piece - more on that in the instructions)
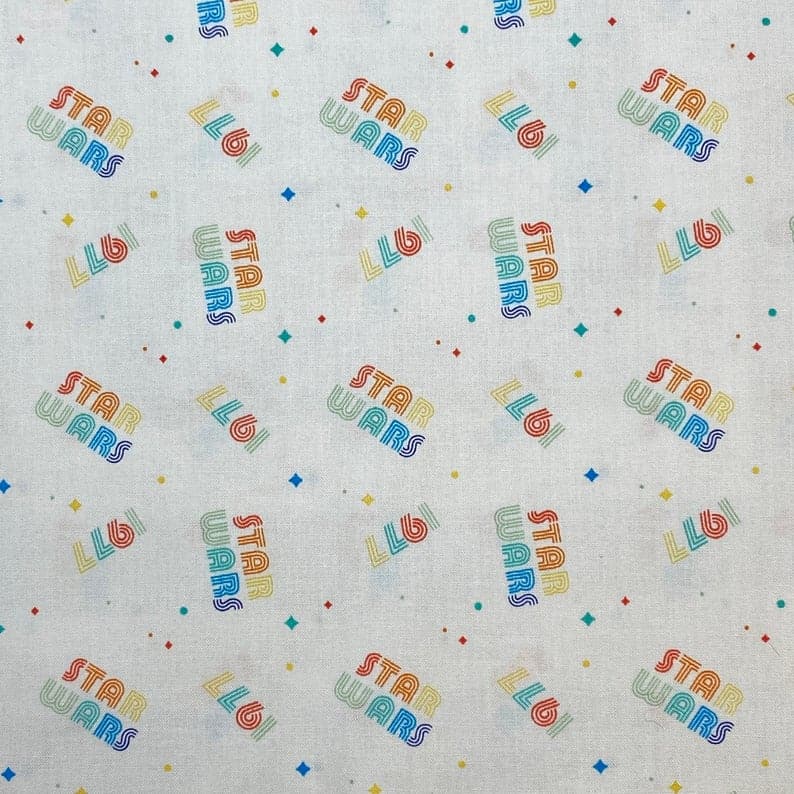
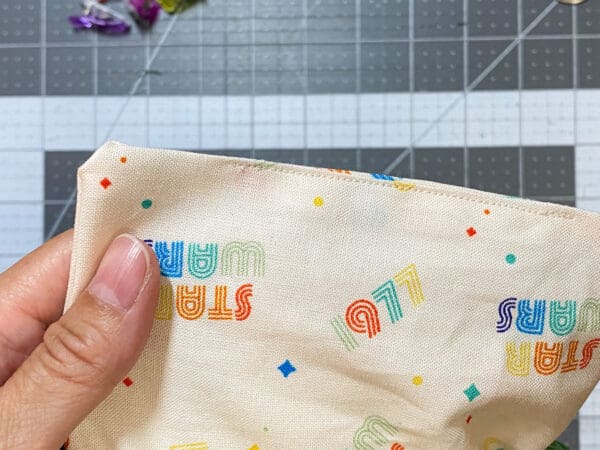
Lining fabric (100% cotton Star Wars 1977 fabric):
- one 6 ¼” wide x 1 ¾” tall for front pocket panel top
- one 6 ¼” wide x 2 ¾” tall for front pocket panel bottom
- one 6” wide x 4 ¼” tall for front pocket back panel
- two 6” wide x 4” tall main pouch lining
Pellon SF101 fusible interfacing:
- one 6” W x 1 ½” T for front pocket panel top
- one 6” W x 2 ½” T for front pocket panel bottom
- one 6” W x 4” T for back panel
Hardware:
- one 7" green nylon zipper (I used #3 green from this Amazon listing or you can go to any fabric store and get one.)
- one 5" khaki nylon zipper (I used #3 light beige from this Amazon listing or you can go to any fabric store and get one.)
- one 1" split ring

How to Sew a Lined 2 Zippered Baby Yoda Pouch for Beginners
Materials
- ¼ yard Blue Baby Yoda fabric fat quarter if possible
- 7 inch Green Baby Yoda fabric
- ¼ yard Star Wars 1977 fabric fat quarter if possible
- 6 inch fusible interfacing
- 7 inch green zipper
- 5 inch khaki zipper
- 1 1-inch split ring
- thread in coordinating colors
Instructions
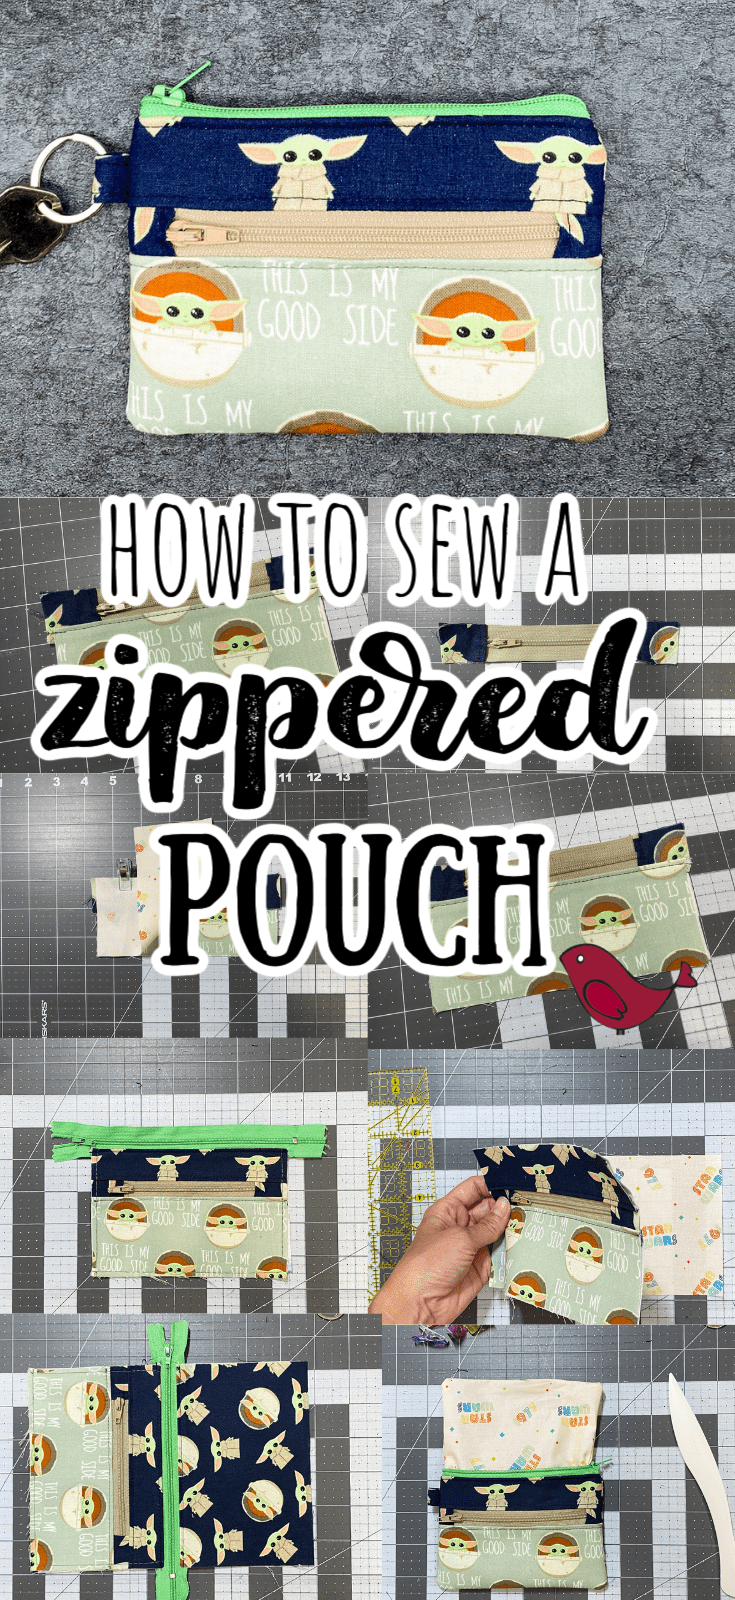
- Cut all fabric and interfacing pieces needed as listed above.
- Iron SF101 fusible interfacing onto the wrong side of the 3 pieces as noted above.
- Take the 2”x2” ring tab piece and place it on the table wrong side up. Fold it in half and press so that you have a crease down the middle. Then open and fold each side in to the middle crease. Fold on the center crease so that the top and bottom edges meet. You will end up with a piece that is ½” wide and 2” long. Topstitch along both long sides about ⅛” in from the edge. Set aside. You won’t need this piece again until the end.

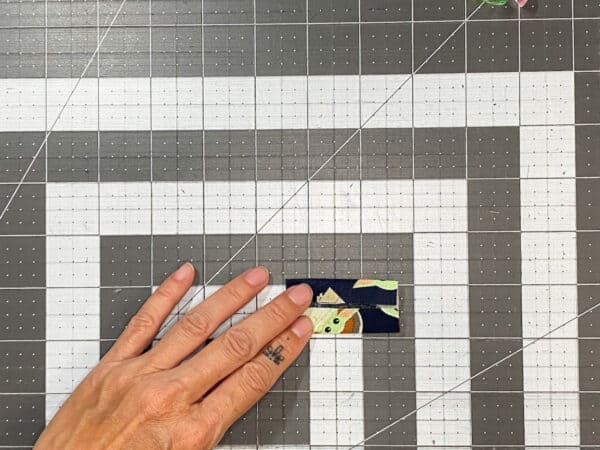
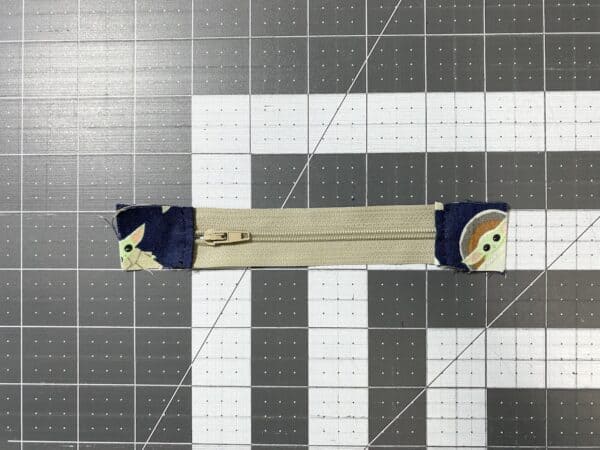
- Trim both metal stops off the 5” zipper and add tabs to each side so that you end up with a tabbed zipper that is at least 6 ¼” long. (There is a link to a simple zipper tab tutorial in the Notes section below.) Trim excess from top and bottom of tabs so that the entire strip matches the width of the zipper.
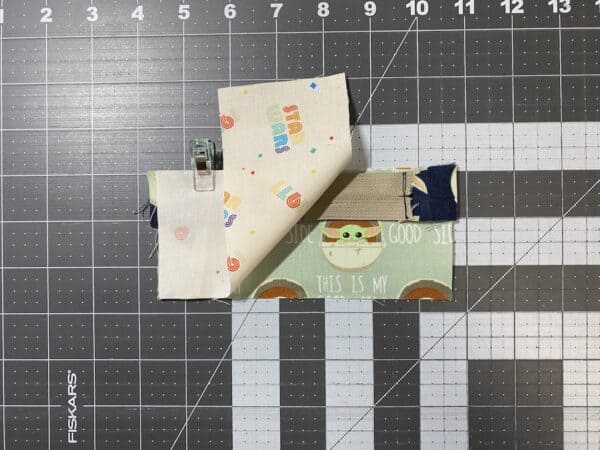
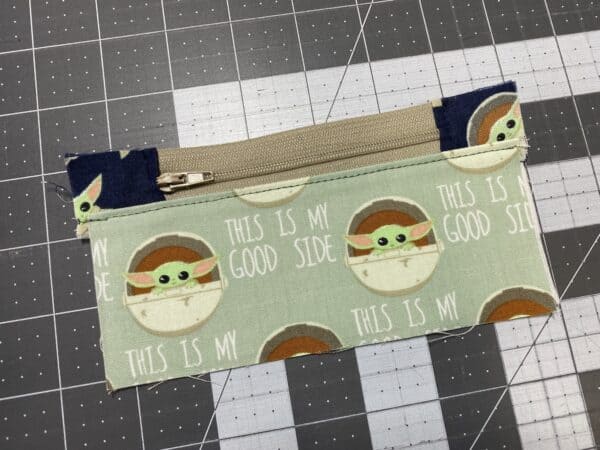
- Place the front pocket panel bottom piece right side up. Align the 6 ¼” tabbed zipper you just made with the top of the front pocket panel bottom piece (with the zipper face down). Place the front pocket panel bottom lining piece on top of the zipper, also right side down. Use a zipper foot to sew all 3 pieces together using a ¼” seam allowance.
- Press both sides open with right sides facing out and topstitch using ⅛” seam allowance.
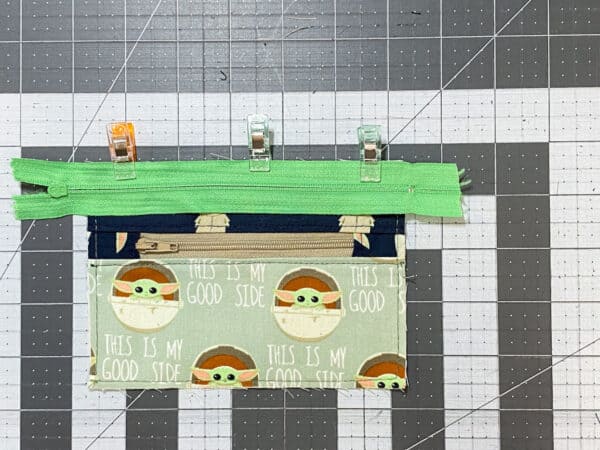
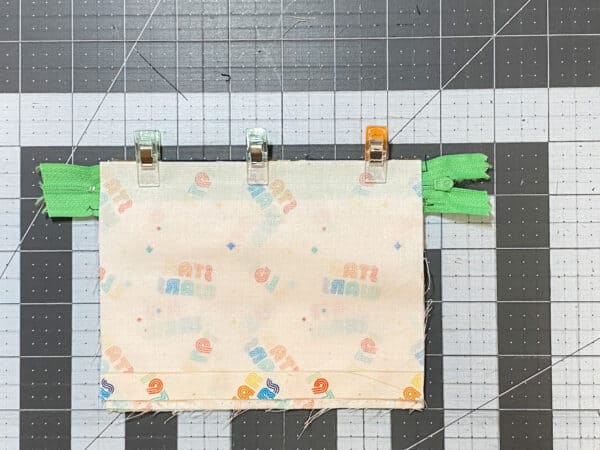
- Align the bottom of the front pocket panel top piece (right side face down) with the zipper tape edge of the panel you just made (right side facing up). Clip in place.
- Flip this over so that the lining side is now face up. Do the same as above with the front pocket panel top lining piece. Place it face down, aligning with the open edge of the zipper tape. Clip in place and sew all 3 pieces together using a ¼” seam allowance.
- Press both top sides open like before with the right sides facing out and topstitch using ⅛” seam allowance.
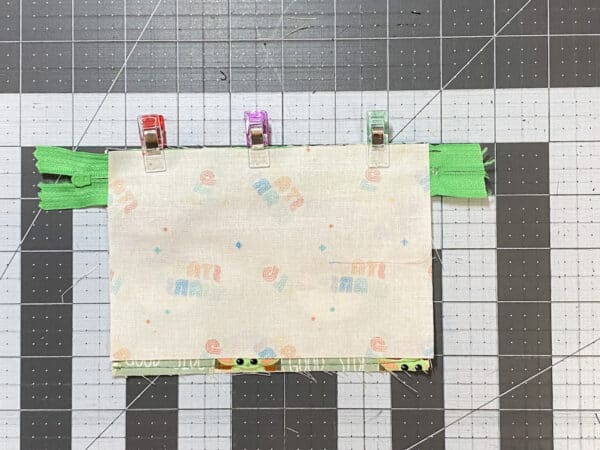
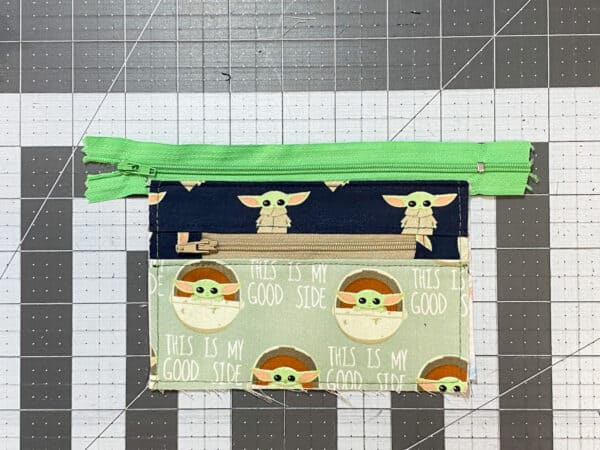
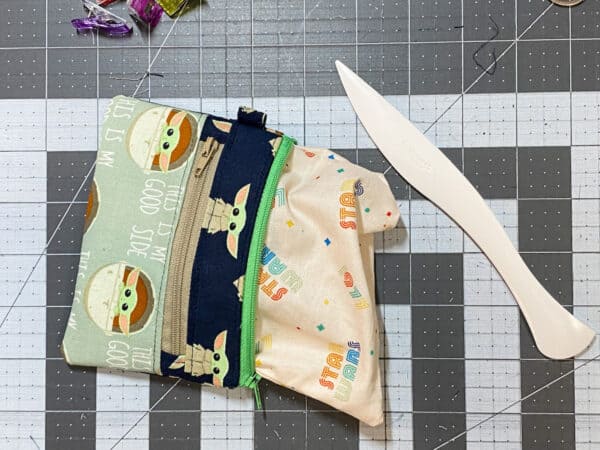
- Trim this front panel piece you just made so that it measures 6” wide by 4 ¼” tall. Place this on top of the front pocket back panel lining piece, both face up.
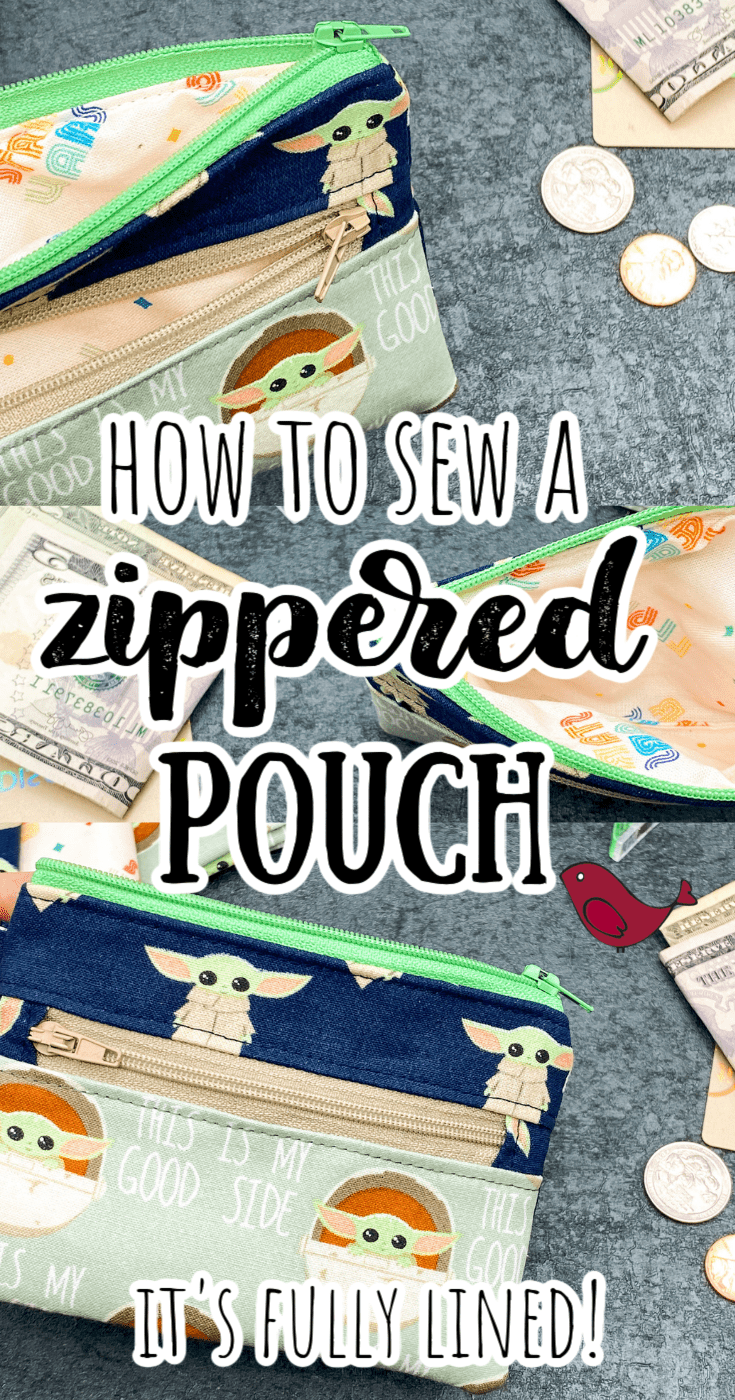
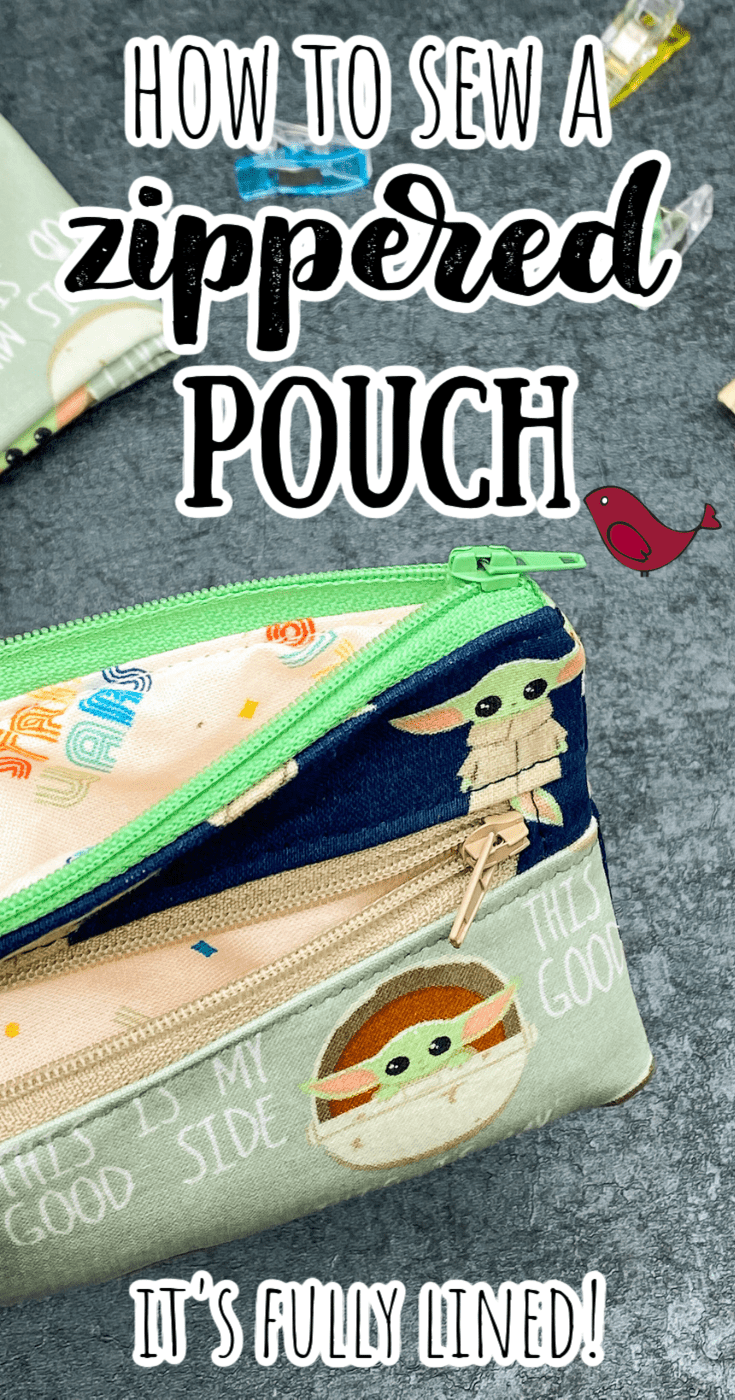
- Baste together around all 4 edges using ⅛” seam allowance. You now have a complete front panel piece with a functioning zippered pocket.
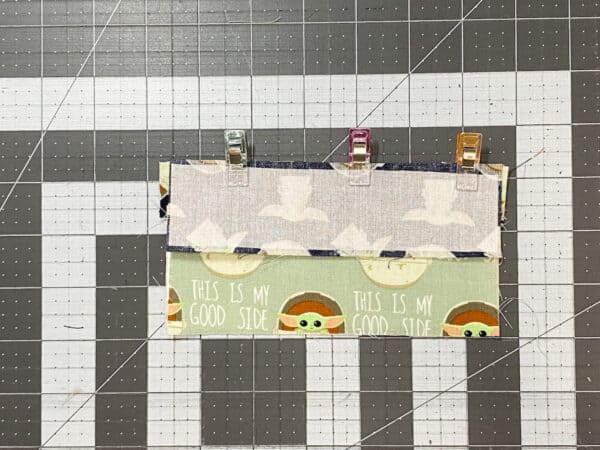
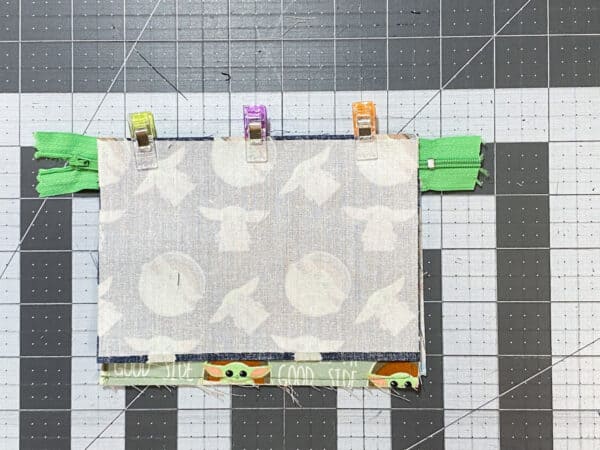
- Place the main zipper face down along the top edge of the panel you just made.
- Place one main pouch lining piece face down on top of that and sew all three pieces together using ¼” seam allowance and zipper foot.
- Just like before, press open and topstitch with ⅛” seam allowance.
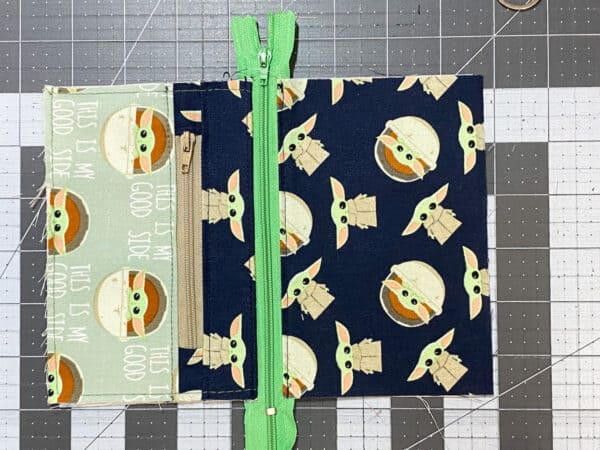
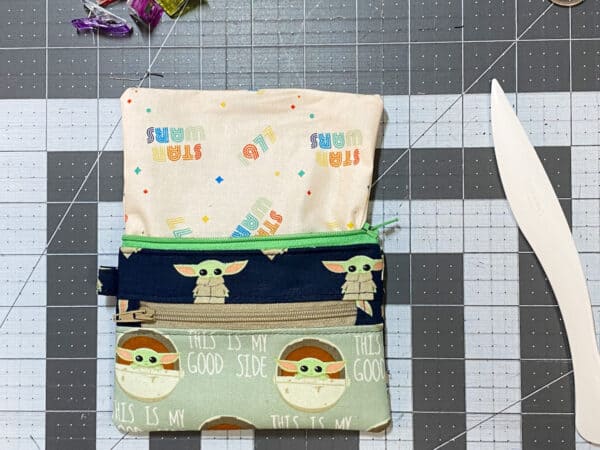
- Place the back panel main fabric piece on top (face down), aligning the top edge with the open edge of the zipper tape below. Clip in place.
- Flip this over so that the lining side is now face up. Place the second main lining piece face down also aligning with the open edge of the zipper tape. Clip in place.
- Sew all 3 pieces together using a ¼” seam allowance. Open both sides, press, and topstitch like before so that now you have a front panel with lining along with a back panel with lining on either side of the main zipper.
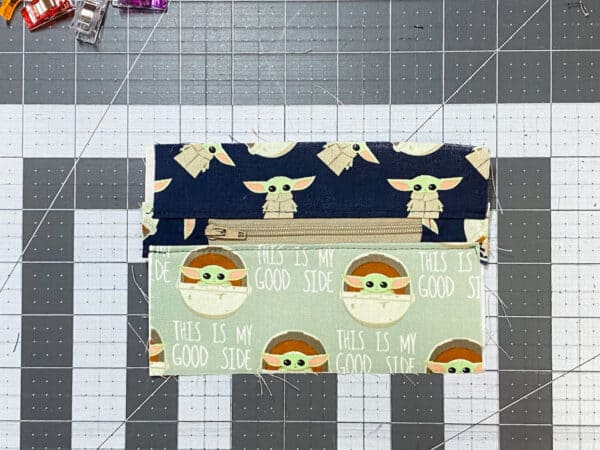
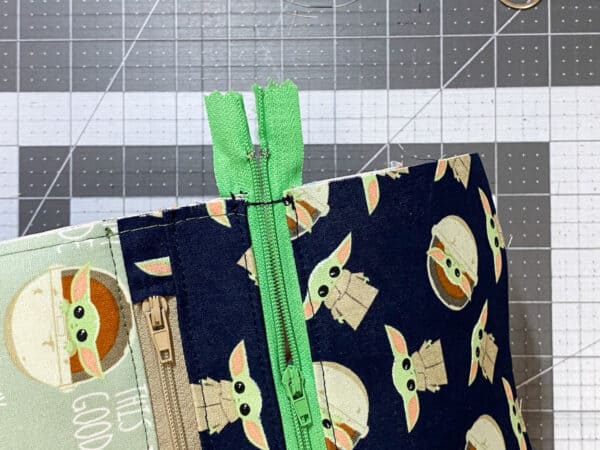
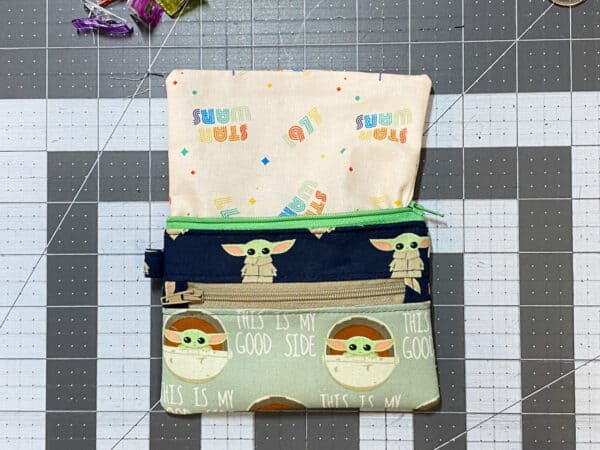
- Move the zipper pull into the center and then stitch the zipper tape together at that end. Trim the zipper tape on both sides so that it is even with the fabric.
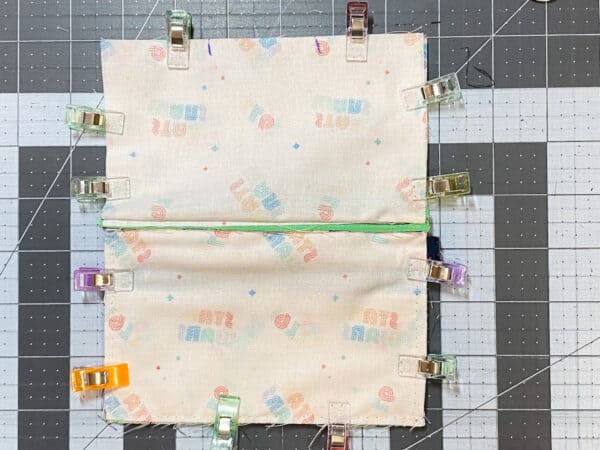
- Match the lining pieces together (right sides together) and match the outer pieces together (the back panel and the front pocket panel piece you made), also right sides together. Mark for a 2” opening on the lining pieces. Clip all the way around.
- Fold the ring tab piece you made earlier in half and place between the outer pieces close to the zipper tab. The raw edges should be out with the loop part being inside the sandwich.
- Sew all the way around (except for the 2” space you left for turning) using a ¼” seam allowance. Clip the corners.
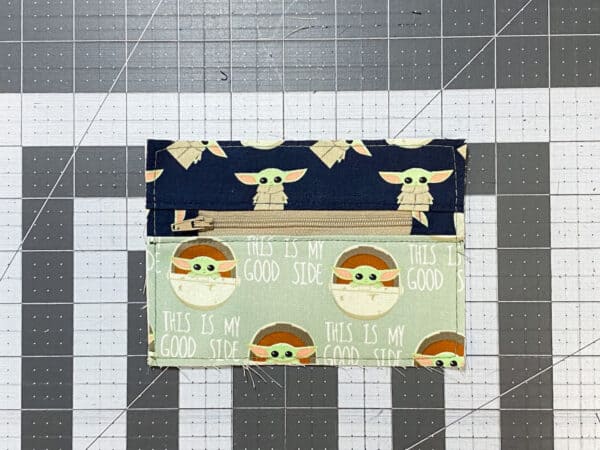
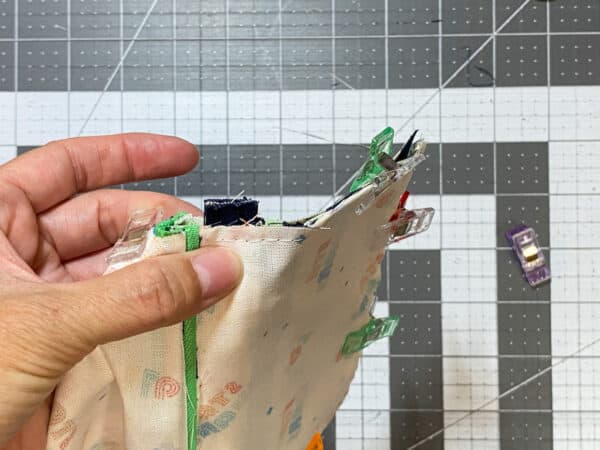
- Put your fingers inside the hole and pull the outside piece through. Keep pulling until the pouch is now right side out. Use a tool to gently press out all 4 corners.
- Press the exterior pieces.
- Align the lining hole pieces that are folded in and press so they match as best as you can. Place a pin to mark just past the opening on each side so that you will be able to easily see where to start and stop sewing the hole shut. Sew the turn hole shut as close to the edge as possible.
- Push the lining into the exterior pieces and push in the corners with your fingers or the tool you used earlier. Close the zipper and attach the 1” split ring to the tab. You’re all done!


Notes
I know it looks like there are a ton of steps to make this zippered pouch, but they go very quickly because the longest seam is about 6 inches. As I mentioned above, you sew the lining at the same time as the outside, and the most complicated part is using a zipper foot to sew around the zipper. (That's my least favorite part! Here's a YouTube video on using a zipper foot.)
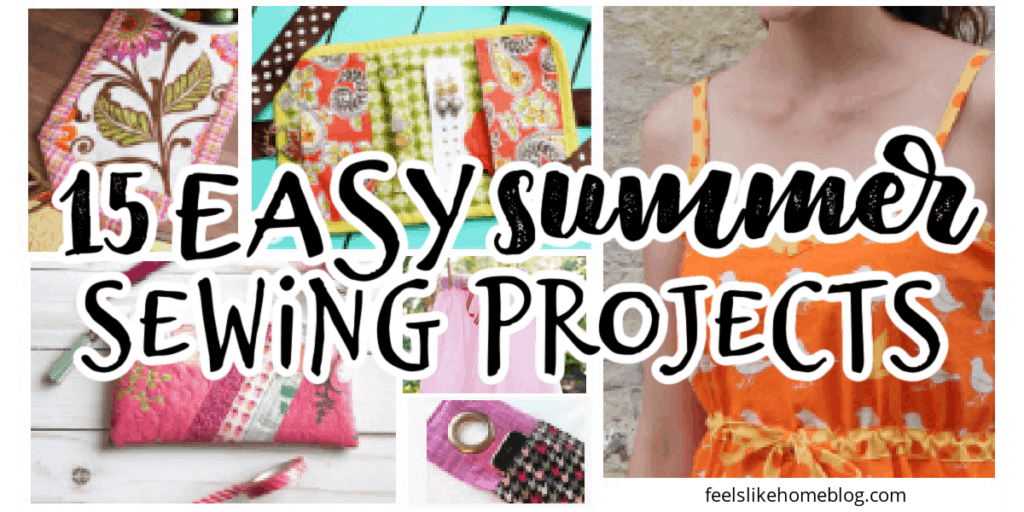
If you're looking for more cute sewing projects, try the oversized flannel receiving blanket, this flannel changing pad, or one of these 15 easy summer sewing projects.


Comments
No Comments