My kids say I'm neglecting them in favor of my new Silhouette CAMEO, which is absolutely not true at all. I totally involve them in almost all my crafty projects.
And also, this is not going to become a Silhouette projects blog. I'm just excited about my new toy, so I want to share some of the things I have done.
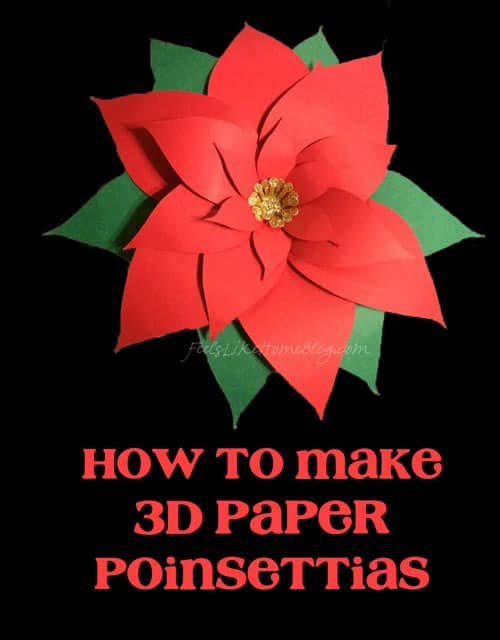
I love this poinsettia so much (I knew I would as soon as I saw the file for it on the Silhouette store.), and it came out perfectly the very first time I made it.
I think you could probably figure out how to make it on your own without a Silhouette machine, which is why I decided to make a tutorial for it, but it is going to take a whole lot of cutting with scissors. You may not make it to the end because you will curse me halfway through and quit.
With the Silhouette machine, though, it takes about three minutes to cut out.
How to Make 3D Paper Poinsettias
Materials
I forgot to take a picture of the materials, but I used the following:
- The Silhouette CAMEO cutting machine (see the awesome deal you can get on them until December 8 at the bottom of this post)
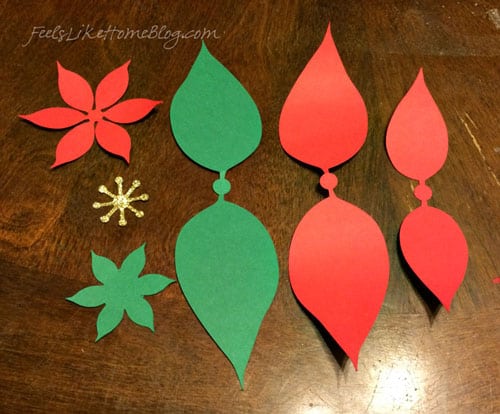
- The cutting file from the Silhouette site - it's 99 cents. If you don't have the machine and/or don't want to buy the file, you could get the general shapes from the photo below and make your own templates to trace and cut.
- One sheet of heavy 12x12" red cardstock
- One sheet of heavy 12x12" green cardstock
- One scrap of gold glitter paper or cardstock
- Many glue dots - I used ½", but they were a hair too big. (You need very small bits, so I don't think double-sided tape would be a good choice here, and regular glue would make this flower take hours to dry. Hot glue might work. It would also give the finished flower a little more volume. I'm going to try that next.)
The shapes you'll need:
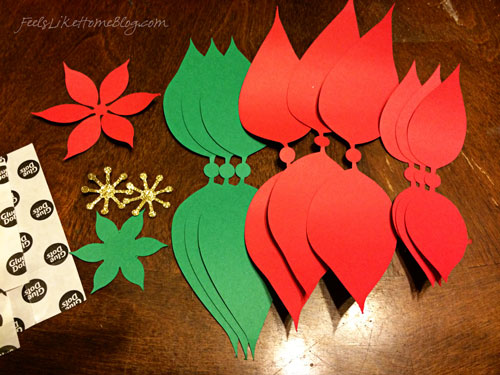
The total pieces you'll need for one 3D paper poinsettia:
- 3 large green leaves
- 3 large red leaves
- 3 medium red leaves
- 1 red center or 3 sets of small leaves
- 1 green center or simply a smallish green circle or square
- 2 gold centers
How to put the poinsettia together:
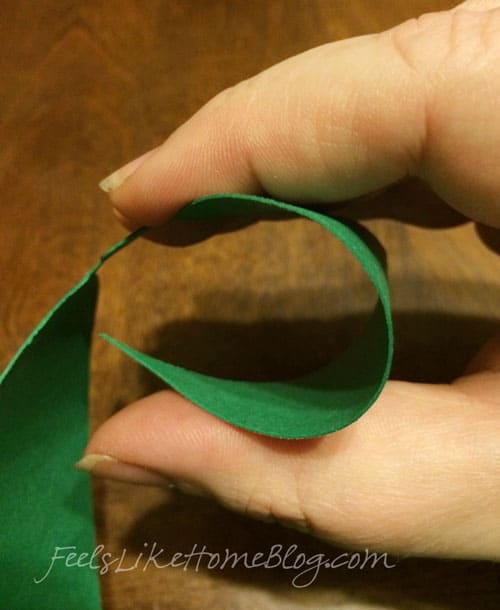
1. Before you do each step below, you will want to roll the leaves under so that the curve down. I experimented with a bunch of different ways. I tried rolling the leaves like this, and that worked the best for me. I also tried rubbing the leaf against the long edge of my scissors (that gave me a smooth curve but not curvy enough), rolling the leaf around my glue pen (made too many little creases in the leaf), and rolling it around my finger (also creases). I didn't do this all at once, but just before I used each piece.
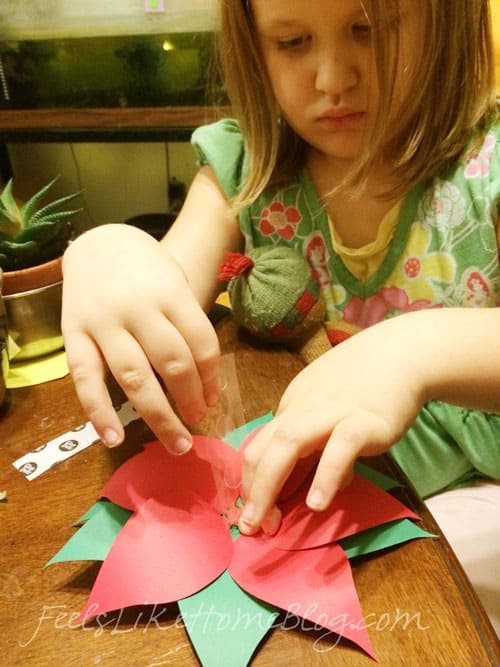
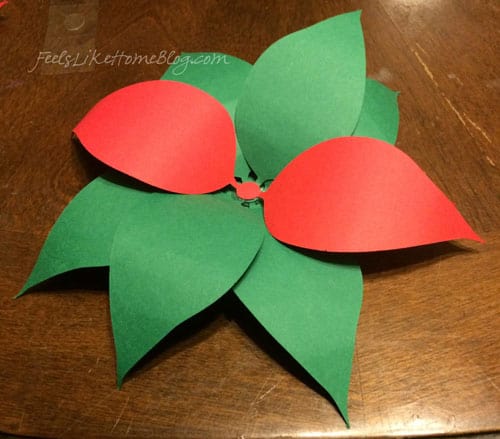
2. The small green shape is going to be the back of the poinsettia, the part that anchors the flower and keeps it stable. Put a glue dot in the center of the back. Roll the first set of green leaves and stick them onto that first glue dot. Repeat with the other two green leaves, rotating them so they spread out in a nice circle.
This is such an easy project that even little kids can help with it. Grace enjoyed sticking the glue dots in the center over and over. (She was tired, and it was almost bedtime. She really was having a good time here.)
Learning about poinsettias
Did you know that the red part we call the flower is really just a set of red leaves on the ends of the branches called bracts? The only part of the plant that's a true flower is the tiny yellow part at the end. It's true. Read more about it from the University of Illinois.
Here are a few more interesting facts about poinsettias from that page:
- Poinsettias are the #1 potted plant sold in both the United States and Canada.
- In Mexico, poinsettias grow year round and form shrubs ten to fifteen feet tall.
- Contrary to popular belief, poinsettias are not poisonous. They taste horrible, and they can cause vomiting and diarrhea, but one would have to ingest hundreds of leaves to have those effects. Still, experts recommend keeping them away from small children and pets.
- A single ranch in California grows 75% of all the poinsettias sold in the US and over 50% of them sold worldwide.
- When broken or damaged, poinsettias ooze a thick white sap that may cause a reaction in people allergic to latex.
- Poinsettias prefer cool temperatures (65-70 degrees and a little cooler at night, as low as 60 but not below), but cannot survive a frost. They only grow outside in temperate coastal climates like southern California and south into Mexico and Central America (where they are sometimes considered weeds).
Growing a live poinsettia
- Select a live plant with dark green leaves and plump stems. Yellowed, dropped, or wilted leaves and shriveling stems are signs of poor care, disease, or root rot.
- Wrap the plant in the store to prevent its bracts from being coming in contact with the cold outside air (as it can make them drop in a very short time). As soon as you get home, unwrap the plant.
- It is not difficult to keep a poinsettia plant growing and re-bloom year after year. (Here are instructions for day to day care and re-blooming from Ohio State and another set of instructions (illustrated even!) from Michigan State.) (I just realized that all of my fact sheets are from Big Ten schools. Clearly, they are academically superior in addition to athletically.)
- Keep poinsettias away from all drafts. This means registers, fans, air vents, windows, and doors. They will drop bracts and leaves if exposed to warm or cold drafts.
- If your plant drops leaves, it's probably too dry. Water it until water runs out the bottom. Let all the water drain out and discard it (I would pour it into another plant that needs watering; I never put plant water down the drain.). Wait 5 minutes and do it again.
- To make a real poinsettia last as long as possible, water it in moderation. When the top of the soil is dry to the touch, water it until the water comes out the bottom of the pot. But then (this is really important) - remove all the water that drips out. Poinsettias won't survive if they completely dry out, but they also won't survive if their roots are sitting in water or sopping wet soil.
- Poinsettias require 12 hours of total darkness per day for at least a week in order to produce colored bracts. Once the bracts have set, however, they require the brightest possible light in order to maintain their color.
Back to the instructions:
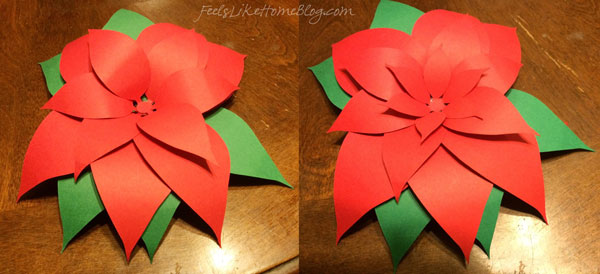
3. Keep putting glue dots in the center, and start adding the large red leaves. Remember these aren't petals but bracts.
4. Do the same with the medium-sized leaves and then the smallest ones. It took a bit of finessing to get the smallest ones to curve but still lie nicely against the ones under them.
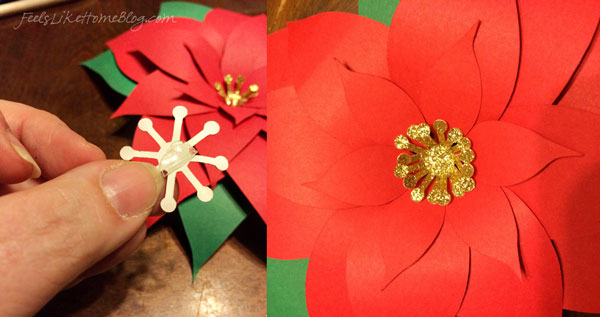
5. I had to fold my ½" glue dots in half to attach them to the gold flowers in the center of the bract, but folding it did work out just fine. Glue the two centers, one on top of the other, adjusting them so that the petals alternate rather than overlapping. Adjust as you see fit so that the center is all bunched up or spread out or whatever you like.
6. Put glue or glue dots on the back and attach it to something. If you're attaching it with string or ribbon to something (like if you want to hang it from a hook on the wall), you may want to attach that before you actually start building the flower in step 1. Otherwise, just glue or tape it onto a package, a stick (to make a bouquet of them), or random things around your house.
I stuck mine to the top of my turtle's tank. It makes him look festive.





Natalie F says
Pretty! My husband wants Silhouette Portrait for Christmas - he is a paper crafter in our family 🙂
Tara Ziegmont says
Now is the time! The big sale goes until December 8. 🙂