
This is one of those projects that I've been meaning to do for a long time.
We tried some resist painting using stickers a few months ago. It went well at first, but the stickers got too wet and let behind half of the sticker paper on the canvas. Someday, I'll blog those pictures. The finished paintings look great, but the process was more difficult than I expected.
Because we were making crosses this time (for Easter but really, is there a time of year when the cross is not timely and relevant?), I knew painter's tape would work out well. It's all straight lines.
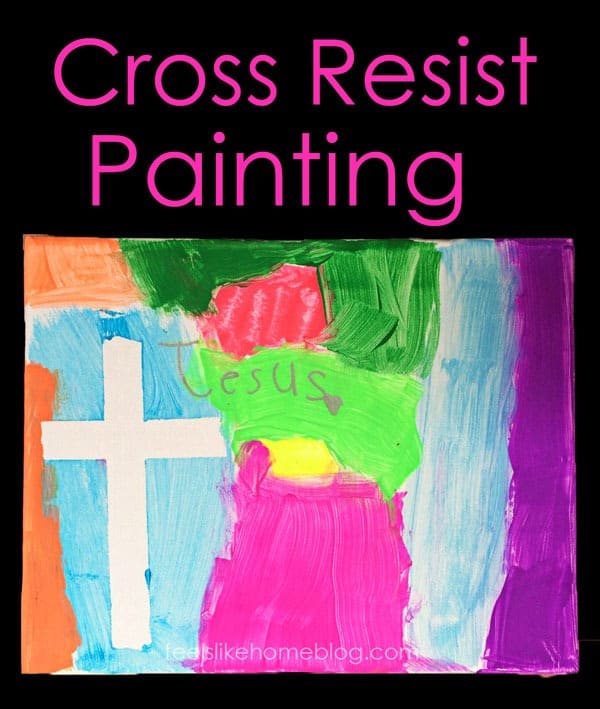
Cross Resist Paintings for Preschoolers and Big Kids
I said this is for preschoolers and bigger kids, but it is easily adaptable even for toddlers. We used washable paint, so I would venture to try this with any little one who is big enough not to eat the paint.
(And even then, the Crayola paint we use is non-toxic. But use your own judgement on that.)
Materials:
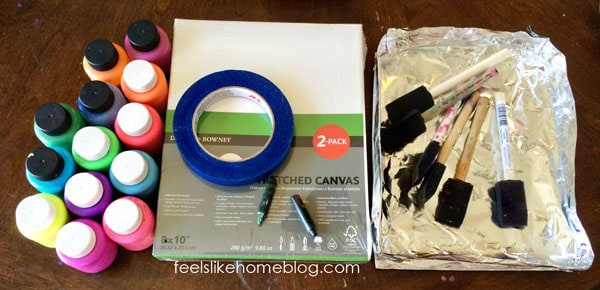
- Canvases - We used 8x10 but any size will be fine.
- Paint - We used Crayola Washable Kids Paint in standard colors and Crayola Washable Kids Paint in neon colors. These are by far my favorite paints. I wish they came in bigger bottles because these small bottles get used up quickly. But they work, and they are 100% washable. I've never had a stain. In the photos, the bottles with black lids are from the standard set and white lids are from the neon set. After we finished this project, I found Crayola's washable kid paints in glitter and metallic finish, both of which would have been awesome for this project, but it was too late.
- Painter's Tape
- Crayons - It turned out that this bright idea didn't work, so ignore the crayons.
- Sharpie markers (not pictured) - These were my replacement to the crayon idea. Grace used a metallic one and I used a plain purple one for Allie's.
- Paint palettes - The last person who used the paint palettes (not me) left them a mess, so I had them soaking while we did this project. Instead, I fashioned palettes out of aluminum foil. Allie's had sides to prevent runover, and Grace's was flat.
Instructions:
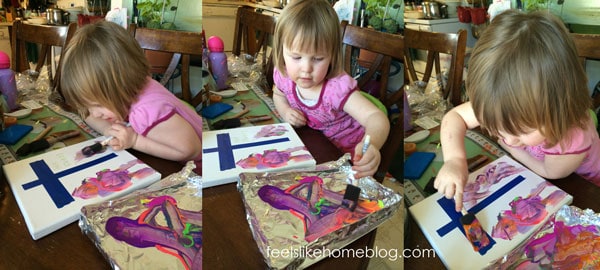
1. Put the tape on your canvas in the shape of a cross. I wanted to make Allie's cross two tape-widths wide and tall, but she wanted to paint right now and I didn't get to add the second width to the tall part. Oh, well.
I also wrote on the canvases with a crayon, thinking that the water-based paint would not stick to the waxy crayon, but that didn't work. Skip that part.
Also to note – I gave Grace the tape and let her put it on her own way. You'll see below what she did with it. It was totally not what I pictured, but it came out beautifully.

2. Paint! I don't know how I ended up with exactly zero pictures of Grace painting. I guess because she's older and requires less hovering than Allie.
It's important to pain the whole canvas. If you just paint spots (as Allie originally did below), you will not see the image of the cross when you remove the tape. It took a lot of prompting for Allie to paint the whole thing. Grace had no trouble with that part.
You are finished painting when the canvas is covered.
I am not a big fan of the 3-year-old mixing all the colors together to make brown stage. It bothers my sense of artistry.
But whatever. Don't ever, ever, ever paint over your kids' artwork once they've done it. Seeing their work appreciated, celebrated, and hung up makes them feel good – confident in their skills and enthusiastic to do more. Some day, they'll get the idea that they're not supposed to mix all their colors up, as you can see below.
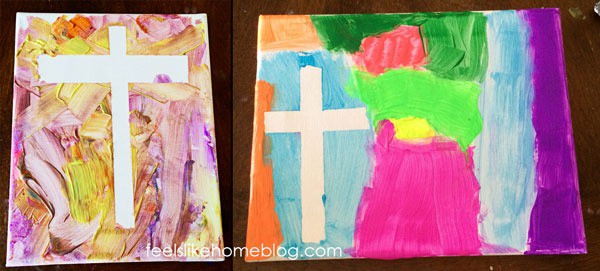
3-year-old painting on the left, 6-year-old painting on the right.
If I was into art interpretation, I would have all kinds of things to say about the yellow spot in the middle of Grace's painting being the empty tomb, but I'll save that. I was really pleased with how she used color and covered the whole canvas.

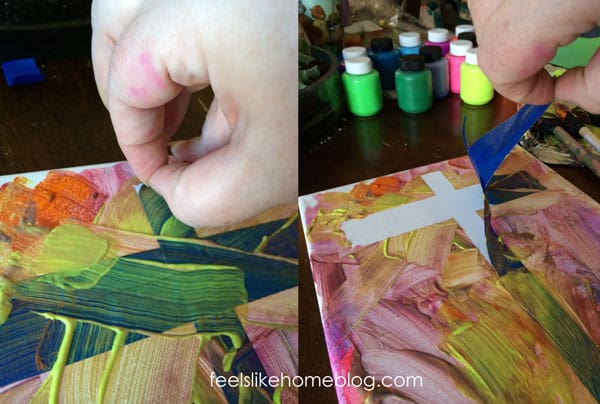
3. Peel off the tape while the paint is still wet. If you wait until the paint has dried, you might remove some of the paint that has gotten crusty over top of the tape.
Finished and drying.
Our painter's tape was kind of old and not quite sticky enough for this project, so we had some paint bleed through onto the cross area. The kids weren't bothered by it, so I made myself be not bothered by it, too.
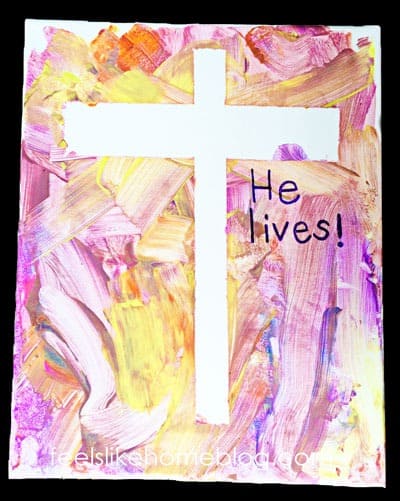
4. Since the crayon resist didn't work, I traced the barely visible letters on Allie's painting with a Sharpie. I had given her a few things to choose from (Jesus is alive! He lives! He reigns! He's alive!), and she chose He lives!
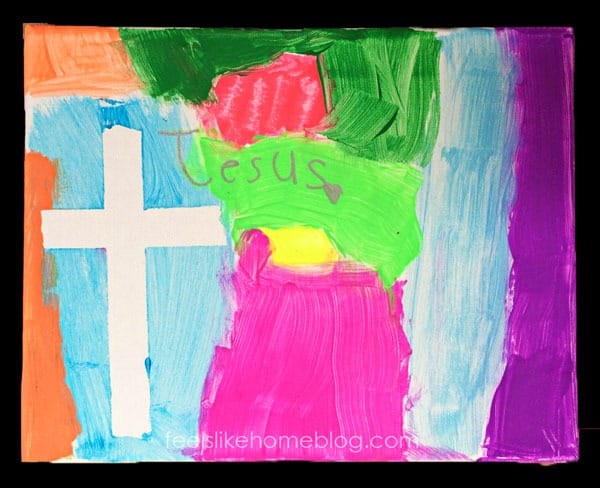
Grace is writing on her own, so I let her write whatever she wanted. I love how she put a heart at the end of Jesus.
That's it. Hang them up and be thankful for the cross and the resurrection.


Comments
No Comments